Chapter 15 Connecting to a Network (LAN)
170
Other
Information
15.6
Specifying the file sharing settings on the external information terminal side
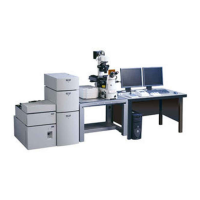
To save images from the DS-L4 to an external information terminal, the file sharing settings must be specified on that
terminal. The DS-L4 treats a shared folder as a network drive.
This document describes only basic settings. For details on how to specify the settings, refer to the Help or other
documentation for the OS.
Connect a network drive using wired LAN
To save images to a network drive, be sure to connect the network drive and the DS-L4 via wired LAN.
Note on using SoftAP mode
In SoftAP mode, you cannot save images from the DS-L4 to network drives.
(1) In Windows
Enabling the file sharing function
1 In the Control Panel, click [Choose homegroup and sharing options].
2 Click [Change advanced sharing settings], and then specify the detailed settings.
Select [Turn on network discovery].
Select [Turn on file and printer sharing].
Select [Turn on password protected sharing]. (This item may not be displayed in some environments.)
3 Save the changes to the settings.
Adding a user
Create a new user account.
1 In [Control Panel], open [Administrative Tools], and then open [Computer Management].
2 In the tree view, select [Computer Management (Local)], [System Tools], and then [Local Users and Groups].
3 Right-click [Users], and then select [New User].
4 Enter a user name and password.
Enter a user name of no more than 20 characters, and a password of no more than 127 characters. (For a password,
enter at least one character. If you enter nothing for a password, you cannot access the DS-L4.)
Clear the [User must change password at next logon] checkbox.
Set the image storage folder to be shared
1 Create a folder.
2 Right-click the folder, select [Share with], and then select [Specific people].
3 Click the blank box, and then select the account of the user you created.
If you select [Everyone], the folder can be accessed by all users who can access the external information terminal.
4 Change the access permission level of the user to [Read/Write].
5 Click [Share].
6 Confirm the name of the shared folder, and then click [Done].
 Loading...