OH THE PASTA-BILITIES
VISIT
NINJAKITCHEN.COM
FOR ACCESSORIES, RECIPES, AND MORE.
1.
Fill Single-Serve
Cup with desired
contents.
2.
Screw on Pro Extractor
Blades Assembly
clockwise until you
have a tight seal.
1.
Select
any of the
illuminated
programs
to begin
blending.
2.
Flip cup
upside down
and lower
it onto base.
2.
When blending is
complete, turn cup
counterclockwise
and lift to remove.
WARNING: Handle the Pro Extractor Blades Assembly with care, as the blades are sharp.
3.
Turn cup
clockwise to
lock in place.
3.
Turn blade
assembly
counterclockwise
to remove.
4.
Place Spout
Lid on top of
cup and turn
clockwise to
lock in place.
ASSE M B LY
BLEND & ENJOY
SINGLE-SERVE CUP
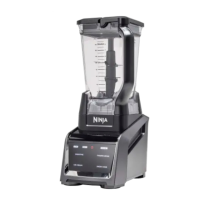
NINJA INTELLI-SENSE™ KITCHEN SYSTEM
QUICK ASSEMBLY
Please make sure to read the enclosed Ninja® Owner’s Guide prior to using your unit.
CT682 SP
Connect the base to power source. Press and hold Power symbol. After the unit is turned on, display
will read “- --” until the cup is correctly connected to the base.
QUESTIONS? We’re here to help. Call 1-877-646-5288 or visit ninjakitchen.com
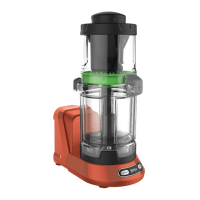
SINGLE-SERVE CUP SPOUT LID
PRO EXTRACTOR
BLADES® ASSEMBLY
PARTS
ASSE M B LY
BLEND & ENJOY
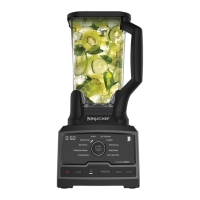
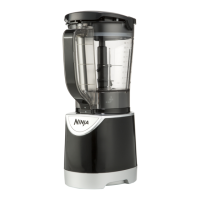
TOTAL CRUSHING® PITCHER
Connect the base to power source. Press and hold Power symbol. After the unit is turned on, display
will read “- --” until the pitcher is correctly connected to the base.
QUESTIONS? We’re here to help. Call 1-877-646-5288 or visit ninjakitchen.com
1.
Place the Total
Crushing Pitcher
on base and turn
clockwise to lock
in place.
2.
Holding Stacked
Blade Assembly by
the top of the shaft,
insert it into pitcher.
1.
Select any of
the illuminated
programs to begin.
3.
To pour out thinner
mixtures, ensure lid is
locked in place, then
open pour spout.
3.
Align arrows on
pitcher lid and
handle, then lower
handle to lock in
place.
2.
When blending is
complete, turn pitcher
counterclockwise and lift
to remove.
4.
For thicker mixtures, press
RELEASE button and lift
handle to remove lid, then
carefully lif t out blade
assembly before pouring.
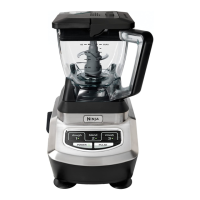
TOTAL CRUSHING
PITCHER
PITCHER LID
STACKE D BL ADE
ASSEMB LY
PARTS
WARNING: Stacked Blade Assembly is sharp and not locked in place. Make sure lid is locked onto the
pitcher before pouring. If pouring without lid, carefully remove Stacked Blade Assembly first. Failure
to do so will result in a risk of laceration. Refer to the Ninja Owner’s Guide for additional information.
Once a container is locked onto base, the program buttons compatible with that container will illuminate.
PROCESS & ENJOY
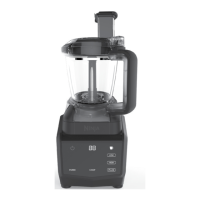
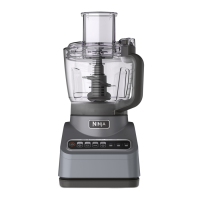
PRECISION PROCESSOR™ BOWL
Connect the base to power source. Press and hold Power symbol. After the unit is turned on, display
will read “- --” until the bowl is correctly connected to the base.
QUESTIONS? We’re here to help. Call 1-877-646-5288 or visit ninjakitchen.com
1.
Select any of
the illuminated
programs to begin.
2.
Remove bowl from
base by turning it
counterclockwise,
then lifting it o.
4.
Remove blade
assembly before
emptying bowl.
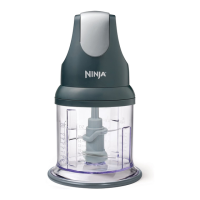
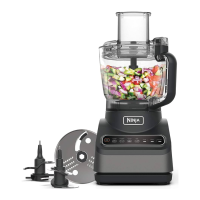
PRECISION
PROCESSOR BOWL
BOWL LID
CHOPPING BLADE
ASSEMB LY
DOUGH BLADE
ASSEMB LY
PARTS
WARNING: Chopping Blade Assembly is sharp and not locked in place. Before pouring, carefully
remove blade assembly. Failure to do so will result in a risk of laceration. Refer to the Ninja®
Owner’s Guide for additional information.
1.
Place Precision
Processor Bowl
on base and turn
clockwise to lock
in place.
2.
Holding the blade
assembly by the top
of the shaft, insert it
into bowl.
Once a container is locked onto base, the program buttons compatible with that container will illuminate.
ASSE M B LY