PRO TT-1
FEATURES,OPERATING, & ASSEMBLY INSTRUCTIONS...
1
2
3
4
5
6
7
8
9
10
17
16
15
14
13
12
11
To fully appreciate the features of the PRO TT-1, please read this entire manual before you begin
operation. The PRO TT-1 should be placed on a level sturdy surface. Keep in mind that there are a few features you may
never have seen before on a turntable of this type that you will need to read about to use properly.
Start by removing all parts from the package and place on a
level surface. Carefully check all packing material for
hidden parts. Use the contents guide for reference.
Do not discard any packing materials!
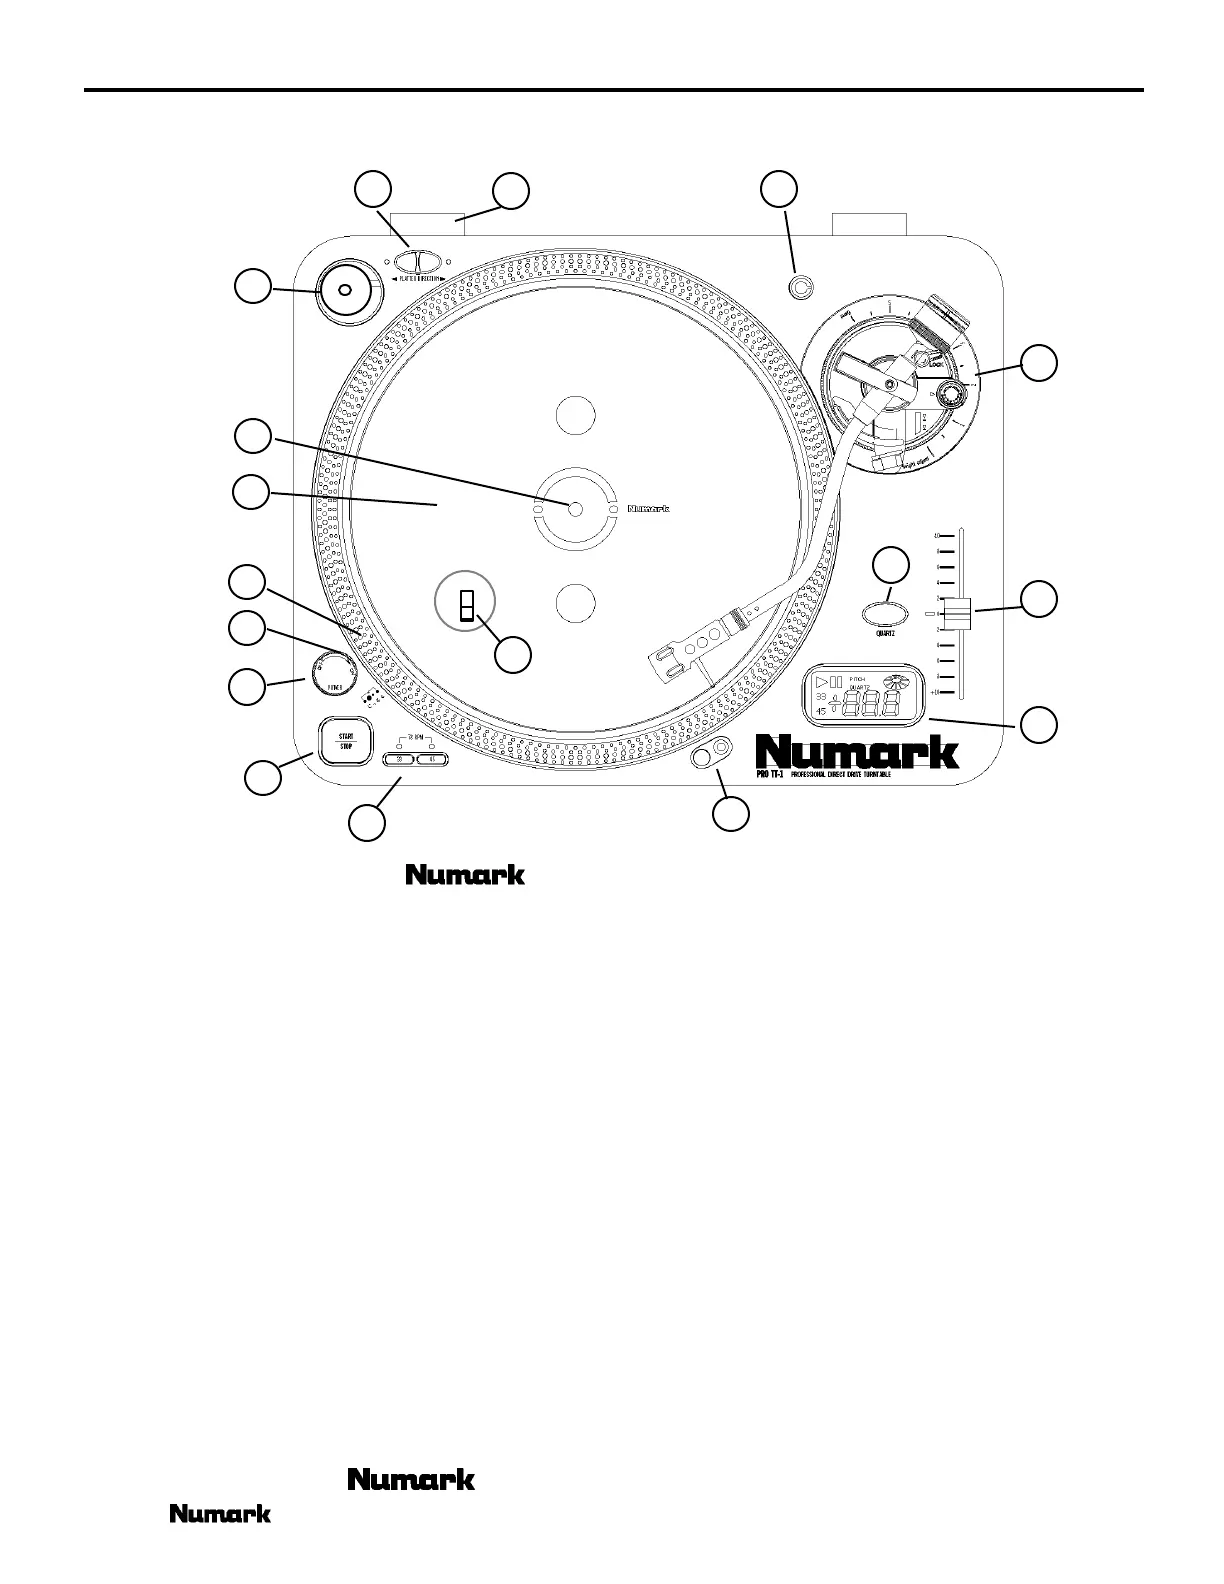
1. Power Dial
On - Rotate Right
Off - Rotate Left
2. START/STOP - Pressing once engages high torque
motor pressing again engages brake.
3. Platter Revolution Speed Buttons
33rpm - Press 33
45rpm - Press 45
78rpm - Press 33 and 45
4. Strobe Light - This Pulses a beam of light at the Strobe
Dots (5). By doing so the large dots will seem not to move
in Quartz Lock mode.
5. Strobe Dots - Four rows of dots that indicate various
stages in pitch adjust.
-3.3% - outer row
0% - large dots
+3.3% - next row
+6% - inner row
6. Platter - Place this on the Center Spindle (7) and
carefully position with the Alignment Pins (17)
7. Center Spindle - Keeps platter and records centered.
Place the supplied slipmat on the Center Spindle now.
- The Leader in DJ Technology
©1999 Industries 6 http://www.numark.com
 Loading...