DSX1000
8.4 Attachment/detachment of the stage
8.4.1 Attaching the motorized stage (DSX10-RMTS or DSX10-MTS)
l Before attaching or detaching the stage, turn OFF the main switch.
As the stage is connected to the microscope frame electrically, if you attach or detach the stage while the
power is ON, the product could be damaged.
l As the connector is attached to the bottom of the motorized stage, be sure to place the motorized stage
only on the stage mount.
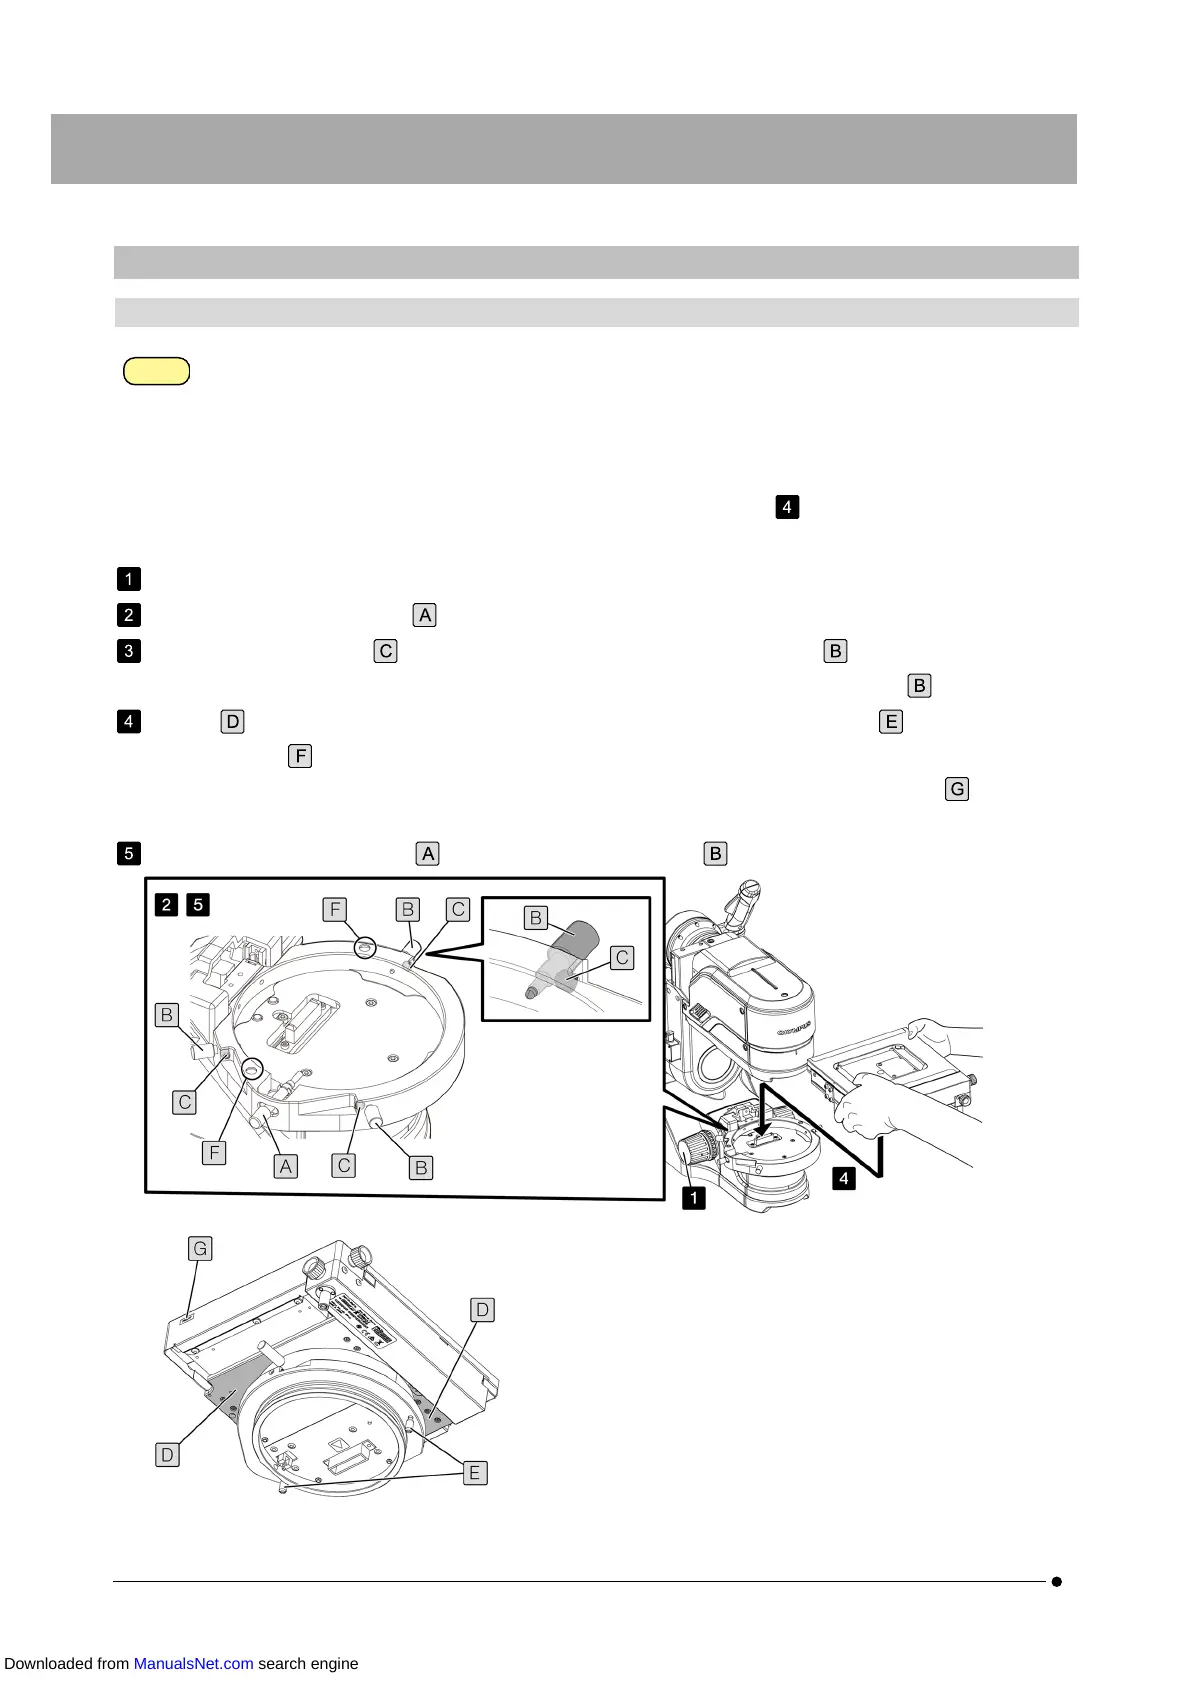
Do not take out the motorized stage from the pacakge box until Step .
Rotate the focusing knob to lower the stage mount sufficiently.
Loosen the stage clamping screw (1 position) of the stage mount.
Loosen the clamping screws (3 positions) of the stage position adjustment screws of the stage mount using
the Allen wrench provided with the stage, and then loosen the stage position adjustment screws (3 positions).
Hold the surface (painted in gray) of the motorized stage, and insert the positioning pins (2 positions) in the
positioning holes (2 positions) of the microscope frame.
When using the rotatable motorized XY stage DSX10-RMTS, attach the stage with the [FRONT] sticker facing to the
front.
Tighten the stage mounting knob and the center adjustment knob of the stage mount.
34
8. Assembly
Downloaded from ManualsNet.com search engine
 Loading...