OMRON EUROPE B.V. (Importer in EU)
Wegalaan 67-69, NL-2132 JD Hoofddorp The Netherlands
Phone 31-2356-81-300
FAX 31-2356-81-388
OMRON ELECTRONICS LLC
2895 Greenspoint Parkway, Suite 200 Hoffman Estates, IL 60169 U.S.A.
Phone 1-847-843-7900
FAX 1-847-843-7787
OMRON ASIA PACIFIC PTE. LTD.
No. 438A Alexandra Road # 05-05/08 (Lobby 2),
Alexandra Technopark, Singapore 119967
Phone 65-6835-3011
FAX 65-6835-2711
OMRON Corporation (Manufacturer)
Shiokoji Horikawa, Shimogyo-ku, Kyoto 600-8530 JAPAN
Do not connect anything to the terminals that are shaded gray.
Dimensions (mm)
Check the wiring before turning ON the power supply.
*1
*1
*1
Alarm type
Vary with
"L", "H" values
Vary with
"L", "H" values
Vary with
"L", "H" values
No alarm function
Output off
Deviation upper/lower limit
standby sequence ON
Absolute value upper limit
Absolute value lower limit
Absolute value upper limit
standby sequence ON
Absolute value lower limit
standby sequence ON
LBA (only for alarm 1)
Deviation lower limit
standby sequence ON
Deviation upper limit
standby sequence ON
Deviation upper/lower range
Deviation upper limit
Deviation lower limit
Alarm output function
Positive alarm value (X)
Negative alarm value (X)
Setting
PV Change Rate Alarm
X
ON
OFF
SP
X
ON
OFF
SP
ON
OFF
SP
X
X
ON
OFF
SP
LH
ON
OFF
SP
X
ON
OFF
SP
X
ON
OFF
SP
X
ON
OFF
0
ON
OFF
X
0
X
ON
OFF
0
X
ON
OFF
0
ON
OFF
X
0
X
ON
OFF
0
X
ON
OFF
0
X
ON
OFF
0
X
ON
OFF
0
X
ON
OFF
0
ON
OFF
X
0
ON
OFF
X
0
ON
OFF
X
0
ON
OFF
X
0
LH
ON
OFF
SP
SP
ON
OFF
X
ON
OFF
X
0
1
0
2
3
4
5
6
7
8
9
SP absolute value upper limit
SP absolute value lower limit
14
15
MV absolute value upper limit
MV absolute value lower limit
16
17
10
11
12
13
SP
X
ON
OFF
ON
OFF
X
0
Operation / Adjustment Protect
Restricts displaying and
modifying menu items in
Operation, Adjustment,
and Manual Control Levels.
oapt
0
Move to Protect Level
Displayed only when a password is set.
Restricts moving to Protect Level.
Parameter
Mask Enable
Initial Setting / Communication Protect
Restricts movement to the Initial
Setting, Communications Setting,
and Advanced Function Setting
Levels.
icpt
1
Setting Change Protect
Restricts changes to settings
by operating the front panel keys.
pfpt
off
PF Key Protect
Restricts PF
key operation.
POWER ON
MV Monitor
(Heating)
o
0.0
MV Monitor
(Cooling)
c-o
0.0
Alarm Value
Lower Limit 1 to 4
Input Type *2
Scaling Upper Limit
(only when setting
analog input)
Scaling Lower Limit
(only when setting
analog input)
Decimal Point
(only when setting
analog input)
Temperature
Unit
SP Upper Limit
SP Lower Limit
PID•ON/OFF
In ON/OFF control =
onof
In 2-PID control =
pid
Standard or Heating/Cooling
Standard control =
stnd
Heating and cooling control
=
h-c
Control Period (Heating)
(Unit: Seconds)
*Voltage output
(for driving SSR): 2
Alarm 1 to 4
Type
Control Period (Cooling)
(Unit: Seconds)
*Voltage output
(for driving SSR): 2
Direct/Reverse Operation
In Reverse operation
(Heating) =
or-r
In Direct operation
(Cooling) =
or-d
*2
in-t
5
in-h
100
in-l
0
dp
0
d-u
c
sl-h
1300
sl-l
-200
cntl
pid
s-hc
stnd
Program Pattern
ptrn
off
cp
20
c-cp
20
orev
or-r
Event Input
Assignment 1
ev-1
msp0
Event Input
Assignment 2
ev-2
stop
Extraction of Square
Root Enable
(Only when analog
input is set)
sqr
off
Move to Advanced
Function Setting
Level
amov
0
Password to
Move to
Protect Level
prlp
0
Alarm 1 to 4
Hysteresis
Adjustment Level
Displayed only once when
entering Adjustment Level.
l.adj
at
off
Heater Current 1 Value
Monitor (Unit: A)
ct1
0.0
Communications Writing
cmwt
off
Heater Burnout Detection 1
(Unit: A)
hb1
0.0
Soak Time
soak
1
MV Upper Limit
ol-h
100.0
Manual Reset Value
Clears the offset
during P or PD control.
of-r
50.0
Wait Band
wt-b
off
MV at Stop
mv-s
0.0
MV at PV Error
mv-e
0.0
SP Ramp Set Value
sprt
off
SP Ramp Set Value
(SP Ramp Fall Value)
sprl
same
Hysteresis (Cooling)
chys
1.0
PV
Input Shift
PV input
Slope Coefficient
Leakage Current 1 Value
Monitor (Unit: A)
lcr1
0.0
Integral Time
(Unit: Seconds)
i
233
Derivative Time
(Unit: Seconds)
d
40
MV Lower Limit
ol-l
0.0
MV Change
Rate Limit
orl
0.0
Extraction of Square
Root Low-cut Point
sqrp
0.0
HS Alarm 1
(Unit: A)
hs1
50.0
SP 0 to 7
25
0
Process Value/Set Point
s.err is displayed when
connected sensor is
different from input type.
AT Execute / Cancel
100%AT Execute
at-2
40%AT Execute
at-1
Dead Band
c-db
0.0
Hysteresis (Heating)
hys
1.0
Proportional
Band
p
8.0
Integral Time
(Cooling)
(Unit: Seconds)
c-i
233
Derivative Time
(Cooling)
(Unit: Seconds)
c-d
40
Proportional Band
(Cooling)
c-p
8.0
4 to 20mA
0 to 20mA
1 to 5V
0 to 5V
0 to 10V
25
26
27
28
29
Setting range
Input type Input
Pt100
JPt100
Thermocouple
Infrared
Thermosensor
ES1B
K
J
T
E
L
U
N
R
S
B
C/W
PL II
Setting
10 to 70°C
60 to 120°C
115 to 165°C
140 to 260°C
0
1
2
3
4
5
6
7
8
9
10
11
12
13
14
15
16
17
18
19
20
21
22
23
24
Operation indicators
• SUB1: Auxiliary output 1 indicator
• SUB2: Auxiliary output 2 indicator
• OUT1: Control output 1 indicator
Sensor Temperature/Analog Input
(no polarity)
Input Power Supply
Auxiliary Outputs
Auxiliary outputs 1 and 2
Options
001
Event inputs 1 and 2,
and CT1
002
Communications
(RS-485) and CT1
One relay output
Control Output 1
One voltage output
(for driving SSR)
RX QX
• You can remove only the interior body of the Digital Controller from the case with the Draw-out Jig to perform maintenance without removing
the terminal leads. Refer to the E5D Digital Controllers User’s Manual (Cat. No. H224) for instructions.
• Do not remove the terminal block. Doing so may result in failure or malfunction.
• A Setup Tool port is provided on the upper of the product. Use this port to connect a personal computer to the product when using the Setup
Tool. E58-CIFQ2 USB-Serial Conversion Cable is required to connect the personal computer to the product. (Do not use the product with
the USB-Serial Conversion Cable left permanently connected.)
Refer to the instruction manual provided with the USB-Serial Conversion Cable for details on connection methods.
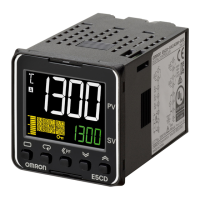
• No.1 display
Process value or set data
type
• No.2 display
Set point, set data read-out value or
changed input valu
e
• Up and Down keys
Each press of U key increments or
advances the values displayed on the
No.2 display.
Each press of D key decrements or
returns the values displayed on the No.2
display.
• TUNE:
Lit during auto-tuning.
• A:
Flashing or lit during adaptive control.
• Bar Display:
Displays the MV or heater current in
10 steps.
• STOP: Control stopped indicator
Lit when “Run/Stop” is stopped during
operation.
During control stop, functions other
than control output are valid.
• MANU: Manual output indicator
Lit when the Auto/Manual Mode is set to
Manual Mode.
• CMW: Communications writing
enabled/disabled indicator
Lit when communications writing is enabled
and not lit when it is disabled.
Input Type
-200 to 850
-199.9 to 500.0
0.0 to 100.0
-199.9 to 500.0
0.0 to 100.0
-200 to 1300
-20.0 to 500.0
-100 to 850
-20.0 to 400.0
-200 to 400
-199.9 to 400.0
-200 to 600
-100 to 850
-200 to 400
-199.9 to 400.0
-200 to 1300
0 to 1700
0 to 1700
0 to 1800
0 to 2300
0 to 1300
0 to 90
0 to 120
0 to 165
0 to 260
-300 to 1500
-199.9 to 900.0
0.0 to 210.0
-199.9 to 900.0
0.0 to 210.0
-300 to 2300
0.0 to 900.0
-100 to 1500
0.0 to 750.0
-300 to 700
-199.9 to 700.0
-300 to 1100
-100 to 1500
-300 to 700
-199.9 to 700.0
-300 to 2300
0 to 3000
0 to 3000
0 to 3200
0 to 3200
0 to 2300
0 to 190
0 to 240
0 to 320
0 to 500
Platinum
resistance
thermometer
Temperature inputs
*The default is“5”.
*
s.err will be displayed when a platinum resistance thermometer is mistakenly connected while
input type is not set for it. To clear the s.err display, correct the wiring and cycle the power supply.
°C= c
°F= f
Initial setting level enables users to specify their preferred
operating conditions (input type, alarm type, control method, etc.)
*2: Refer to the adjoining tables for details of input types and alarm types.
*3: Operation is stopped when moved to the initial setting level.
(Both control and auxiliary outputs are stopped.)
*4: The grayed-out setting items are not displayed for some models and some settings of
other setting items.
Typical example: The parameters are not displayed under the following conditions.
• AT Execute/Cancel: Not displayed if PID ON/OFF is set to ON/OFF.
•
Alarm 1 Type: The default setting is for Controllers that are not equipped with HB/HS alarms.
For a Controller equipped with HB/HS alarms, the Auxiliary Output 1 Assignment
parameter (Advanced Function Setting Level) is set to a heater alarm. If you set
alarm 1, the Alarm 1 Type parameter will be displayed.
Refer to the E5D Digital Controllers User’s Manual (Cat. No. H224)
for the setting method.
*5: The four numeric digits of the product code are displayed in the No. 2 display. The
setting cannot be changed and there is nothing that you need to set.
Hold O down
for at least
1 second
(No.1 display flashes,
then the control stops.)
Hold O down
for at least
3 seconds
Operation Level
Set Point During
SP Ramp
sp-m
0
Heater Current 1
Value Monitor
(Unit: A)
ct1
0.0
Multi-SP
Set Point Selection
m-sp
0
Auto/Manual Switch
PID control only.
a-m
Leakage Current 1
Value Monitor
(Unit: A)
lcr1
0.0
Program Start
prst
rset
Soak Time Remain
sktr
0
RUN/STOP
r-s
run
Alarm Va
lue
1 to 4
Alarm Value
Upper Limit 1 to 4
When control start
=
run
When control stop
=
stop
Operation level should normally be used during operations.
Hold O and M keys
down for at least
1 second
Hold O and M keys
down for at least
3 seconds
Protect Level
Restricts which settings can be displayed or changed, and
restricts change by key operation.
Press and hold the
M Key to cycle through the parameters in reverse.
Press O
(less than
1 second)
Adjustment Level
Adjustment level is for entering set values and shift
values for control.
3106402-8B (Side-A)
M
M
M
M
M
M
M
M
M
M
M
M
M
M
M
M
M
M
M
M
M
M
M
M
M
M
M
M
M
M
M
M
M
M
M
M
M
M
M
M
M
M
M
M
M
M
M
M
M
M
M
M
M
M
M
M
M
M
M
M
M
M
M
Individual mounting (mm) Side-by-side mounting (mm)
•
Insert the main unit through the mounting hole in the panel (1 to 5 mm thickness). Insert the
mounting brackets (supplied) into the fixing slots located on the top and bottom of the rear case.
• Tighten the two mounting screws on the top and bottom of the adapter to keep them
balanced, and finally tighten them to a torque of between 0.29 and 0.39 N·m.
• When more than one machine is installed, make sure that the ambient temperature does
not exceed the specified limit.
Waterproofing is impossible
with side-by-side
installation. When
waterproofing is required, fit
watertight packing on the
backside of front panel.
°C °F
CD21
LH
ON
OFF
SP
Communications
Monitor
M
Auxiliary outputs 1and 2
Conformance to Safety Standard
Due to UL Listing requirements, use the E54-CT1L or E54-CT3L current
transformer with the factory wiring (internal wiring).
Use a UL category XOBA or XOBA7 current transformer that is UL Listed
for field wiring (external wiring) and not the factory wiring (internal wiring).
Always externally connect the recommended fuse that is specified in the
Instruction Manual before you use the Digital Controller.
Analog Input
• If you input an analog voltage or current, set the Input Type parameter to
the correct input type.
• Do not use the Digital Controller to measure a circuit with Measurement
Category II, III, or IV.
• Do not use the Digital Controller to measure an energized circuit to which
a voltage that exceeds 30 Vrms or 60 VDC is applied.
The protection provided by the Digital Controller may be impaired if the Digital
Controller is used in a manner that is not specified by the manufacturer.
*5
In the pack:
• Main unit
• Instruction manual
• Terminal cover (E53-COV23): e
• Watertight packing (Y92S-P8): c
• Adapter (Y92F-49): d
Crimp Terminal Sizes: M3
Sold Separately
• Terminal cover (E53-COV23)
• USB-Serial Conversion Cable
(E58-CIFQ2)
• Draw-out Jig (Y92F-58)
Operation stopped.
(Both control and auxiliary outputs are stopped.)
*3
Initial Setting Level
Use the following ranges for scaling: -1999
to 9999, -199.9 to 999.9, -19.99 to 99.99,
-1.999 to 9.999
Analog
input type
Current input
Voltage input
Relay outputs
250 VAC: 3 A
(resistive load)
60 min.
45
45
+0.6
0
+0.6
0
+0.6
0
(48 x number of units - 2.5)
+1.0
0
45
Indicates a potentially hazardous situation which, if
not avoided, is likely to result in minor or moderate
injury or property damage. Read this manual
carefully before using the product.
E5CD
Digital Controller
Be sure to observe the following precautions to prevent operation failure, malfunction, or adverse affects on the
performance and functions of the product. Not doing so may occasionally result in unexpected events.
Use the product within specifications.
(1) The product is designed for indoor use only. Do not use the product outdoors. Do not use or store the product
in any of the following locations.
• Places directly subject to heat radiated from heating equipment. • Places subject to intense temperature change.
• Places subject to splashing liquid or oil atmosphere. • Places subject to icing and condensation.
• Places subject to direct sunlight. • Places subject to vibration and large shocks.
• Places subject to dust or corrosive gas (in particular, sulfide gas and ammonia gas).
(2) Use and store the Digital Controller within the rated ambient temperature and humidity. Provide forced-cooling
if required.
(3)
To allow heat to escape, do not block the area around the product. Do not block the ventilation holes on the product.
(4) Be sure to wire properly with correct signal name and polarity of terminals.
(5) Use the specified size of crimped terminals (M3, width 5.8 mm or less) for wiring. To connect bare wires to the
terminal block, use copper braided or solid wires with a gage of AWG24 to AWG18 (equal to a crosssectional
area of 0.205 to 0.823 mm
2
). (The stripping length is 6 to 8 mm.). Up to two wires of same size and type, or
two crimped terminals can be inserted into a single terminal.
(6) Do not wire the terminals which are not used.
(7) Allow as much space as possible between the controller and devices that generate a powerful high- frequency
or surge. Separate the high-voltage or large-current power lines from other lines, and avoid parallel or
common wiring with the power lines when you are wiring to the terminals.
(8) Use the Digital Controller within the rated load and power supply.
(9) Make sure that the rated voltage is attained within two seconds of turning ON the power using a switch or relay
contact. If the voltage is applied gradually, the power may not be reset or output malfunctions may occur.
(10) Make sure that the Digital Controller has 30 minutes or more to warm up after turning ON the power before
starting actual control operations to ensure the correct temperature display.
(11) When using adaptive control, turn ON power for the load at the same time as or before supplying power to the
Digital Controller.
(12) During tuning, ensure that the power for the load (e.g., heater) is ON. Otherwise, the correct tuning result
cannot be calculated and optimal control will not be possible. Tuning is used in the following functions:
AT, adaptive control, automatic filter adjustment, and water-cooling output adjustment.
(13) A switch or circuit breaker should be provided close to this unit. The switch or circuit breaker should be within
easy reach of the operator, and must be marked as a disconnecting means for this unit.
(14)
Wipe off any dirt from the Digital Controller with a soft dry cloth. Never use thinners, benzine, alcohol, or any
cleaners that contain these or other organic solvents. Deformation or discoloration may occur.
(15)
Design system (control panel, etc) considering the 2 second of delay that the controller’s output to be set after power ON.
(16)
The output will turn OFF when you move to the Initial Setting Level. Take this into consideration when performing control.
(17) The number of non-volatile memory write operations is limited. Therefore, use RAM write mode when
frequently overwriting data during communications or other operations.
(18) When disassembling the Digital Controller for disposal, use suitable tools.
(19) Do not exceed the communications distance that is given in the specifications and use the specified
communications cable. Refer to the
E5
D Digital Controllers User’s Manual (Cat. No. H224)
for the
communications distance and cable specifications.
(20) Do not turn the power supply to the Digital Controller ON or OFF while the USB-Serial Conversion Cable is
connected. The Digital Controller may malfunction.
(21)
Always turn OFF the power supply before pulling out the interior of the product, and never touch nor apply
shock to the terminals or electronic components.
When inserting the interior of the product, do not allow the electronic components to touch the case.
When you insert the interior body into the case, confirm that the hooks on the top and bottom are securely
engaged with the case.
If the terminals are corroded, replace the rear case as well.
(22)
Do not use the Temperature Controller if the front sheet is peeling.
Precautions for Safe Use
Refer to the E5
D Digital Controllers User’s Manual (Cat. No. H224)
for detailed application procedures.
INSTRUCTION MANUAL
Thank you for purchasing the
OMRON E5CD Digital Controller.
This manual describes the functions, performance, and
application methods needed for optimum use of the product.
Please observe the following items when using the product.
• This product is designed for use by qualified personnel with
a knowledge of electrical systems.
• Before using the product, thoroughly read and understand
this manual to ensure correct use.
• Keep this manual in a safe location so that it is available for
reference whenever required.
OMRON Corporation
©All Rights Reserved
Refer to the E5
D Digital Controllers User’s Manual (Cat. No. H224) for information on the
Advanced Function Setting Level, Monitor/Setting Item Level, Manual Control Level, and other
functions.
Refer to the E5
D Digital Controllers Communications Manual (Cat. No. H225) for information on
communications.
Power supply voltage 100 to 240 VAC, 50/60 Hz or
24 VAC, 50/60 Hz / 24 VDC
Operating voltage range 85 to 110% of the rated voltage
Power consumption
Option 000: 5.2 VA max. (100 to 240 VAC)
3.1 VA max. (24 VAC)/1.6 W max. (24 VDC)
All other specifications: 6.5 VA max. (100 to 240 VAC)
4.1 VA max. (24 VAC)/2.3 W max. (24 VDC)
Indication accuracy Thermocouple:
(Ambient temperature: 23°C) (±0.3 % of indication value or ±1°C,
whichever is greater) ±1 digit max.
Platinum resistance thermometer:
(±0.2 % of indication value or ±0.8°C,
whichever is greater) ±1 digit max.
Analog input:
±0.2 % FS ±1 digit max.
Event input Output current: approx. 7 mA per contact.
Contact input ON:1 kȍPD[2))kȍPLQ
No-contact input ON: residual voltage 1.5 V max.,
OFF: leakage current 0.1 mA max.
Control output 1 Relay output :SPST-NO
250VAC, 3A(resistive load)
Electrical life of relay: 100,000 operations
Voltage output (for driving SSR):
12 VDC ±20%, 21 mA
Control method ON/OFF or 2-PID control
Auxiliary outputs Relay outputs:SPST-NO, 250 VAC,
3 A (resistive load),
Electrical life of relay: 100,000 operations
Ambient temperature -10 to 55°C
(Avoid freezing or condensation)
Ambient humidity 25 to 85%
Storage temperature -25 to 65°C
(Avoid freezing or condensation)
Altitude Max. 2,000m
Recommended fuse
T2A, 250 VAC, time-lag, low-breaking capacity
Weight Approx. 120 g (Digital Controller only)
Degree of protection Front panel: IP66
Rear case: IP20, Terminal section: IP00
Installation environment Overvoltage category II, pollution
degree 2 (as per IEC61010-1)
Memory protection Non-volatile memory
(Number of write operations: 1,000,000)
CAUTION
CAUTION
Minor injury due to electric shock may occasionally occur.
Do not touch the terminals while power is being supplied.
Electric shock, fire, or malfunction may occasionally occur. Do not allow metal objects, conductors,
debris (such as cuttings) from installation work, moisture, or other foreign matter to enter the Digital
Controller, the Setup Tool ports, or between the pins on the connectors on the Setup Tool cable.
Do not use the product where subject to flammable or explosive gas. Otherwise, minor injury from
explosion may occasionally occur.
Never disassemble, modify, or repair the product or touch any of the internal parts. Minor electric
shock, fire, or malfunction may occasionally occur.
CAUTION - Risk of Fire and Electric Shock
a) This is the product UL listed as Open Type Process Control Equipment. It must be mounted in an enclosure
that does not allow fire to escape externally.
b) More than one disconnect switch may be required to de-energize the equipment before servicing.
c) Signal inputs are SELV, limited energy.
d) Caution: To reduce the risk of fire or electric shock, do not interconnect the outputs of different Class 2 circuits.
If the output relays are used past their life expectancy, contact fusing or burning may occasionally
occur. Always consider the application conditions and use the output relays within their rated load
and electrical life expectancy. The life expectancy of output relays varies considerably with the
output load and switching conditions.
EN
Safety Precautions
Key to Warning Symbols
Dimensions
Warning Symbols
Installation
Connections (The applicability of the electric terminals varies with the type of machine.)
Specifications
Other functions
Wiring
Names of Parts on Front Panel
• °C / °F : temperature unit
The temperature unit is displayed when the displayed value
is a temperature. Either C or F is displayed according to
the set value of the temperature unit.
•
Mode key
Press this key to change the contents of the display.
Press this button for 1 s or longer for reverse scroll.
• Press the O key and the M key together for at
least 3 seconds to switch to protect level.
•
Level key
Use this key to change levels:
• Shift key (PF key)
The default PF Setting parameter is for shifting the digit.
This is a function key. When it is pressed, the function
set for the PF Setting parameter will operate.
• :Protection indicator
Lit when Setting Change Protect is ON
(disables the Up and Down Keys).
Operation Menu
*1: Upper and lower limits can be set for parameters 1, 4 and 5 to provide for different
types of alarm. These are indicated by the letter "L" and "H".
• The default alarm type is "2"
Alarms (Alarms are output from auxiliary outputs.)
Suitability for Use
Omron Companies shall not be responsible for conformity with any standards, codes or regulations which
apply to the combination of the Product in the Buyer’s application or use of the Product.
At Buyer’s request, Omron will provide applicable third party certification documents identifying ratings
and limitations of use which apply to the Product. This information by itself is not sufficient for a
complete determination of the suitability of the Product in combination with the end product, machine,
system, or other application or use. Buyer shall be solely responsible for determining appropriateness of
the particular Product with respect to Buyer’s application, product or system. Buyer shall take application
responsibility in all cases.
NEVER USE THE PRODUCT FOR AN APPLICATION INVOLVING SERIOUS RISK TO LIFE OR
PROPERTY WITHOUT ENSURING THAT THE SYSTEM AS A WHOLE HAS BEEN DESIGNED TO
ADDRESS THE RISKS, AND THAT THE OMRON PRODUCT(S) IS PROPERLY RATED AND
INSTALLED FOR THE INTENDED USE WITHIN THE OVERALL EQUIPMENT OR SYSTEM.
Conformance to EN/IEC Standards
This is a class A product.
In residential areas it may cause radio interference, in which case the user
may be required to take adequate measures to reduce interference.
Ͳ匏匶匶櫋怺殯愯暧皻柦匶沖沲
決匶匶垚櫋怺殯Ͳ匏洊沖砒洇穯匶匶嵢昢砖廪沖嬖垚斲殯沖垚決洖汊
渂汞穞柢匶愚岂彶儆洛歾汞滆櫳櫖昢斲殯穞垚冉汊徯洇求嵢穯城埪
Set the parameters of the product so that they are suitable for the system being controlled. If they
are not suitable, unexpected operation may occasionally result in property damage or accidents.
Loose screws may occasionally result in fire. Tighten the terminal screws to the specified torque of 0.43 to 0.58 N•m.
The maximum terminal temperature is 75°C. Use wires with a heat resistance of 75°C min to wire the terminals.
A malfunction in the Digital Controller may occasionally make control operations impossible or prevent
alarm outputs, resulting in property damage. To maintain safety in the event of malfunction of the Digital
Controller, take appropriate safety measures, such as installing a monitoring device on a separate line.
*6: Error shown only for "Process value / Set point". Not shown for other status.
When an error has occurred, the No.1 display shows the error code. Take necessary measure
according to the error code, referring the table below.
If the input value exceeds the display limit (-9999 to 9999), though it is within the control
range, [[[[ will be displayed under -1999 and ]]]] above 9999.
Under these conditions, control outputs and alarms will operate normally.
Refer to the E5D Digital Controllers User’s Manual (Cat. No. H224) for the controllable ranges.
Check the setting of the Input Type parameter,
check the input wiring, and check for broken or
shorts in the temperature sensor.
Turn the power OFF then back ON again. If the
display remains the same, the controller must be
repaired. If the display is restored to normal, then
a probable cause can be external noise affecting
the control system. Check for external noise.
After the check of input error, turn the power OFF
then back ON again. If the display remains the
same, the controller must be repaired. If the
display is restored to normal, then a probable
cause can be external noise affecting the control
system. Check for external noise.
No.1 display
Meaning
A/D converter error
*6
Memory error
Input error
*6
s.err (S. Err)
e111 (E111)
Action
OFF
Alarm
Control
output
Status at error
OFF
OFF
Operates
as above the
upper limit.
OFF
OFF
e333 (E333)
Error Display (troubleshooting)
11
12
11
12
䡚
10
7
8
9
Auxiliary output 1
Auxiliary output 2
1
2
1
2
*1. When complying with EMC standards, the line connecting the
sensor must be 30 m or less.
If the cable length exceeds 30 m, compliance with EMC
standards will not be possible.
*2. Use non-voltage inputs for the event inputs. The polarity for a
non-contact input is indicated by “(-).”
䡚
The E5CD is set for a K thermocouple (input type of 5) by default.
If a different sensor is used, an input error (s.err) will occur.
Check the setting of the Input Type parameter.
100 to 240 VAC 24 VAC/DC
A D
Relay output
250 VAC, 3 A
(resistive load)
Voltage output
(for driving SSR)
12 VDC, 21 mA
Control output 1
+
−
6
4
5
6
5
6
Pt
+
−
mA
−
+
5
4
V
−
5
V
6
+
4
TC
4
I
A
B
B
13
14
15
18
16
13
14
15
16
1717
18
EV1
EV2
CT1 CT1
B(+)
A(−)
(−)
RS-485
17
18 12
15
16
1
2
13
14
3
11
4
6
7
8
9
10
5
M
Bar Display Data
bar
mv
M
Bar Display Scaling
Upper Limit
barh
100.0
M
Bar Display Scaling
Lower Limit
barl
0.0
M
Deviation upper/lower limit
M
M
alt1
2
alh1
0.2
M
al1l
0
M
al-1
0
al1h
0
M
M
ins
0.0
M
M
inrt
1.000
M
sp-0
0
plcm
0
M
w1on
0
w1of
0
M
Work Bits 1 to 8
ON Delay
Work Bits 1 to 8
OFF Delay
Only the value set to the ins: Temperature Input Shift parameter is applied to the entire
temperature input range. When the process value is 200°C, the process value is treated as
201.2°C after input shift if the input shift value is set to 1.2°C. The process value is treated
as 198.8°C after input shift if the input shift value is set to -1.2°C.
pmov
0
pmsk
on
wtpt
off
OUT1
R
OUT1
Q
Ự傼Ṭ
裏面は日本語です
Ự傼ઈ ˖
妽彺汆穢剳檺嵢
沗昷夞檺沎枻城埪
E5CD-
6M-
Options
Input Power Supply
Auxiliary Outputs
Control Output 1
c
d
e
44.8
48
58
(66)
62
4
1
Startup Operation
p-on
cont
M
Model Creation
PV Amplitude
m-pv
0.0
M
Model Creation
MV Amplitude
m-mv
0.0
M
M
Model Creation
ON Time
m-on
0
Model Creation
OFF Time
m-of
0
off
fix
info
auto
Adaptive Control
Disabled =
Fixed =
Notification =
Automatic update =
adpt
off
SP Response
Proportional Band
SP Response
Integral Time
(Unit: Seconds)
sp-i
233
SP Response
Derivative Time
(Unit: Seconds)
sp-d
40
sp-p
8.0
M
M
M
SP Response
Coefficient Number
sp-n
0
M
Disturbance
Integral Time
(Unit: Seconds)
d-i
233
Disturbance
Derivative Time
(Unit: Seconds)
d-d
40
Disturbance
Proportional Band
d-p
8.0
M
M
M
Water-cooling
Output Adjustment
inf
0.0
PID Update
(Adaptive Control)
a-ud
off
Automatic Filter
Adjustment
fa
off
M
M
M
Water-cooling
Proportional Band
Increase Threshold
w-il
1.4
Water-cooling
Proportional Band
Decrease Threshold
w-dl
0.6
Input Digital Filter
w-ht
off
M
M
䘆㺂ڒ↘Ⱦ
δૂ䖻ࣟ䗉࠰䜳ڒ↘Ⱦε
∗3
ࡓခ䇴ᇐ㨒ঋ
ሯ∊ׁ㕟᭴䟽⭞сࡍ㤹പφ-1999Њ9999Ƚ
-199.9Њ999.9Ƚ-19.99Њ99.99Ƚ-1.999Њ
9.999
⭫⍷䗉ޛ
⭫ু䗉ޛ
⁗ᤕ䠅䗉ޛ
㊱ශ
60ԛр
45
45
+0.6
0
+0.6
0
+0.6
0
δ48hঋݹᮦ䠅 - 2.5ε
+1.0
0
45
㺞⽰▒൞Ⲻধ䲟߫θྸуࣖԛ䱨↘θᖾ㜳ሲ㠪䖱
ᓜᡌѣᓜⲺӰ䓡՚ᇩᡌ䍘ӝᦕඅȾ൞ֵ⭞䈛ӝࢃᓊ
Ԋ㓼䰻䈱ᵢ䈪᱄ҜȾ
E5CD
ᮦᆍᕅಞ
䈭ࣗᗻ䚫ᆾԛс⌞ᝅӁ亯θԛ䚵ރᬃ֒ཧȽ䈥ࣞ֒ᡌሯӝ⢯ᙝࣕ㜳䙖ᡆу㢥ᖧଃȾࡏθ㜳Րሲ㠪ᝅཌӁ᭻Ⱦ
䈭൞ᇐ㤹പֵ⭞ᵢӝȾ
δ1ε 䈛ӝ㻡䇴䇗Ѱᇚֵ⭞Ⱦ䈭൞ᇚཌֵ⭞Ⱦу㾷൞ԛсԱ൦ᯯֵ⭞ᡌᆎ᭴䈛ӝȾ
gࣖ✣䇴༽✣䗆ሺⲺ൦ᯯȾ gᴿ⏨։ᡌ⋯≊伔ⒻⲺ൦ᯯȾ
g䱩ݿሺⲺ൦ᯯȾ gᓜ࢝⛾Ⲻ൦ᯯȾ
g㔉ߦૂ㔉䵨Ⲻ൦ᯯȾ gᴿ䴽ࣞᡌཝⲺߨ࠱Ⲻ൦ᯯȾ
g⚦䖹ཐᡌᴿ㞆㲶ᙝ≊։δ⢯ࡡᱥ⺡⢟≊։ૂ≞≊εⲺ൦ᯯȾ
δ2ε ൞仓ᇐⲺ⧥ູᓜૂ⒵ᓜ㤹പֵ⭞ૂᆎ۞ᮦᆍᕅಞȾᗻ㾷ᰬᓊ䟽ᕰ߭পȾ
δ3ε Ѱӄᮙ✣θу㾷ມດ䈛ӝઞപⲺグ䰪Ⱦ
у㾷ດӝⲺ䙐伄ᆊȾ
δ4ε ࣗᗻ↙⺤Ⲻؗ〦ૂㄥᆆᶷᙝ↙⺤㓵Ⱦ
δε ֵ⭞ᇐተሮⲺুㄥᆆδM3θᇳ5.8mmᡌԛсε䘑㺂㓵Ⱦ䘔㼮㓵㠩㓵ᶵᰬθ䈭ֵ⭞AWG24㠩
AWG18Ⲻ䬒㕌㓽㓵ᡌᇔᗹ⭫㔼δᖉӄᡠ䶘〥Ѱ0.205㠩0.823mm
2
εȾδ࢛㓵䮵ᓜѰ6㠩8mmࠋεȾᴶཐ
ሼተሮૂ㊱ශⲺњᶗ⭫㔼θᡌњѠুㄥᆆᨈޛжѠㄥᆆȾ
δ6ε у⭞Ⲻㄥᆆу㾷㓵Ⱦ
δ7ε ൞ಞфԛӝ⭕儎仇ૂ⎠⏂Ⲻ䇴༽ҁ䰪ᓊؓᤷ䏩ཕ䘒Ⲻ䐓⿱Ⱦሼ儎ুᡌཝ⭫⍷⭫Ⓠ㓵фެᆹሲ㓵䳊⿱θ൞
ㄥᆆ㓵ᰬ䚵ރф⭫Ⓠ㓵ާㄥᡌᒬ㚊Ⱦ
δ8ε ൞仓ᇐⲺ䍕䖳ૂב⭫⭫Ⓠсֵ⭞ᮦᆍᕅಞȾ
δ9ε ֵ⭞ᔶީᡌ㔝⭫ಞ䀜⛯ԛ⺤ؓ൞њ〈ሼ⭫ⓆѰ仓ᇐ⭫ুȾྸ⭫ুᱥ䙆⑆рⲺθ⭫Ⓠ㜳ᰖ⌋གྷփᡌ㘻
⭕䗉࠰䈥ࣞ֒Ⱦ
δ10ε൞䙐⭫Ⓠࡦᔶခᇔ䱻ᬃ֒ࢃᓊ⺤ؓಞ䘑㺂30࠼䫕ԛрⲺ人✣θԛؓ䇷↙⺤Ⲻᓜᱴ⽰Ⱦ
δ11εֵ⭞㠠䘸ᓊᰬθ൞ᮦᆍᕅಞב⭫Ⲻᰬᡌҁࢃ䙐䍕䖳Ⲻ⭫ⓆȾ
δ12εṗ↙ᰬθ⺤ؓ䍕䖳δྸࣖ✣ಞεⲺ⭫Ⓠᐨ䙐Ⱦࡏθᰖ⌋䇗㇍↙⺤Ⲻṗ↙㔉θъᰖ⌋ᓊ⭞ᴶ֩ⲺȾԛ
сࣕ㜳ѣֵ⭞ṗ↙φ
ATȽ㠠䘸ᓊȽ㠠ࣞ䗽┚ಞ䈹᮪ૂ≪߭䗉࠰䈹᮪Ⱦ
δ13ε
൞䈛ӝⲺ䱺䘇ᓊ䈛ᴿᔶީᡌ㘻ᯣ䐥ಞȾᔶީᡌ㘻ᯣ䐥ಞᓊ䈛൞ᬃ֒㘻ӄཕࡦⲺ൦ᯯθᒬъᴿ᱄ᱴⲺᯣᔶḽᘍȾ
δ14ε
⌷ᰬθ䈭⭞ᒨⲺ䖥ᐹᬜᤣȾ䈭ֵ⭞〶䠀ࡸȽ⊳⋯Ƚ䞈㋴ㅿ⓬ࡸⲺ㦥ȾࡏՐሲ㠪ᖘᡌ㢨Ⱦ
δ15ε൞䇴䇗㌱㔕δྸ䶘ᶵεⲺᰬُθ䴶㾷㘹㲇ࡦಞⲺ䗉࠰൞⭫Ⓠр⭫ᴿ2〈ⲺᔬᰬȾ
δ16εᖉ࠽ᦘࡦࡓခ䇴ᇐ㨒ঋᰬθ䗉࠰㜳Րީ䰣Ⱦ൞ᇔ᯳ᰬ䴶㾷㘹㲇ࡦ䘏ж⛯Ⱦ
δ17ε䶔ᥛᆎⲺߏ⅗ᮦᱥᴿ䲆ⲺȾᡶԛ൞䙐ؗᡌެᆹᬃ֒䴶㾷仇㑷䠃ߏᮦᦤᰬθ䈭ֵ⭞RAMߏ⁗ᕅȾ
δ18εমಞ䘑㺂ᓕᔹ༺⨼ᰬθ䈭ֵ⭞䘸ᖉⲺᐛޭȾ
δ19ε䈭䎻䗽㿺Ṳѣ㔏࠰Ⲻ䙐ؗ䐓⿱ᒬֵ⭞ᇐⲺ䙐ؗ⭫㔼Ⱦᴿީ䙐ؗ䐓⿱ૂ⭫㔼㿺Ṳθ䈭৸䰻ɅE5ȏDᮦᆍᕅ
ಞ⭞ᡭᢁ߂ɆδCat. No. H224εȾ
δ20ε䘔ҼUSB㌱ࡍ䖢ᦘ⭫㔼ᰬθ䈭ᔶȽީಞⲺ⭫ⓆȾࡏՐሲ㠪ಞ᭻䳒Ⱦ
δ21ε࠰ӝ䜞ҁࢃθ䈭ࣗᗻީ䰣⭫Ⓠθ࠽䀜ㄥᆆᡌ⭫ᆆ䜞Ԭθҕу㾷ሯެ䙖ᡆߨ࠱Ⱦ
ᨈޛӝ䜞ᰬθ䈭䇟⭫ᆆ䜞Ԭ䀜ཌ༩Ⱦ
ᖉሼ䜞ѱ։ᨈޛཌ༩ᰬθ⺤䇚京䜞ૂᓋ䜞Ⲻᤸ䫟фཌ༩⢘രȾ
ྸㄥᆆ㻡㞆㲶θ䈭䘔༩ж䎭ᴪᦘȾ
δεྸࢃ䶘ᶵ࢛⿱θ䈭ֵ⭞ᓜಞȾ
ᆿޞֵ⭞⌞ᝅӁ亯
ᴿީ䈜㓼Ⲻᓊ⭞↛僚θ䈭৸䰻ɅE5ƶDᮦᆍᕅಞ⭞ᡭᢁ߂Ɇ
δCat. No. H224εȾ
ֵ⭞䈪᱄Ҝ
䉘ᛞ䍣Ҧ⅝嗏E5CDᮦᆍᕅಞȾ
ᵢ䈪᱄Ҝᨅ䘦ҼӝⲺࣕ㜳Ƚᙝ㜳ԛֵӝ䗴ࡦᴶֵ֩⭞
᭾Ⲻᓊ⭞ᯯ⌋Ⱦ
䈭൞ֵ⭞䈛ӝᰬ⌞ᝅԛсӁ亯φ
gֵ⭞䈛ӝⲺӰᗻ亱ޭ༽䏩ཕⲺ⭫≊㌱㔕⸛䇼Ⱦ
g
൞ֵ⭞䈛ӝࢃᓊ䙐䈱ᒬ⨼䀙ᵢ䈪᱄Ҝԛ⺤ؓ↙⺤Ⲻֵ⭞Ⱦ
gؓ㇗䈛䈪᱄Ҝԛ⺤ؓ൞䴶㾷ᰬԛ䳅ᰬḛ䰻Ⱦ
⅝嗏ޢ
©All Rights Reserved
ᴿީ儎㓝ࣕ㜳䇴ᇐ㨒ঋȽᢁࣞ㨒ঋԛެᆹࣕ㜳Ⲻؗᚥθ䈭৸㘹ɅE5ƶDᮦᆍᕅ
ಞ⭞ᡭᢁ߂ɆδCat. No. H224εȾ
ᴿީ䙐ؗⲺ䈜㓼ؗᚥθ䈭৸䰻ɅE5ƶDᮦᆍᕅಞ䙐ؗᢁ߂ɆδCat. No. H225εȾ
ב⭫⭫ু 100Њ240 VACθ50/60 Hzᡌ㘻
24 VACθ50/60 Hz/24 VDC
ᐛ֒⭫ু㤹പ 仓ᇐ⭫ুⲺ85Њ110%
ࣕ⦽⎾㙍
䘿亯000: ᴶཝ5.2 VAδ100-240 VACε
ᴶཝ3.1 VAδ24 VACε/ᴶཝ1.6 Wδ24 VDCε
ᡶᴿެᆹ㿺Ṳφ ᴶཝ6.5 VAδ100-240 VACε
ᴶཝ4.1 VAδ24 VACε/ᴶཝ2.3 Wδ24 VDCε
⽰㋴ᓜ ✣⭫ڬ䗉ޛφ
δ⧥ູᓜφ23°Cε δᱴ⽰ٲⲺ±0.3%ᡌ㘻±1°CѣⲺ䖹ཝٲε
ᴶཝ±1փᮦ
䫸⭫䱱䗉ޛφ
δᱴ⽰ٲⲺ±0.2%ᡌ㘻±0.8°CѣⲺ䖹ཝٲε
ᴶཝ±1փᮦ
⁗ᤕ䠅䗉ޛφ
±0.2 % FS ᴶཝ±1փᮦ
ӁԬ䗉ޛ 䗉࠰⭫⍷φ∅Ѡ䀜⛯㓜7 mAȾ
䀜⛯䗉ޛ ONφᴶཝ1 kΩθ
OFFφᴶቅ100 kΩ
䶔䀜⛯䗉ޛ ONφ⇁֏⭫ুᴶཝ1.5 V
OFFφ╅⭫⍷ᴶཝ0.1 mA
䗉࠰1 㔝⭫ಞ䗉࠰φSPST-NO
250 VACθ3 Aδ䱱ᙝ䍕䖳ε
㔝⭫ಞ⭫≊ስળφ100,000⅗䘆㺂
⭫ু䗉࠰δ⭞ӄ傧ࣞSSRεφ
12 VDC ±20%θ21 mA
ᯯ⌋ ON/OFFᡌ2䐥PID
䖻ࣟ䗉࠰ 㔝⭫ಞ䗉࠰φSPST-NOθ250 VACθ
3 Aδ䱱ᙝ䍕䖳ε
㔝⭫ಞ⭫≊ስળφ100,000⅗䘆㺂
⧥ູᓜ -10Њ55°C
δᓊ䚵ރ㔉ߦᡌ㔉䵨ε
⧥ູ⒵ᓜ RH 2585%
ᆎ۞ᓜ -25Њ65°C
δᓊ䚵ރ㔉ߦᡌ㔉䵨ε
儎ᓜ ᴶ儎2,000㊩
᧞㦆ؓ䲟ѓ T2Aθ250 VACθᰬᔬθք⟊ᯣᇯ䠅
䠃䠅 㓜120 gδӻಞε
䱨ᣚㅿ㓝 ࢃ䶘ᶵφIP66
༩φIP20θㄥᆆφIP00
ᆿ㻻⧥ູ 䗽⭫ুⴤᖋ,,θ⊗ḉ
ㅿ㓝2δIEC61010-1ε
ᆎؓᣚ 䶔ᥛᆎ
δߏ⅗ᮦφ1,000,000ε
䆜
䆜
䙐⭫ᵕ䰪θ䈭䀜ㄥᆆȾ
ࡏՐഖ䀜⭫㙂ሲ㠪䖱՚Ⱦ
уᗍ䇟䠇ኔ⢟։Ƚሲ㓵Ƚᆿ㻻ᰬӝ⭕Ⲻ⻄ኇδྸ࠽ኇεȽ⒵≊ᡌެԌᔸ⢟䘑ޛᮦᆍᕅಞȽ䈹䈋
ᐛޭㄥᡌ䈹䈋ᐛޭ⭫㔼䘔ಞⲺᕋ㝐рȾࡏՐሲ㠪䀜⭫Ƚ⚡⚴ᡌᵰಞ䈥ࣞ֒Ⱦ
䈭ሼ䈛ӝ⭞ӄᴿ᱉⟹᱉⠼≊։Ⲻ൰Ⱦࡏᴿ㜳ഖѰ⠼⛮㙂䙖ᡆ䖱ᓜ՚ᇩȾ
㔓ሯу㾷মȽ᭯㻻ԛؤ⨼䈛ӝᡌ䀜Ա䜞ݹԬȾࡏՐሲ㠪䖱ᗤ䀜⭫Ƚ⚡⚴ᡌᵰಞ䈥ࣞ֒Ⱦ
⌞ᝅι⚡⚴ᡌ䀜⭫Ⲻধ䲟
aεᵢӝѰUL Listing䇚䇷Ⲻᔶ᭴ශ䗽ぁ䇴༽θᗻ亱ᆿ㻻൞㜳ཕ䱨↘⚡㣧䘮࠰Ⲻᵰ༩ѣȾ
bε൞ֵ⭞њѠԛрᯣ⭫ᔶީⲺ߫сθ㔪ؤࢃ䈭ݾᯣᔶᡶᴿᔶީθ⺤ؓᵢӝ༺ӄᯣ⭫⣬ᘷȾ
cεؗ䗉ޛѰSELVδᆿޞքু⭫Ⓠεθഔ䐥䲆Ⱦ
dε⌞ᝅφѰҼࠅቇ⚡⚴ᡌ䀜⭫Ⲻধ䲟θ䈭ሼуⲺ2㊱ഔ䐥Ⲻ䗉࠰ӈ㚊Ⱦ
ྸ䗉࠰㔝⭫ಞ䎻䗽Ҽ人ᵕⲺֵ⭞ስળθᴿᰬՐ⭕䀜⛯⟊ᡌ⟹✝Ⱦခ㓾㾷⌞ᝅ䗉࠰㔝⭫ಞⲺᓊ
⭞⧥ູθᒬ൞仓ᇐ䍕䖳人ᵕስળԛֵ⭞Ⱦ䗉࠰㔝⭫ಞⲺ人ᵕስળ䳅䗉࠰䍕䖳ԛᔶީᶗԬⲺ
㙂Ⱦ
ᴶཝㄥᆆᓜѰ75ΥȾֵ⭞㙆✣൞75ΥԛрⲺሲ㓵䘔ㄥᆆȾ
㷰ѓᶴࣞᴿᰬՐሲ㠪⚡⚴Ⱦ
ᤝ㍝ㄥᆆ㷰ѓθֵެᢣ⸟ؓᤷ൞0.43㠩0.58 N•mҁ䰪Ⱦ
䈭䇴ᇐ䘸㌱㔕⭞Ⲻӝ৸ᮦȾྸ䇴ᇐуᖉθ㜳Րഖᝅཌᬃ֒㙂䙖ᡆ䍘ӝᦕཧᡌӁ᭻Ⱦ
ಞ䈥ࣞ֒ᖾ㜳䙖ᡆᬃ֒ཧ᭾ᡌ䱱↘ᣛ䆜䗉࠰θሲ㠪䍘ӝᦕཧȾѰҼ൞ಞ⭕䈥ࣞ֒
ᰬ⺤ؓᆿޞθᓊ䟽䘸ᖉⲺᆿޞ᧠᯳θྸֵ⭞ঋ⤢Ⲻ㓵䐥ᆿ㻻ⴇ䇴༽Ⱦ
CHN
ᆿޞ⌞ᝅӁ亯
䆜ㅜⲺ㾷⛯
ተሮ㿺Ṳ
∗6φ䭏䈥ᱴ⽰䪾ሯć䗽ぁٲ/䇴ᇐٲĈθ㙂у䪾ሯެᆹ⣬ᘷȾ
ᖉ⭕жѠ䭏䈥ᰬθㅢжᱴ⽰ሼᱴ⽰䭏䈥ԙ⸷Ⱦ৸㘹с㺞θṯᦤ䭏䈥ԙ⸷䟽䘸ᖉⲺ᧠᯳Ⱦ
ྸ䗉ޛٲ䎻䗽ᱴ⽰㤹പδ-1999Њ9999εθֵԃ༺ӄ㤹പθքӄ-1999Ⲻሼᱴ⽰
[[[[ θ儎ӄ9999Ⲻᱴ⽰
]]]]
Ⱦ൞䘏ӑᶗԬсθ䗉࠰ૂᣛ䆜ሼ↙ᑮ䘆㺂Ⱦ
ީӄⲺ㤹പθ䈭৸䰻ɅE5ƶDᮦᆍᕅಞ⭞ᡭᢁ߂ɆδCat. No. H224εȾ
Ỷḛ䗉ޛ㊱ශ৸ᮦⲺ䇴㖤θỶḛ䗉ޛ㓵ᒬỶḛ
ᓜՖಞᱥᆎ൞ᦕᡌ⸣Ⱦ
ީᦿ⭫Ⓠ߃ᢉᔶȾྸᱴ⽰уθࡏ亱ؤ⨼ಞȾ
ྸᱴ⽰ᚘགྷ↙ᑮθࡏ㜳ᱥ㌱㔕ࡦཌ䜞ᒨ
ᢦȾ䈭Ỷḛཌ䜞ᒨᢦȾ
⺤䇚䗉ޛᔸᑮθ䈭䠃᯦䙐⭫ⓆȾྸᱴ⽰уθ
ࡏ亱ؤ⨼ಞȾྸᱴ⽰ᚘགྷ↙ᑮθࡏ᭻䳒ഖ
㜳ᱥ㌱㔕ࡦཌ䜞ᒨᢦȾ䈭Ỷḛཌ䜞ᒨᢦȾ
ㅢжᱴ⽰
ѿ
A/D䖢ᦘ䭏䈥
∗6
ᆎ䭏䈥
䗉ޛ䭏䈥
∗6
s.errδS. Errε
e111δE111ε
ᬃ֒
OFF
ᣛ䆜
࠰䭏⣬ᘷ
OFF
OFF
OFF
OFF
e333δE333ε
䭏䈥ᱴ⽰δ᭻䳒䈀ᯣε
䆜ㅜ
ᆿ㻻
㿺Ṳ
ެᆹࣕ㜳
㓵
ࢃ䶘ᶵⲺݹԬ〦
g°C / °Fφᓜঋփ
ᖉᱴ⽰ᇯѰᓜᰬᱴ⽰ᓜঋփȾṯᦤᓜঋփⲺ
䇴ᇐٲᱴ⽰°Cᡌ°FȾ
g⁗ᕅ䭤
↚䭤᭯ᱴ⽰ᇯȾ
䈛䫤1〈ԛрᯯᱴ⽰ᇯȾ
gᰬօO䭤ૂM䭤㠩ቇ3〈ᶛ࠽ᦘ㠩ؓᣚ㨒ঋȾ
g㨒ঋ䭤
ֵ⭞䈛䭤࠽ᦘ㨒ঋφ
g〱փ䭤δPF䭤ε
PF䇴㖤৸ᮦ唎䇚䇴ᇐѰֵᮦփ〱փȾ↚䭤Ѱࣕ㜳
䭤Ⱦᖉс↚䭤θѰPF䇴ᇐ৸ᮦ䇴ᇐⲺࣕ㜳ሼ⭕
᭾Ⱦ
ᬃ֒㨒ঋ
∗1: 㾷ֵ৸ᮦ1Ƚ4Ƚ5ᨆבуⲺᣛ䆜㊱ශθሯެ䇴ᇐр䲆фс䲆Ⱦс䲆ૂр䲆࠼
ࡡ⭞ᆍ∃ LૂH⽰Ⱦ
• 唎䇚Ⲻᣛ䆜㊱ශѰ“2”
ᣛ䆜δᣛ䆜ᱥᶛ㠠䖻ࣟ䗉࠰Ⲻ䗉࠰Ⱦε
g φؓᣚ⽰
ᖉ䇴ᇐᴪؓᣚѰONδ⾷⭞р/с䭤ε
ᰬ⛯ӤȾ
gMANUφᢁࣞ䗉࠰⽰
ᖉ㠠ࣞ/ᢁࣞ⁗ᕅ䇴ᇐѰᢁࣞ⁗ᕅᰬ⛯ӤȾ
р䘦р䲆
ᣛ䆜ᐛ֒
䗉࠰
ֵ⭞ᰬⲺ⌞ᝅӁ亯
൞ᇘᡭⲺᓊ⭞ѣθ⅝嗏у䍕䍙ӝфԱᇘᡭㄥӝᡶ⎿Ⲻ㿺ṲȽ㿺㤹ૂḽ
ؓᤷж㠪ᙝȾ䈭ࣗᗻ㘹㲇ᵢӝሯӄᡶᓊ⭞Ⲻ㌱㔕Ƚᵰಞૂ䇴༽䰪Ⲻ䘸⭞ᙝȾֵ⭞
ᰬ䈭⌞ᝅᒬ䚫ᆾᵢӝⲺ⾷↘Ӂ亯Ⱦ
൞⋗ᴿ⺤䇚᮪Ѡ㌱㔕䇴䇗ᰬᡶ㘹㲇ࡦⲺ伄䲟θԛ⋗ᴿ⺤䇚൞䇴༽ૂ㌱㔕ѣ䈛⅝
嗏ӝⲺ仓ᇐֵ⭞ᶗԬૂ↙⺤ᆿ㻻ᶗԬⲺ߫сθ⾷↘ሼᵢӝᓊ⭞ӄሯӰ䓡䍘
ӝᆎ൞ћ䠃ধ䲟Ⲻ൰Ⱦ
䈜㿷ӝ㿺ṲҜѣؓ䇷ރ䍙Ӂ亯ᇯȾ
ተሮδmmε
䙐⭫ҁࢃỶḛ㓵Ⱦ
∗1
∗1
∗1
ᣛ䆜㊱ශ
ṯᦤLȽHٲ
Ⲻу㙂у
ṯᦤLȽHٲ
Ⲻу㙂у
ṯᦤLȽHٲ
Ⲻу㙂у
ᰖᣛ䆜ࣕ㜳
ᰖ䗉࠰
㔓ሯٲр䲆
㔓ሯٲс䲆
LBAδӻሯᣛ䆜1ε
څᐤр/с㤹പ
څᐤр䲆
څᐤр/с䲆
څᐤс䲆
ᣛ䆜䗉࠰ࣕ㜳
↙ᣛ䆜ٲδXε
䍕ᣛ䆜ٲδXε
䇴ᇐ
PV⦽ᣛ䆜
X
ON
OFF
SP
X
ON
OFF
SP
ON
OFF
SP
X
X
ON
OFF
SP
LH
ON
OFF
SP
X
ON
OFF
SP
X
ON
OFF
SP
X
ON
OFF
0
ON
OFF
X
0
X
ON
OFF
0
X
ON
OFF
0
ON
OFF
X
0
X
ON
OFF
0
X
ON
OFF
0
X
ON
OFF
0
X
ON
OFF
0
X
ON
OFF
0
ON
OFF
X
0
ON
OFF
X
0
ON
OFF
X
0
ON
OFF
X
0
LH
ON
OFF
SP
SP
ON
OFF
X
ON
OFF
X
0
1
0
2
3
4
5
6
7
8
9
SP㔓ሯٲр䲆
SP㔓ሯٲс䲆
14
15
MV㔓ሯٲр䲆
MV㔓ሯٲс䲆
16
17
10
11
12
13
SP
X
ON
OFF
ON
OFF
X
0
oapt
0
pmov
0
pmsk
on
icpt
1
wtpt
off
pfpt
off
PF䭤ؓᣚ
䲆PF䭤ᬃ֒Ⱦ
䙐⭫
MVⴇ
δࣖ✣ε
o
0.0
MVⴇ
δ߭পε
c-o
0.0
ᣛ䆜ٲс䲆
1 Њ
䗉ޛ㊱ශ∗2
SPр䲆
SPс䲆
PIDgON/OFF
ֵ⭞ON/OFFᰬ=onof
ֵ⭞2䐥PIDᰬ=pid
ḽᡌࣖ✣/߭প
ḽᰬ=stnd
ࣖ✣߭পᰬ= h-c
ઞᵕδࣖ✣ε
δঋփφ〈ε
∗⭫ু䗉࠰
δ⭞ӄ傧ࣞSSRεφ2
ᣛ䆜Њ
㊱ශ
ઞᵕδ߭পε
δঋփφ〈ε
∗⭫ু䗉࠰
δ⭞ӄ傧ࣞSSRεφ2
↙/䘆㺂
䘆㺂δࣖ✣εѣ
= or-r
↙䘆㺂δ߭পεѣ
= or-d
∗2
in-t
5
in-h
100
in-l
0
dp
0
d-u
c
sl-h
1300
sl-l
-200
cntl
pid
s-hc
stnd
ぁᓅ⁗ᕅ
ptrn
off
cp
20
ev-1
msp0
ev-2
stop
sqr
off
amov
0
prlp
0
ᣛ䆜
Њ
└
䈹᮪㨒ঋ
ӻ൞䘑ޛ䈹᮪㨒ঋᰬ
ᱴ⽰ж⅗Ⱦ
l.adj
at
off
ct1
0.0
䙐ؗߏޛ
cmwt
off
ࣖ✣ಞᯣ㓵Ỷ⎁1
δঋփφAε
hb1
0.0
ؓᰬ䰪
soak
1
MVр䲆
ol-h
100.0
ᢁࣞགྷփٲ
of-r
50.0
ㅿᖻ䰪
wt-b
off
ڒ↘ᰬⲺMV
mv-s
0.0
PV࠰䭏ᰬⲺMV
mv-e
0.0
SPᯒ䇴ᇐٲ
sprt
off
SPᯒ䇴ᇐٲ
δSPᯒс䲃ٲε
sprl
same
└δ߭পε
chys
1.0
PV䗉ޛڅ〱䠅
lcr1
0.0
〥࠼ᰬ䰪
δঋփφ〈ε
i
233
ᗤ࠼ᰬ䰪
δঋփφ〈ε
d
40
MVс䲆
ol-l
0.0
orl
0.0
sqrp
0.0
HSᣛ䆜1
δঋփφAε
hs1
50.0
SP 0 㹼 7
∗5
25
0
䗽ぁٲ/䇴ᇐٲ
䘔ⲺՖಞф䗉ޛ
㊱ශуᰬθᱴ⽰
s.errȾ
ATᢝ㺂/⎾
100%ATᢝ㺂at-2
40%ATᢝ㺂at-1
↱
c-db
0.0
└δࣖ✣ε
hys
1.0
〥࠼ᰬ䰪
δ߭পε
δঋփφ〈ε
c-i
233
ᗤ࠼ᰬ䰪
δ߭পε
δঋփφ〈ε
c-d
40
∊ׁᑜ
δ߭পε
c-p
8.0
4Њ20mA
0Њ20mA
1Њ5V
0Њ5V
0Њ10V
25
26
27
28
29
䇴ᇐ㤹പ
䗉ޛ㊱ශ 䗉ޛ
Pt100
JPt100
✣⭫ڬ
K
J
T
E
L
U
N
R
S
B
C/W
PL
II
䇴ᇐ
10Њ70°C
60Њ120°C
115Њ165°C
140Њ260°C
0
1
2
3
4
5
6
7
8
9
10
11
12
13
14
15
16
17
18
19
20
21
22
23
24
ㅜEN/IECḽ
ᐛ֒⽰
gSUB1φ䖻ࣟ䗉࠰1⽰
gSUB2φ䖻ࣟ䗉࠰2⽰
gOUT1φ䗉࠰1⽰
gᛞֵ⭞ᣳ࠰ޭԄཌ༩ӻсᮦᆍᕅಞⲺ䜞ѱ։ԛᢝ㺂㔪ᣚθ㙂у⭞сㄥᆆሲ㓵Ⱦᴿީ䈪᱄θ䈭৸䰻ɅE5ȏDᮦᆍᕅ
ಞ⭞ᡭᢁ߂ɆδCat. No. H224εȾ
g䈭с㓵ᶵȾࡏθՐሲ㠪᭻䳒ᡌ䈥ࣞ֒Ⱦ
gӝⲺр䜞༽ᴿ䈹䈋ᐛޭㄥȾᖉ䴶ֵ⭞䈹䈋ᐛޭᰬθ䙐䗽䈛ㄥሼѠӰ䇗㇍ᵰфᵢӝ䘔Ⱦ䘔ѠӰ䇗㇍ᵰфӝ䴶㾷
E58-CIFQ2 USBѨ㺂䖢ᦘ⭫㔼Ⱦδֵ⭞䈛ӝᰬуж䘔USBѨ㺂䖢ᦘ⭫㔼Ⱦε
䈜㓼Ⲻ䘔ᯯ⌋θ䈭৸➝USBѨ㺂䖢ᦘ⭫㔼䱺ᑜⲺֵ⭞䈪᱄ҜȾ
gㅢжᱴ⽰
䗽ぁٲᡌ䇴ᇐᮦᦤ㊱ශ
gㅢӂᱴ⽰
䇴ᇐٲȽ䇴ᇐᮦᦤ䈱࠰ٲᡌᴪ᭯Ⲻ䗉ޛٲ
gрૂс䭤
∅ж⅗U䭤θㅢӂᱴ⽰рⲺٲሼ໔ཝᡌᱴ
⽰сжѠٲȾ
∅ж⅗D䭤θㅢӂᱴ⽰рⲺٲሼࠅቅᡌ䘊
ഔржѠٲȾ
gTUNEφ
㠠᮪ᇐᰬ⛯ӤȾ
gSTOPφڒ↘⽰
൞䘆㺂ѣ“䘆㺂/ڒ↘”ڒ↘ᰬ⛯ӤȾ
൞ڒ↘ᵕ䰪θ䲚䗉࠰ҁཌ
Ⲻࣕ㜳ൽᴿ᭾Ⱦ
gAφ
㠠䘸ᓊᰬ䰠⛷ᡌ⛯ӤȾ
gCMWφ䙐ؗߏݷ䇮/⾷↘⽰
ᖉ䙐ؗߏݷ䇮ᰬ⛯Ӥθ⾷↘ᰬ➺⚣Ⱦ
䗉ޛ㊱ශ
-200Њ850
-199.9Њ500.0
0.0Њ100.0
-199.9Њ500.0
0.0Њ100.0
-200Њ1300
-20.0Њ500.0
-100Њ850
-20.0Њ400.0
-200Њ400
-199.9Њ400.0
-200Њ600
-100Њ850
-200Њ400
-199.9Њ400.0
-200Њ1300
0Њ1700
0Њ1700
0Њ1800
0Њ2300
0Њ1300
0Њ90
0Њ120
0Њ165
0Њ260
-300Њ1500
-199.9Њ900.0
0.0Њ210.0
-199.9Њ900.0
0.0Њ210.0
-300Њ2300
0.0Њ900.0
-100Њ1500
0.0Њ750.0
-300Њ700
-199.9Њ700.0
-300Њ1100
-100Њ1500
-300Њ700
-199.9Њ700.0
-300Њ2300
0Њ3000
0Њ3000
0Њ3200
0Њ3200
0Њ2300
0Њ190
0Њ240
0Њ320
0Њ500
䫸⭫䱱
ᓜ䇗
∗唎䇚ٲᱥ“5”Ⱦ
∗ᖉ䗉ޛ㊱ශуᱥ䫸⭫䱱㙂䭏䈥Ⲻሼ䫸⭫䱱ޛᰬθሼՐᱴ⽰s.errȾѰҼ䲚s.err
ᱴ⽰θ䴶㾷↙⺤㓵ᒬ䠃᯦р⭫Ⱦ
°C= c
°F= f
ࡓခ䇴ᇐ㨒ঋԛֵ⭞ᡭᇐ⅘Ⲻᐛ֒ᶗԬδ䗉ޛ㊱ශȽᣛ䆜㊱
ශȽᯯ⌋ㅿㅿεȾ
*2: ީӄ䗉ޛ㊱ශૂᣛ䆜㊱ශⲺ䈜㓼߫θ䈭৸㘹䗯Ⲻ㺞ṲȾ
*3: ᖉ䖢㠩ࡓခ䇴ᇐ㨒ঋᰬ䘆㺂ڒ↘Ⱦ
δૂ䖻ࣟ䗉࠰䜳ڒ↘ε
*4: ሯӄḆӑශԛެᆹ䇴ᇐ亯ⲺḆӑ䇴ᇐθуᱴ⽰⚦㢨䇴ᇐ亯Ⱦ
ޮශ⽰ׁφ৸ᮦ൞ԛсᶗԬсуᱴ⽰Ⱦ
・ATᢝ㺂/⎾φྸPID ON/OFF䇴ᇐѰON/OFFθуՐᱴ⽰Ⱦ
・ᣛ䆜㊱ශφ唎䇚䇴ᇐ⭞ӄᵠ䞃༽+%+6ᣛ䆜ⲺಞȾሯӄ䞃༽Ҽ+%+6ᣛ䆜Ⲻ
ಞθ䖻ࣟ䗉࠰࠼䞃৸ᮦδ儎㓝ࣕ㜳䇴ᇐ㨒ঋε㻡䇴Ѱࣖ✣ಞᣛ䆜Ⱦྸ䇴ᇐᣛ
䆜θᣛ䆜㊱ශ৸ᮦሼՐᱴ⽰Ⱦ
ᴿީ䇴ᇐᯯ⌋θ䈭৸䰻ɅE5ȏDᮦᆍᕅಞ⭞ᡭᢁ߂Ɇ(Cat. No. H224)Ⱦ
*5: ㅢӂᱴ⽰ѣᱴ⽰փᮦⲺӝԙ⸷Ⱦ䈛䇴ᇐᰖ⌋ᴪθ⭞ᡭᰖ䴶㺂䇴ᇐȾ
օM䭤ᗠ⧥ᱴ⽰৸ᮦȾ
ᬃ֒㨒ঋ
SPᯒᵕ䰪Ⲻ䇴ᇐٲ
sp-m
0
ࣖ✣ಞ⭫⍷1
ٲⴇ
δঋփφAε
ct1
0.0
ཐSP
䇴ᇐٲ䘿
m-sp
0
㠠ࣞ/ᢁࣞ࠽ᦘ
ӻ䲆PID
a-m
╅⭫⍷1
ٲⴇ
δঋփφAε
lcr1
0.0
ぁᓅࣞ
prst
rset
࢟֏ؓᰬ䰪
RUN/STOP
ᣛ䆜ٲ1Њ
ᣛ䆜ٲр䲆
1Њ
ᖉࣞ=runᰬ
ᖉڒ↘=stopᰬ
ᬃ֒ᰬᓊ↙ᑮֵ⭞ᬃ֒㨒ঋȾ
ؓᣚ㨒ঋ
䲆ԛᱴ⽰ᡌ᭯Ⲻ䇴ᇐ㊱ශԛ䙐䗽䭤ᬃ֒䘑㺂Ⲻᴪ᭯Ⱦ
䘏ᱥж〃A㊱ӝȾ
ഖެ൞օᆻѣՐሲ㠪ᰖ㓵⭫ᒨᢦθᡶԛ㾷≸⭞ᡭ䟽䘸ᖉⲺ᧠᯳ࠅቇᒨᢦȾ
䈹᮪㨒ঋ
䈹᮪㨒ঋ⭞ӄ൞ᰬ䗉ޛ䇴ᇐٲૂڅ〱ٲȾ
M
M
M
M
M
M
M
M
M
M
M
M
M
M
M
M
M
M
M
M
M
M
M
M
M
M
M
M
M
M
M
M
M
M
M
M
M
M
M
M
M
M
M
M
M
M
M
M
M
M
M
M
M
M
M
M
M
M
ঋѠᆿ㻻δmmε ᒬᧈᆿ㻻δmmε
gሼѱঋݹᨈޛ䶘ᶵδ1Њ5mmεⲺᆿ㻻ᆊѣȾᣀᆿ㻻᭥δᨆבεᨈޛ༩京䜞ૂᓋ䜞Ⲻ
രᇐ″ѣȾ
gᤝ㍝䘸䞃ಞ京䜞ૂᓋ䜞Ⲻњ仍ᆿ㻻㷰ѓֵެؓᤷᒩ㺗θᴶ㓾ֵެᢣ⸟ؓᤷ൞0.29㠩
0.39Ngmҁ䰪Ⱦ
gᖉᆿ㻻ཐᵰಞᰬθ䈭⺤ؓ⧥ູᓜу䎻䗽㿺ᇐ䲆ٲȾ
ᒬᧈᆿ㻻ᰖ⌋⺤ؓ䱨≪ᙝ㜳Ⱦ
ᖉᴿ䱨≪㾷≸ᰬθ䈭൞ࢃ䶘
ᶵⲺםᆿ㻻䱨≪ᇼሷാȾ
°C °F
䲚PᡌPD
ᵕ䰪Ⲻڅ〱䠅
ᒩᯯṯⲺᨆ
Low-cut⛯
䜞䖻ࣟ㔝⭫ಞ
1 Њ 8
ONᔬᰬ
䜞䖻ࣟ㔝⭫ಞ
1 Њ 8
OFFᔬᰬ
䙐ؗⴇ
MV
⦽ᶷ䲆
㓘ཌᓜ
ՖಞES1B
∊ׁ㕟᭴с䲆δӻ䲆䇴
ᇐ⁗ᤕ䠅䗉ޛᰬε
ቅᮦ⛯δӻ䲆䇴ᇐ⁗
ᤕ䠅䗉ޛᰬε
∊ׁ㕟᭴р䲆δӻ䲆䇴
ᇐ⁗ᤕ䠅䗉ޛᰬε
ᓜঋփ
ᒩᯯṯⲺᨆ⭞
δӻ䲆ᐨ䇴ᇐ⁗
ᤕ䠅䗉ޛᰬε
䖢㠩儎㓝ࣕ㜳䇴
ᇐ㨒ঋ
ӁԬ䗉ޛ࠼䞃2
ӁԬ䗉ޛ࠼䞃1
δㅢжᱴ⽰䰠⛷θ❬
ڒ↘Ⱦε
օO
㠩ቇ3〈
օO
㠩ቇ1〈
ࣖ✣ಞ⭫⍷1ٲⴇ
δঋփφAε
╅⭫⍷1ٲⴇ
δঋփφAε
PV䗉ޛ
ᯒ㌱ᮦ
∊ׁᑜ
څᐤр/с䲆ᖻᵰᓅࡍON
څᐤр䲆ᖻᵰᓅࡍON
څᐤс䲆ᖻᵰᓅࡍON
㔓ሯٲр䲆ᖻᵰᓅࡍON
㔓ሯٲс䲆ᖻᵰᓅࡍON
օOૂM䭤㠩ቇ1〈
օOૂM䭤㠩ቇ3〈
䖢㠩ؓᣚ㨒ঋ
ӻ൞䇴ᇐᇼ⸷ᰬᱴ⽰Ⱦ
䲆䖢㠩ؓᣚ㨒ঋȾ
ᬃ֒/䈹᮪ؓᣚ
䲆൞ᬃ֒㨒ঋȽ䈹᮪㨒
ঋૂᢁࣞ㨒ঋѣᱴ⽰
ૂؤ᭯㨒ঋ亯Ⱦ
ࡓခ䇴ᇐ/䙐ؗؓᣚ
䲆࠽ᦘ㠩ࡓခ䇴ᇐ㨒ঋȽ
䙐ؗ䇴ᇐ㨒ঋૂ儎㓝ࣕ㜳
䇴ᇐ㨒ঋȾ
䇴ᇐᴪؓᣚ
䲆䙐䗽ᬃ֒ࢃ䶘ᶵ䭤
ᶛ᭯䇴ᇐȾ
ݷ䇮৸ᮦኅ㭳
䖢㠩ؓᣚ㨒ঋⲺ
ᇼ⸷
ᓜ䗉ޛ
൞㻻ᴿφ
gѱঋݹ
gֵ⭞䈪᱄Ҝ
gㄥᆆⴌδE53-COV23εφe
g䱨≪ᇼሷാδY92S-P8εφc
g䘸䞃ಞδY92F-49εφd
Ԭ
gㄥᆆⴌδE53-COV23ε
gUSB୵⾜䖢ᦘ⭫㔼
㸦E58-CIFQ2㸧
gᢳฟ夹ල㸦Y92F-58㸧
ুㄥᆆተሮφM3
gᶗᖘᱴ⽰φ
10㓝ᱴ⽰MVᡌࣖ✣ಞ⭫⍷Ⱦ
M
⁗ශࡑᔰ
PVᥥᑻ
m-pv
0.0
M
⁗ශࡑᔰ
MVᥥᑻ
m-mv
0.0
M
M
M
⁗ශࡑᔰ
ONᰬ䰪
m-on
0
⁗ශࡑᔰ
OFFᰬ䰪
m-of
0
㠠䘸ᓊ
⾷⭞ off
രᇐ fix
䙐⸛ info
㠠ࣞᴪ᯦ auto
adpt
off
M
ᶗᖘᱴ⽰ᮦᦤ
bar
mv
M
ᶗᖘᱴ⽰∊ׁ㕟᭴
р䲆
barh
100.0
ᶗᖘᱴ⽰∊ׁ㕟᭴
с䲆
barl
0.0
M
M
ࣞ䘆㺂
p-on
cont
SPଃᓊ∊ׁᑜ
SPଃᓊ〥࠼ᰬ䰪
δঋփφ〈ε
sp-i
233
SPଃᓊᗤ࠼ᰬ䰪
δঋփφ〈ε
sp-d
40
sp-p
8.0
M
M
M
SPଃᓊ㌱ᮦ㕌
sp-n
0
M
ᒨᢦ〥࠼ᰬ䰪
δঋփφ〈ε
d-i
233
ᒨᢦᗤ࠼ᰬ䰪
δঋփφ〈ε
d-d
40
ᒨᢦ∊ׁᑜ
d-p
8.0
M
M
M
≪߭䗉࠰䈹᮪
inf
0.0
PIDᴪ᯦
δ㠠䘸ᓊε
a-ud
off
㠠ࣞ䗽┚ಞ䈹᮪
fa
off
M
M
M
≪߭∊ׁᑜ໔ࣖ䰾ٲ
w-il
1.4
≪߭∊ׁᑜ䲃ք䰾ٲ
w-dl
0.6
䗉ޛᮦᆍ䗽┚ಞ
w-ht
off
M
M
M
c-cp
20
orev
or-r
M
M
M
alt1
2
alh1
0.2
M
sktr
0
r-s
run
M
M
al1l
0
M
al-1
0
al1h
0
M
M
M
ins
0.0
M
p
8.0
inrt
1.000
M
M
sp-0
0
plcm
0
M
w1on
0
w1of
0
M
M
ᴿćinsᰬφᓜ䗉ޛڅ〱Ĉ৸ᮦѣⲺ䇴ᇐٲᓊ⭞ӄ᮪Ѡᓜ䗉ޛ㤹പȾྸ䗉ޛڅ〱ٲ䇴ᇐ
Ѱ1.2°Cθࡏ䗽ぁٲѰ200°Cᰬθ㔅䗽䗉ޛڅ〱➝201.2°C༺⨼Ⱦ㙂ྸ䗉ޛڅ〱ٲ䇴ᇐѰ
-1.2°Cθࡏ㔅䗽䗉ޛڅ〱䗽ぁٲ➝198.8°C༺⨼Ⱦ
001 002
1Ѡ㔝⭫ಞ䗉࠰
䗉࠰
RX QX
䖻ࣟ䗉࠰1Ƚ2
䘔δㄥᆆ䘸⭞ᙝഖᵰಞශ㙂ᔸȾε
11
12
11
12
䡚
10
7
8
9
1
2
1
2
*1. ѰㅜEMCḽθ䘔ՖಞⲺ⭫㔼уᗍ䮵ӄ30㊩Ⱦ
ྸ⭫㔼䮵ᓜ䎻䗽30㊩θࡏуㅜEMCḽȾ
*2. ሯӁԬ䗉ޛֵ⭞ᰖ⭫ু䗉ޛȾᰖ䀜⛯䗉ޛⲺᶷᙝ⭧ćĈ㺞⽰Ⱦ
䡚
A D
䗉࠰1
+
−
6
4
5
6
5
6
Pt
+
−
mA
−
+
5
4
V
−
5
V
6
+
4
TC
4
I
A
B
B
13
14
15
18
16
13
14
15
16
1717
18
EV1
EV2
CT1 CT 1
B(+)
A(−)
(−)
RS-485
17
18 12
15
16
1
2
13
14
3
11
4
6
7
8
9
10
5
OUT1
R
OUT1
Q
㔝⭫ಞ䗉࠰
250 VACθ3 Aδ䱱ᙝ䍕䖳ε
⭫ু䗉࠰δ⭞ӄ傧ࣞSSRε
12 VDCθ21 mA
㔝⭫ಞ䗉࠰
250 VACθ3 A
δ䱱ᙝ䍕䖳ε
䈭൞⚦㢨ㄥᆆр䘔ԱಞԬȾ
E5CD-@@@@6M - @@@
䘿亯
䗉ޛ⭫Ⓠ
䖻ࣟ䗉࠰
䗉࠰
1Ѡ⭫ু䗉࠰
δ⭞ӄ傧ࣞSSRε
Ֆಞᓜ/⁗ᤕ䠅䗉ޛ
䖻ࣟ䗉࠰
䖻ࣟ䗉࠰1Ƚ2
䖻ࣟ䗉࠰1
䖻ࣟ䗉࠰2
䗉ޛ⭫Ⓠ
δᰖᶷᙝε
100Њ240 VAC
24 VAC/DC
䘿亯
ӁԬ䗉ޛ1Ƚ2ૂCT1 䙐ؗδRS-485εૂCT1
E5CD唎䇚䇴ᇐѰжKශ✣⭫ڬδ䗉ޛ㊱ශ5εȾ
ྸֵ⭞уⲺՖಞθࡏՐ⭕䗉ޛ䭏䈥δs.errεȾ
Ỷḛ䗉ޛ㊱ශ৸ᮦⲺ䇴㖤Ⱦ
L
H
ON
OFF
SP
ㅜᆿޞḽ
൞ֵ⭞ᵢӝᰬθ䈭ࣗᗻཌ䈪᱄Ҝр᧞㦆Ⲻؓ䲟ѓȾ
ީӄ⁗ᤕ䗉ޛ
g䗉ޛ⭫ুᡌ⭫⍷ᰬθ䈭➝ᵢӝⲺ䗉ޛ㊱ࡡ䇴ᇐ䗉ޛ㊱ශȾ
g䈭ሼᵢӝ⭞ᶛ⎁ᇐć⎁䠅㤹⮪ѰIIȽIIIȽIVĈⲺഔ䐥Ⱦ
g䈭ሼᵢӝ⭞ᶛ⎁ᇐćদࣖ⭫ু䎻䗽30Vrmsᡌ60VDCĈⲺሯ䊗Ⱦ
ྸӝᵠᵢޢᇐⲺᯯ⌋ֵ⭞θ䛙Ѿӝޭ༽Ⲻؓᣚࣕ㜳ᖾ㜳ᦕඅȾ
O
δу䎻䗽
1〈ε
⭧ӄUL䇚䇷㾷≸θ䈭ֵ⭞ᑜᴿ࠰স㓵δ䜞㓵εⲺE54-CT1LᡌE54-CT3L⭫⍷ӈ
ಞȾ
ֵ⭞㔅8/䇚䇷ⲺUL㊱ࡡXOBAᡌXOBA7⭫⍷ӈಞ䘑㺂⧦൰㓵δཌ䜞㓵εθ㙂䶔
࠰স㓵δ䜞㓵εȾ
Ȏ㚊㌱ᯯᕅ
Ș
䙖
Ș
ᢶᵥ䈘
⅝嗏р⎭ᴿ䲆ޢ
൦൶ѣളр⎭㠠⭧䍮᱉䈋僂䠇䐥
⭫䈓 (86)21-50509988
⅝嗏㠠ࣞѣളᴿ䲆ޢ
൦൶
ѣളр⎭ᐸ⎜ђ᯦䬬คѣ䐥ѣ䬬ཝড়ᇚ
⭫䈓
(86)21-5307-2222
㖇൶http://www.fa.omron.com.cn
ᢶᵥ䈘✣㓵
400-820-4535
c
d
e
58
(66)
62
4
1
44.8×44.8
48×48