Thank you for purchasing the OMRON MIT Precision 5 Wrist Blood
Pressure Monitor.
The OMRON MIT Precision 5 is a compact and easy to use blood
pressure monitor, operating on the oscillometric principle. It
measures your blood pressure and pulse rate simply and quickly.
For comfortable controlled inflation without the need of pressure
pre-setting or re-inflation the device uses its advanced “IntelliSense”
technology.
Intended Use
This product is designed to measure the blood pressure and pulse
rate of people within the range of the designated wrist cuff. It is
mainly designed for general household use.
Please read this instruction manual thoroughly before using the
unit.
Please keep for future reference.
For specific information about your own blood pressure,
CONSULT YOUR DOCTOR.
Consult your doctor prior to using in pregnancy or if diagnosed with
arrhythmia or arteriosclerosis.
Warning:
• Indicates a potentially hazardous situation which, if not avoided,
could result in death or serious injury.
(General Usage)
• Always consult your doctor. Self-diagnosis of measurement results
and self-treatment are dangerous.
• People with severe blood flow problems, or blood disorders, should
consult a doctor before using the unit, as cuff inflation can cause
internal bleeding.
(Battery Usage)
• If battery fluid should get in your eyes, immediately rinse with
plenty of clean water. Consult a doctor immediately.
Caution:
• Indicates a potentially hazardous situation which, if not avoided,
may result in minor or moderate injury to the user or patient or
damage to the equipment or other property.
(General Usage)
• Do not leave the unit unattended with infants or persons who
cannot express their consent.
• Do not use the unit for any purpose other than measuring blood
pressure.
• Do not use a mobile phone or other devices that emit
electromagnetic fields, near the unit. This may result in incorrect
operation of the unit.
• Do not disassemble the unit or wrist cuff.
• Do not operate the unit in a moving vehicle (car, airplane).
(Battery Usage)
• If battery fluid should get on your skin or clothing, immediately rinse
with plenty of clean water.
• Use only two “AAA” alkaline or manganese batteries with this unit.
Do not use other types of batteries.
• Do not insert the batteries with their polarities incorrectly aligned.
• Replace old batteries with new ones immediately. Replace both
batteries at the same time.
• Remove the batteries if the unit will not be used for three months or
more.
• Do not use new and used batteries together.
General Precautions
• Do not apply strong shocks and vibrations to or drop the unit.
• Do not take measurements after bathing, drinking alcohol or
caffeine, smoking, exercising or eating.
• Do not inflate the wrist cuff when it is not wrapped around your
wrist.
• Read and follow the “Important information regarding Electro
Magnetic Compatibility (EMC)” in the Technical Data Section.
• Read and follow the “Correct Disposal of This Product” in the
Technical Data Section when disposing of the device and any used
accessories or optional parts.
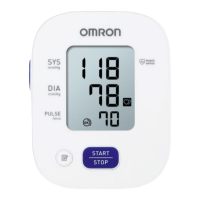
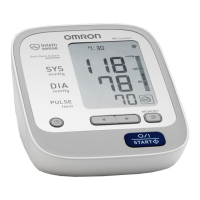
Main unit:
Components:
Display:
Display symbols:
Irregular Heartbeat
Symbol ( )
When the monitor detects
an irregular rhythm two or
more times during the
measurement, the irregular
heartbeat symbol will
appear on the display with
the measurement values.
An irregular heartbeat
rhythm is defined as a rhythm that is 25% less or 25% more than the
average rhythm detected while the monitor is measuring the systolic
and diastolic blood pressure.
If the irregular heartbeat symbol displays with your measurement
results, we recommend you consult your physician. Follow the
directions of your physician.
Average Value Symbol ( )
The average value symbol is displayed when you press Memory
button. The most recent average value based on the measurements
from the last three readings taken within 10 minutes appears on the
display screen.
Cuff Wrap Guide Symbol ( / )
If the cuff was wrapped too loosely, it may cause unreliable results. If
the wrapping of cuff is too loose, the cuff wrap guide symbol
appears. Otherwise appears. This is the function which is used
as an aid in determining if the cuff is wrapped snugly enough.
Blood Pressure Level Indicator
Blood pressure level indicator will light up
between the systolic blood pressure and
the diastolic blood pressure.
2013 ESH/ESC Guidelines for the management of arterial
hypertension
Definitions of hypertension by office and home blood pressure levels
2.1 Installing/Replacing the Batteries
Notes:
• If the battery low symbol ( ) appears on the display, turn off
the unit then replace both batteries at the same time.
• The measurement values continue to be stored in memory
even after the batteries are replaced.
Disposal of used batteries should be carried out in accordance
with the national regulations for the disposal of batteries.
2.2 Setting the Date and Time
Notes:
• If the batteries have been removed, the date and time setting
will need to be reset.
• If the date and time are not set, “-:--” appears during or after
measurement.
3.1 Applying the Wrist Cuff
Do not apply over clothing.
3.2 How to Sit Correctly
• Relax your wrist and hand. Do not bend your wrist back, clench
your fist, or bend your wrist forward.
3.3 Taking a Reading
Notes:
• To cancel a measurement, press the START/STOP button at
any time during measurement.
• Remain still while taking a measurement.
The monitor automatically stores the measurement in its
memory.
It will automatically turn off after two minutes.
Notes:
• Wait 2 - 3 minutes before taking another blood pressure
measurement. Waiting between readings allows the arteries
to return to the condition prior to taking the blood pressure
measurement.
• The blood pressure can differ between the right arm and the
left arm, and therefore also the measured blood pressure
values can be different. OMRON recommends to always use
the same arm for measurement. If the values between the
two arms differ substantially, please check with your
physician which arm to use for your measurement.
3.4 Setting the Positioning Sensor
3.5 Using the Memory Function
The unit automatically stores up to 90 sets of measurement
values (blood pressure and pulse rate).
It can also calculate an average reading based on the
measurements from the last three readings taken within 10
minutes. If there are only two readings in memory for that
period, the average will be based on two readings. If there is
one reading in memory for that period, the average will be
based on one reading.
Notes:
• If the memory is full, the monitor will delete the oldest
readings.
• When viewing the reading taken without setting the date and
time, “-:--” is displayed instead of the date and time.
To View the Average Value
To View the Readings Stored in Memory
To Delete All the Values Stored in Memory
Note: You cannot partially delete the stored readings.
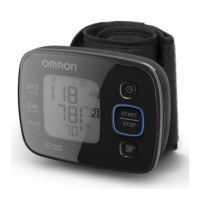
Wrist Blood
Pressure Monitor
Model MIT Precision 5
Instruction Manual
IM-HEM-6150-E-01-05/2014
5344799-0A
Introduction
Important Safety Information
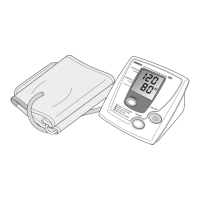
1 Know your unit
Wrist cuff
Battery compartment
Display
Date/Time
setting button
START/STOP
button
Memory button
Thank you for purchasing the OMRON MIT Precision 5 Wrist Blood
Pressure Monitor.
The OMRON MIT Precision 5 is a compact and easy to use blood
pressure monitor, operating on the oscillometric principle. It
measures your blood pressure and pulse rate simply and quickly.
For comfortable controlled inflation without the need of pressure
pre-setting or re-inflation the device uses its advanced “IntelliSense”
technology.
Intended Use
This product is designed to measure the blood pressure and pulse
rate of people within the range of the designated wrist cuff. It is
mainly designed for general household use.
Wrist Blood
Pressure Monitor
Model MIT Precision 5
Instruction Manual
IM-HEM-6150-E-01-05/2014
5344799-0A
Introduction
2 “AAA”
Alkaline Batteries
Instruction
Manual
Storage Case
Office Home
Systolic Blood Pressure 140 mmHg 135 mmHg
Diastolic Blood Pressure 90 mmHg 85 mmHg
1.
Remove the battery cover.
2.
Insert two 1.5V “AAA”
batteries as indicated in
the battery compartment
and then replace the
battery cover.
1.
Press and hold the button until the year
flashes on the display.
2.
Set the monitor to the correct date and time
before taking a measurement for the first time.
Date/Time display
Memory symbol
Systolic blood
pressure
Diastolic blood
pressure
Low battery symbol
Heartbeat symbol
(Flashes during
measurement)
Cuff wrap guide
symbol
Blood pressure level
indicator
Irregular heartbeat
symbol
Deflation symbol
Pulse display /
Memory number
Average value
symbol
Positioning symbol
Positioning indicator
orma
eart
eat
Irregular Heartbeat
Pulse
Blood pressure
Blood pressure
Short
Long
Pulse
2Preparation
Year
Month
Day
Hour
Minute
1) Press the button to change.
• Hold down to advance the digit
rapidly.
2) Press the button to confirm.
• Next setting appears.
3.
Press the START/STOP button to store the
setting.
1.
Place the wrist cuff over
your wrist.
Your palm should face upward.
2.
Wrap the wrist cuff around
your wrist.
Wrap the wrist cuff securely
around the wrist for taking
accurate measurements.
Make sure that the wrist cuff
does not cover the protruding
part of the wrist bone (ulna) on
the outside of the wrist.
Note: You can take a
measurement on either
your left or right wrist.
To take a measurement, you need
to be relaxed and comfortably
seated, under comfortable room
temperature. No bathing, drinking
alcohol or caffeine, smoking,
exercising or eating 30 minutes
before taking a measurement.
• Sit on a chair with your feet flat on the
floor.
• Sit upright with your back straight.
• The cuff should be at the same level
as your heart.
1.
Press the START/STOP button.
All the symbols appear on the display.
While your position is improper, the Positioning symbol and the
Positioning indicator flash, when you are in proper position the
Positioning symbol lights on the display.
After the Positioning symbol lights for more than 2 seconds,
the wrist cuff will start to inflate automatically.
2.
Undo the wrist cuff and remove the unit.
3.
Press the START/STOP button to turn off the
monitor.
3 Using the Unit
The monitor is in
proper position.
The monitor is higher
than the heart.
The monitor is lower
than the heart.
Cuff Wrapping Guide Symbol
START INFLATE DEFLATE COMPLETE
Alternating
date/time display
1.
Press and hold the
button to set the
Positioning Sensor.
The Positioning Sensor
“on” or “oFF” appears on
the display.
Press the button to
reset the Positioning
sensor.The Positioning
Sensor is set “on” as
default.
Press the button.The
year flashes to set the
current date and time on
the display.
2.
After setting the date and time, press the
START/STOP button to store the Positioning
Sensor setting.
For more information about setting the date and time, please
refer to 2.2 Setting the Date and Time.
Press the button to
display the average
reading based on the
measurements from the
last three readings taken
within 10 minutes of the
most recent reading. The
Average value symbol
( ) appears on the
display when the average
reading is shown
Note: If there are no measurements
results stored in the memory, the
screen to the right is displayed.
1.
Press the button, while the average value is
displayed.
The Memory number
appears for a second
before the pulse rate is
displayed. The newest
set is numbered “1”.
2.
Press the button repeatedly to view the
readings stored in memory.
When the memory symbol ( ) appears, first press
the button. Then while holding it down, press the
START/STOP button simultaneously for about 2 - 3
seconds.
Alternating
date/time
display
First Second