b)
Son
-107/
0)
Cevy10710)
COxyle)
TABLE
OF
CONTENTS
Specifications
........c
cece
cece cece
cece
eeeeeeseeeeeneeneeeans
Service
procedures
........ccccccccccceeeccueceseeeeeeeeeeeees
Caution
on
replacement
of
optical
pickup..............
Protection
of
eyes
from
laser
beam.....................
Laser
warning
labels
................ccccccec
ce
nse
ee
eeueeeees
IC
block
diagrams
and
descriptions
.....................
Packing
VIEW.........
ccc
ccc
ecnceseeeceeecececcecceuereeneeeneues
Pick-up
drive
unit
......c..
ccc
cece
ccc
ceecsseeeeseesenneees
Chassis-exploded
View...........cccccsccceeeeccecceuueeeeuves
Parts
List...
ccc
ccc
cceceenceseeseeevsseeessseceunuerecnees
Block
diagram............cccc
ccc
c
ccc
seecacueevccceeseesuseeeees
Adjustment
procedures
.........cccccccsesececsseuvacecvseess
Printed
circuit
board
view
from
bottom
side.........
Printed
circuit
board-parts
list............cccccseeeeee
eee
Control
position
and
names
..........cccccece
eee
eeneee
ences
SERVICE
PROCEDURES
]
1.
Safety-check
out
2
After
correcting
the
original
service
problem,perform
2
the
following
safety
check
before
releasing
the
set
3
to
the
customer:
3
Connect
the
insulating-resistance
tester
between
the
4
plug
of
power
supply
cord
and
chassis.
9
Specifications:More
than
10Mohm
at
500V.
.
Voltage
Selector
(Back
panel)
Worldwide
models
are
equipped
with
a
voltage
selector
to
conform
with
local
power
supplies.Be
sure
to
set
this
switch
to
match
the
voltage
of
the
power
supply
in
user's
area
before
turning
the
power
switch
on.
Voltage
is
changed
by
sliding
the
groove
in
the
switch
with
a
screw
driver
to
the
right
or
left.
Confirm
that
the
switch
has
been
moved
all
the
way
to
the
right
or
left
before
turning
the
power
switch
on.
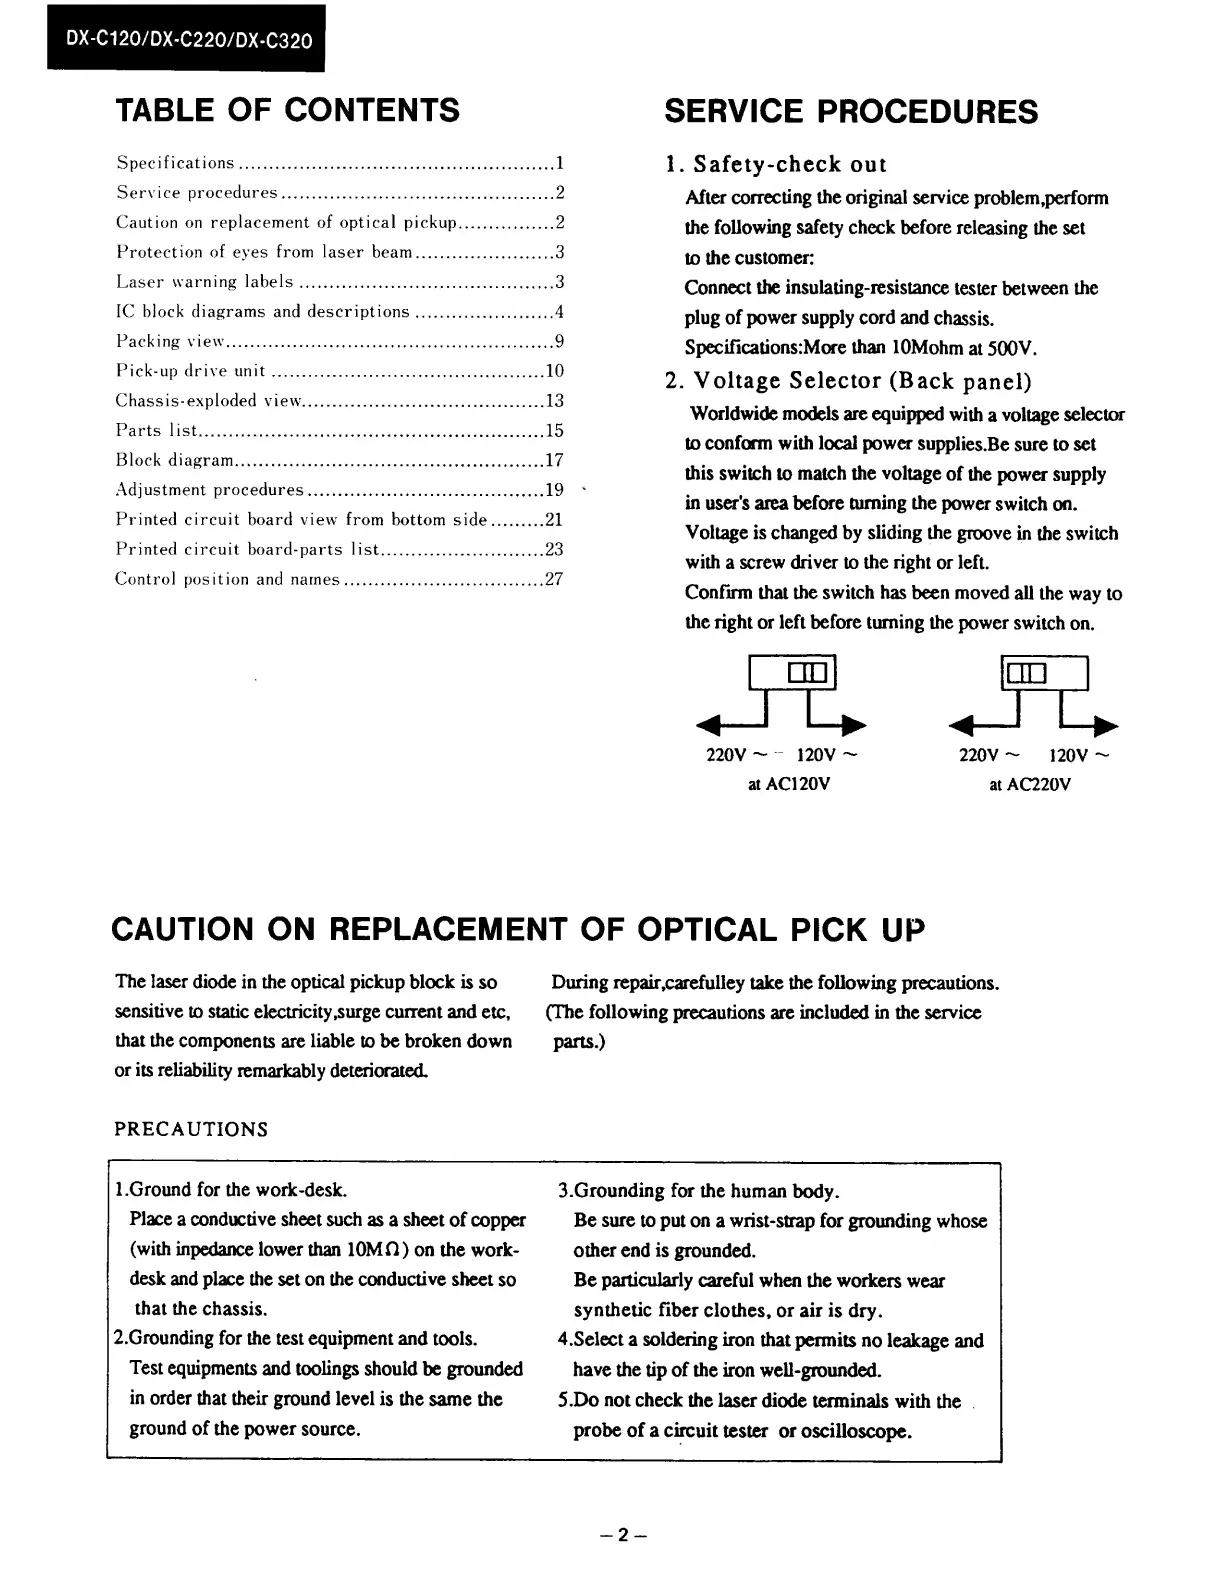
220V
~
120V
~
at
AC220V
220V
~~
120V
~
at
AC120V
CAUTION
ON
REPLACEMENT
OF
OPTICAL
PICK
UP
The
laser
diode
in
the
optical
pickup
block
is
so
sensitive
to
static
electricity
surge
current
and
etc,
that
the
components
are
liable
to
be
broken
down
or
its
reliability
remarkably
deteriorated.
PRECAUTIONS
1.Ground
for
the
work-desk.
Place
a
conductive
sheet
such
as
a
sheet
of
copper
(with
inpedance
lower
than
10M2Q)
on
the
work-
desk
and
place
the
set
on
the
conductive
sheet
so
that
the
chassis.
2.Grounding
for
the
test
equipment
and
tools.
Test
equipments
and
toolings
should
be
grounded
in
order
that
their
ground
level
is
the
same
the
ground
of
the
power
source.
During
repair,carefulley
take
the
following
precautions.
(The
following
precautions
are
included
in
the
service
parts.)
3.Grounding
for
the
human
body.
Be
sure
to
put
on
a
wnist-strap
for
grounding
whose
other
end
is
grounded.
Be
particularly
careful
when
the
workers
wear
synthetic
fiber
clothes,
or
air
is
dry.
4.Select
a
soldering
iron
that
permits
no
leakage
and
have
the
tip
of
the
iron
well-grounded.
5.Do
not
check
the
laser
diode
terminals
with
the
.
probe
of
a
circuit
tester
or
oscilloscope.
 Loading...