How to Download and Install Pantum Printer Driver for Mac OS ? How to Download and Install Pantum Printer Driver for Mac OS ?
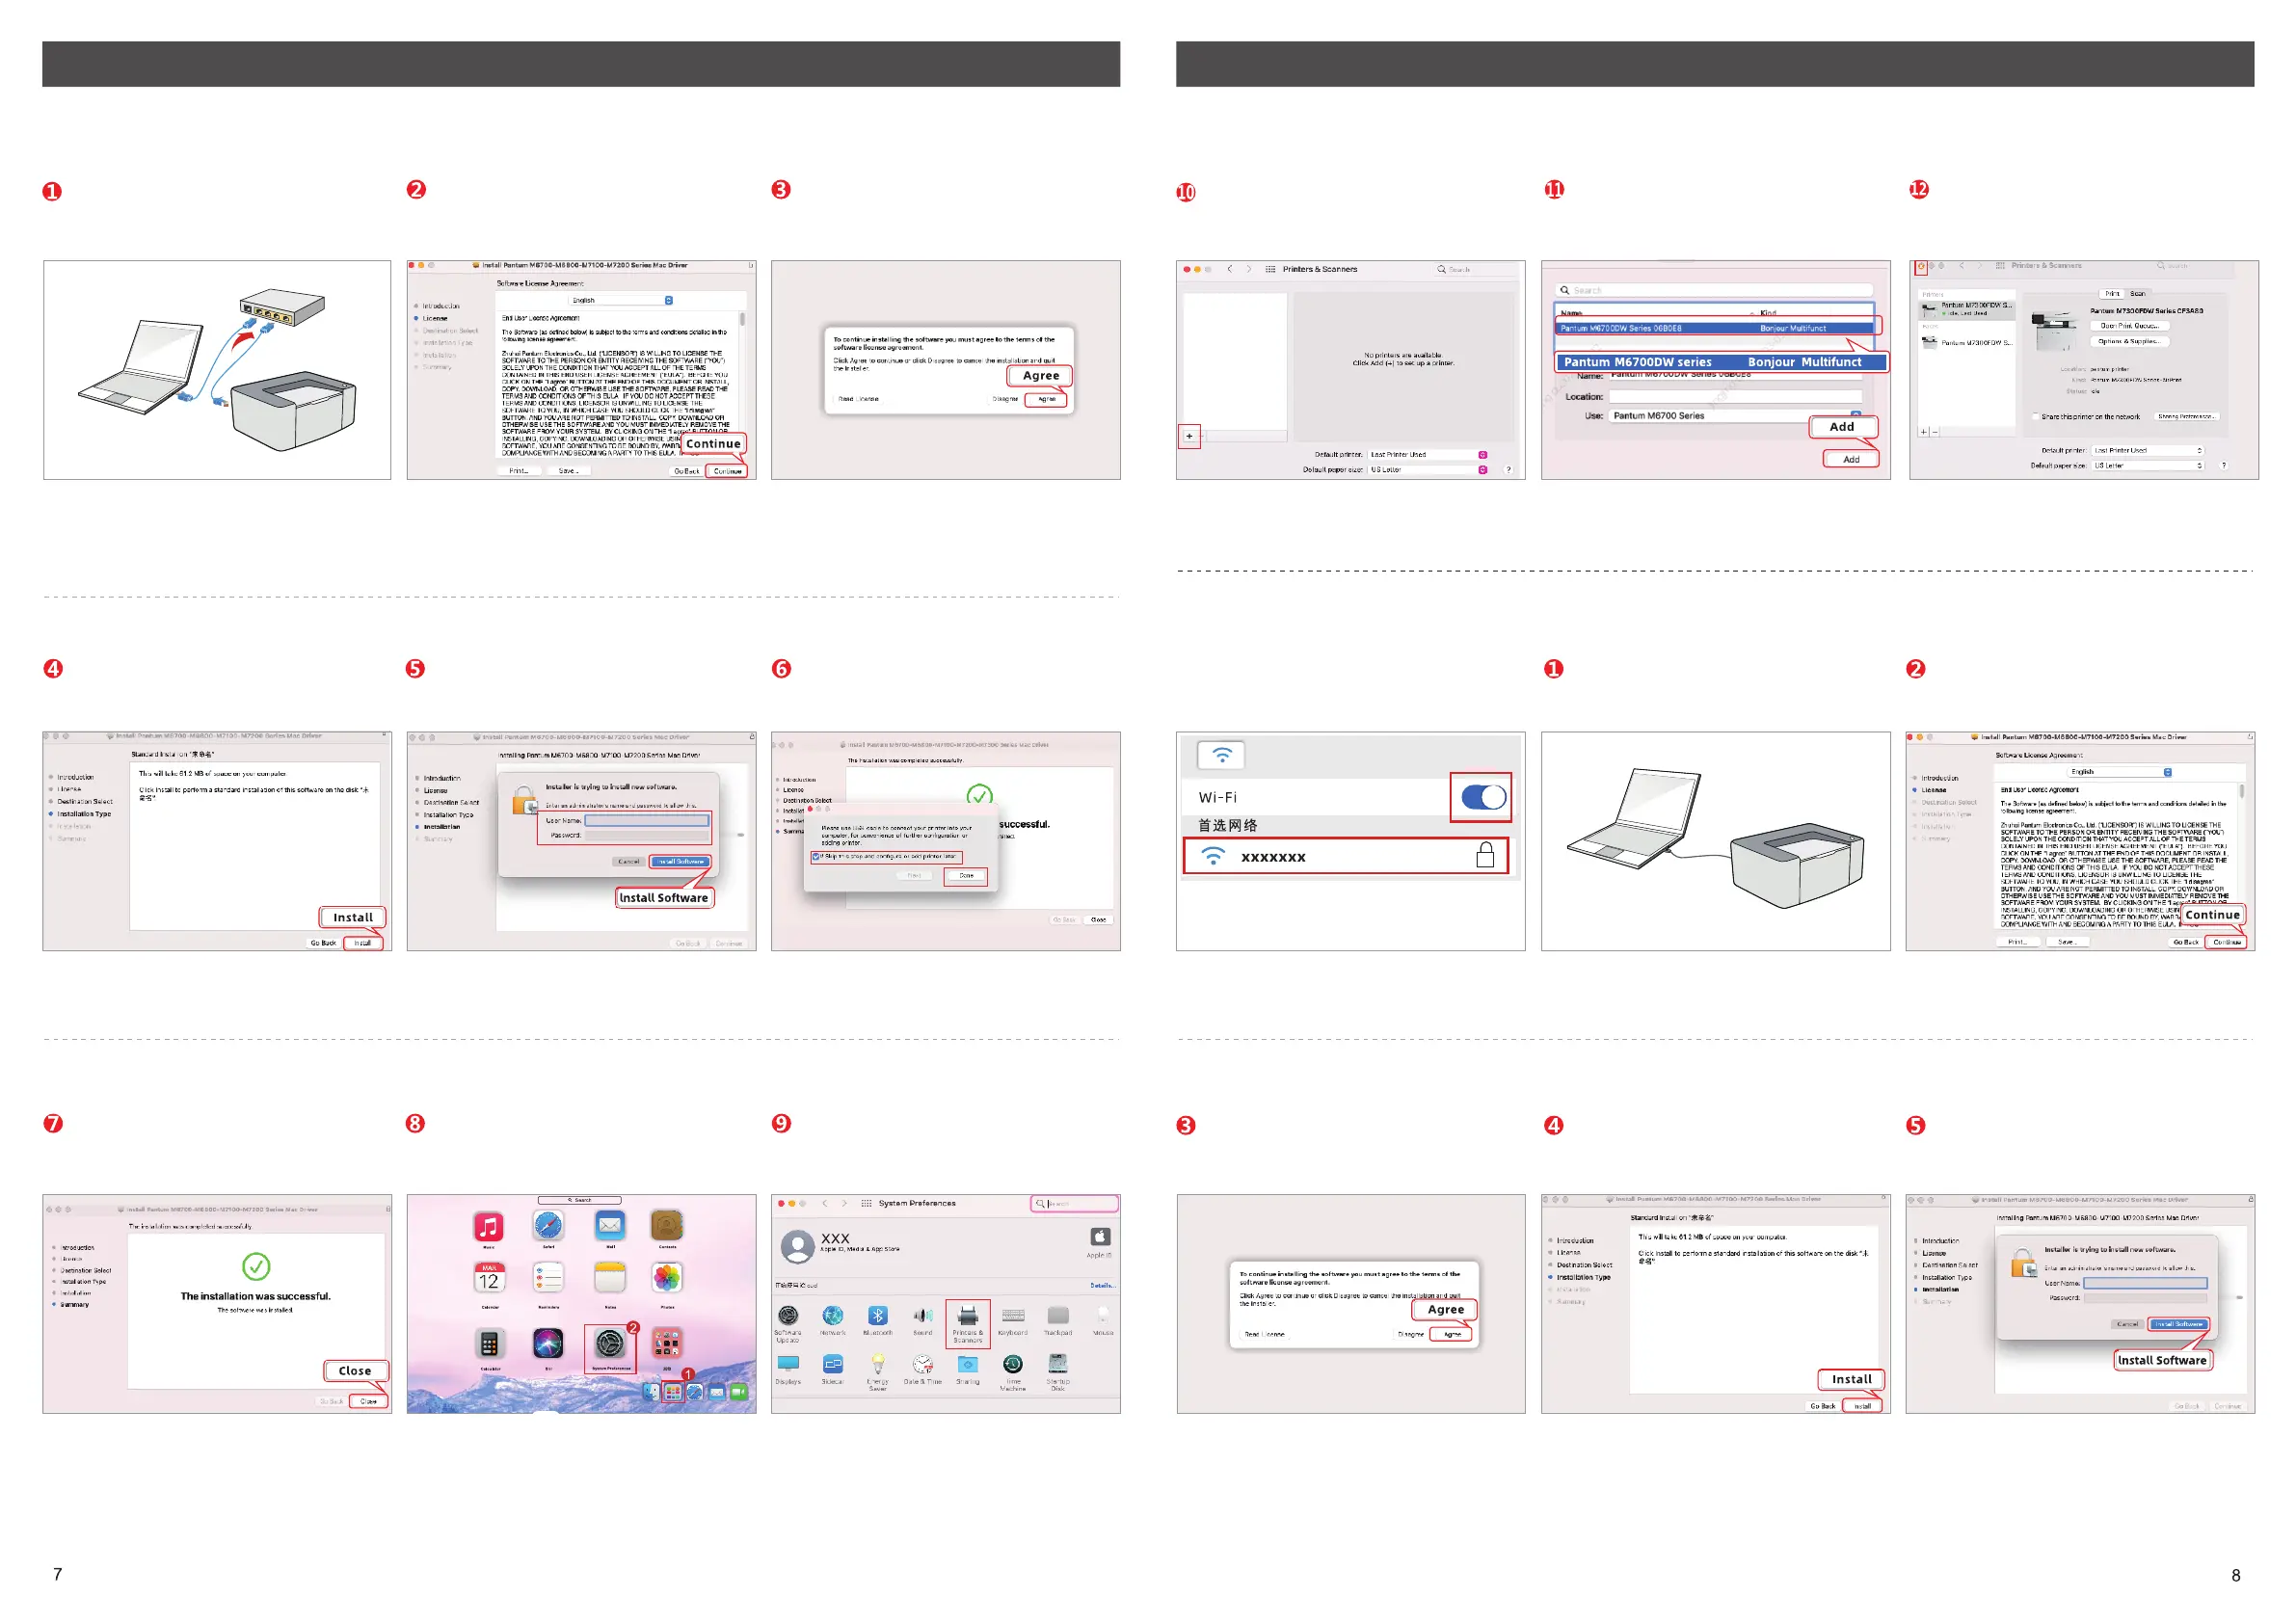
Plug in the network cable, then make your
printer and computer connected to the
same router.
After reading installation agreement, then
click “Continue”.
Enter installation interface and click
“Agree”.
Click “+”(see bottom left) and add
printer in “printers&scanners”.
Select the connection type called
“ Pantum (Product name) series
Bonjour Multifunct” and click “Add”.
The connection is complected and close it.
Read the installation instruction and click
“Install”.
Input your computer username and
password, then click “Install Software”.
Select “Skip this step and configure or
add printer laser” and click “Done”.
Choice 3 only can work when your
computer has connected wireless network
and in a normal connection state.
Plug into the USB cable to make a
connection between printer and
computer.
Read the installation agreement and click
“continue”.
The driver installation has complected
and click “Close”.
Open your “System Preferences”. Click “Printers&Scanners” in your
System Preferences.
Enter the installation interface and click
“Agree”.
Read the installation instruction and click
“Install”.
Input your computer username and
password and then click “Install
Software”.
Choice 2 : Install the driver by wired network connection.
Choice 3: Install the driver by wireless network connection
(The choice is only available for the product which has “N”, “W” remark. Like M7100DN, M7100DWW)
*(The choice only works for the printers which are labeled as “W”, like M7100DW
Notes:
Notes:
 Loading...