13
Please note the color order
The colors of the jacks on the DVD Recorder must match those on the
TV (red-red/blue-blue/green-green). If they are not matched properly,
this could cause the color of the picture to be reversed or there could
be no picture at all.
Tip
5
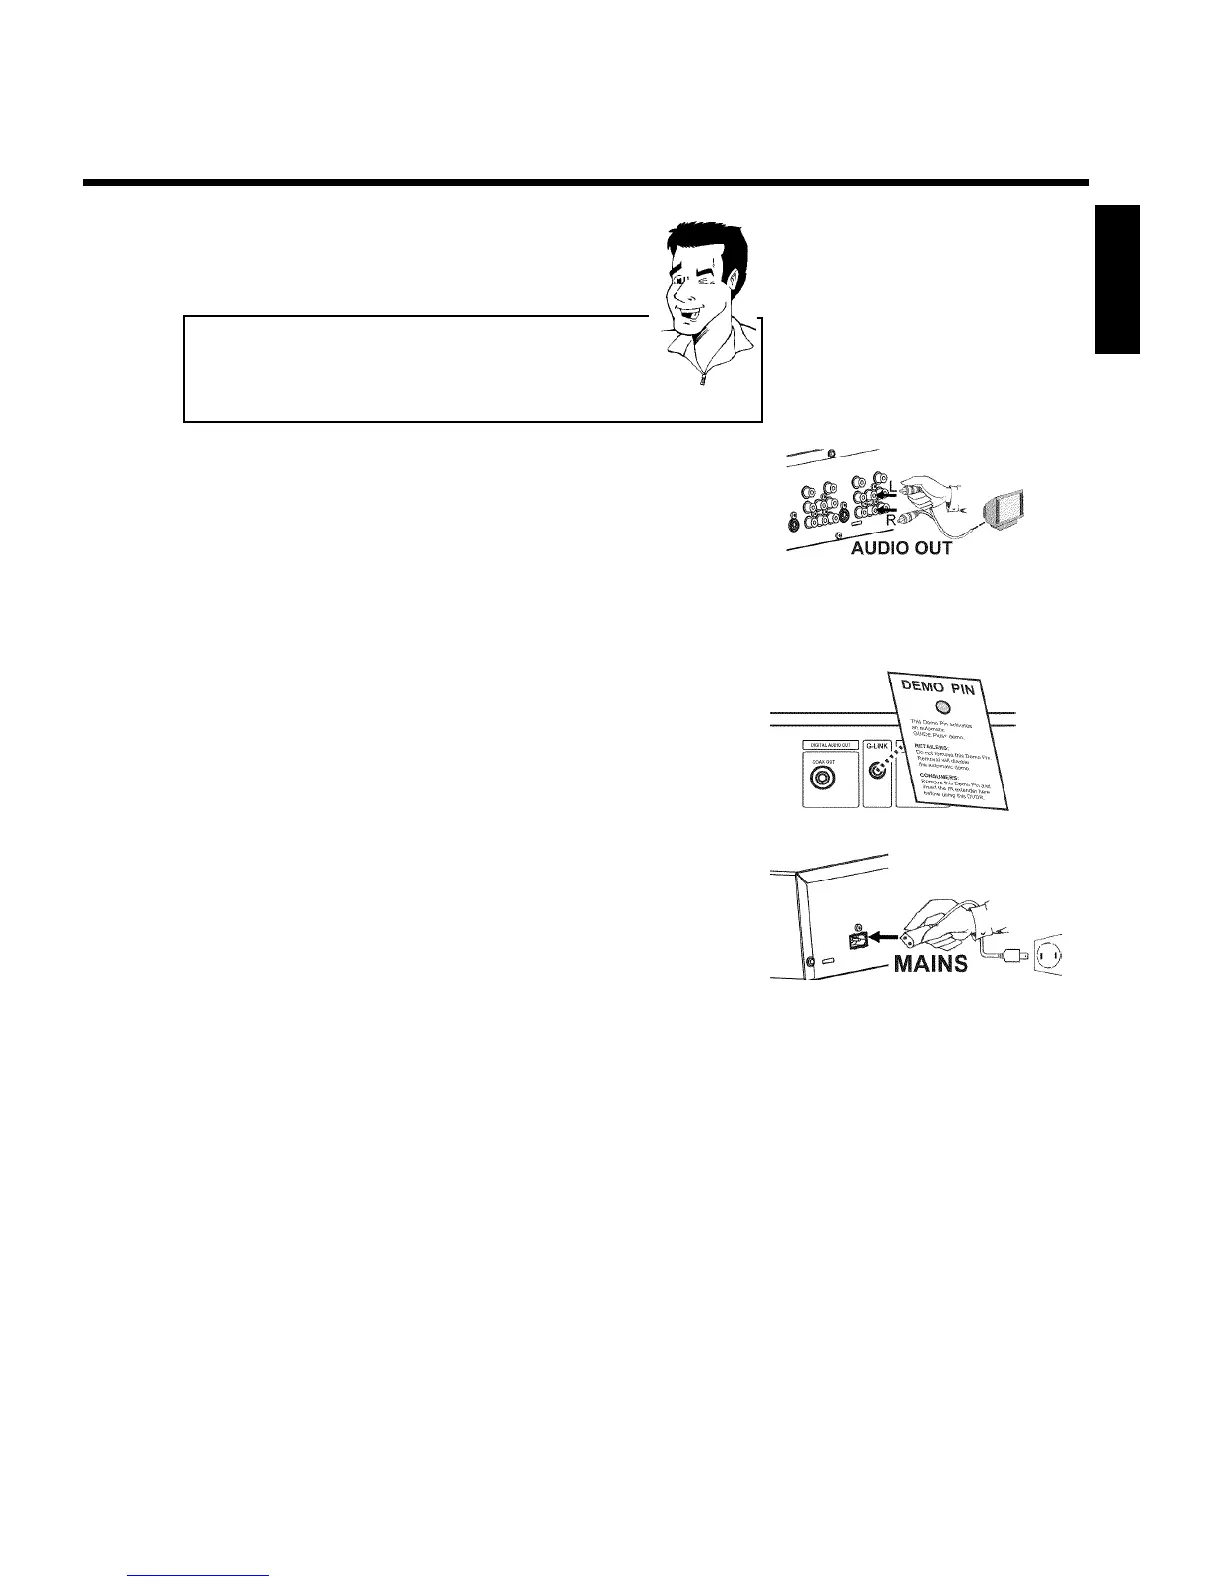
Use an audio cable and plug one end into the OUT AUDIO
LR jack at the back of the DVD Recorder (next to OUT
COMPONENT VIDEO ) and the other into the red/white Audio
In jacks of the TV (usually called Audio in', 'AV in'. Please see
your TV's instruction manual).
6
Switch on the TV.
If necessary, set the TV to the Component Video channel. See
the operating instructions of your TV for details.
7
Demo Pin
Your DVD-Recorder is equipped with a Retail Demo Pin inserted
in the G-LINK jack at the back. On the retail floor with the
Demo Pin inserted, the demo about the GUIDE Plus+
®
system is
automatically activated after the automatic channel search.
Remove the Demo Pin to disable the Retail Demo feature.
8
Connect the mains jack 4MAINS at the back of the DVD
Recorder with the power supply using the supplied power cable.
The most important features of the DVD Recorder will appear
on the display.
After the initial installation is completed, this function will be
switched off. How you switch on this function again, read in the
chapter 'User preferences' in the section 'Standby'.
9
Press STANDBY-ON m on the recorder. 'IS TV ON?' will
appear on the display.
ENGLISH
Connecting the DVD Recorder
 Loading...