ACCESSORY ITEMS
•Power cable
Taiwan, Mexico, Middle Latin America models x 2
All other models x 1
•RCA plug cord x 1
• Operating instructions
FEATURES
n 150 W (Taiwan model)/180 W (all other models) (RMS) power with AB
class amplifier that serves audio and video software playback such
as Dolby Digital with a wide dynamic range.
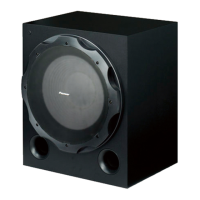
n Equipped with 30 cm driver
n Crossover frequency can be set to 50 Hz to 200 Hz.
IN COMBINATION WITH SPEAKERS
The frequency characteristics of the S-RS3SW combined with small-
size speakers are shown below. As shown in these figures, the low
frequency range is improved.
• These special characteristics are obtained in an echoless chamber.
The effect of an additional S-RS3SW in an ordinary listening room is
better than the chart indicates when positioned adequately.
• With playback of Dolby Digital, establishment of a special channel
for the subwoofer is recommended; and with playback of LFE (Low
Frequency Effect: sound effect like the rumbling of the earth, whose
purpose is to intensify the force of the video), the S-RS3SW is
especially effective.
INSTALLATION
Speaker Installation
• Subwoofer Installation Criteria
1 Left speaker
2 Right speaker
3 Recommended
installation range
for the subwoofer
4 Listening position
The subwoofer plays back the bass in monaural, making use of the fact
that the human ear is not very sensitive to the direction of low-pitched
sound. Because of this, the subwoofer can be installed almost
anywhere. If it is installed too far away, however, the sound from the
other speakers may become unnatural.
• An example of speaker positioning
1 Front left speaker
2 Center speaker
3 Front right speaker
4Subwoofer
5 Listening area
6 Rear left speaker
7 Rear right speaker
NOTES:
• Position the left and right channel speakers at equal distances from
the TV set and approximately 1.8 meters from each other.
• Install the center speaker above or below the TV so that the sound of
the center channel is localized at the TV screen.
• The rear (surround) speakers are most effective when installed in
parallel locations directly to the side, or slightly behind, the listener,
at a level about 1 meter above the listener’s ears.
Installation Precautions
• Do not attach the subwoofer to the wall or ceiling. They may fall off
and cause injury.
• Install the unit in a well-ventilated location where it will not be
exposed to high temperatures and high humidity.
• Do not place the unit near stoves or other heating equipment or at
locations exposed to direct sunlight, as these can have an adverse
effect on the cabinet and internal components. Also, do not install
the unit where there is too much dust or high humidity, as these can
cause malfunctioning or breakdowns. (Avoid cooking tables and
other locations where the unit would be exposed to heat, steam and
soot.)
• Do not place heavy or large objects on top of the speaker. Doing so
could provoke the speaker to fall, causing damages or bodily injury.
If speakers fall from their installation locations, they may suffer
irreparable cracks in their finish.
• Keep the unit away from devices such as cassette decks which are
sensitive to magnetic fields.
• Do not place the speaker on an unstable surface, as doing so may
cause the speaker to fall and cause damage or bodily injury.
• Do not place cups, glasses, or other containers with fluids on top of
the units, since the units may be damaged if the liquid spills.
• The installation location selected should have a sturdy floor surface.
Mounting the speaker on a long-pile carpet should be avoided, since
the carpet may touch the driver’s diaphram, causing distorted
sound.
• Please install this unit away from the antenna cable of the tuner, as
noise can be caused with installation close to the antenna cable. In
such a case, use this unit at a position away from the antenna and
the antenna cable, or when playback of extra bass is not required,
switch off the power for this unit.
Small-size speakers + S-RS3SW
Small-size speaker
FREQUENCY (Hz)
RESPONCE (dB)
3
12
4
1
4
2
3
67
5
CAUTION:
When installing the center speaker on top of the TV, be sure to
secure it with tape or some other suitable means.
Otherwise, the speaker may fall from the TV due to external shocks
such as earthquakes, and it may lead to endangering those nearby
or damaging the speaker.
The subwoofer is not magnetically shielded and so should not be
placed near a TV or monitor. Magnetic storage media (such as
floppy discs and tape or video cassettes) should also not be kept
close to the subwoofer.
MAINTENANCE OF EXTERNAL SURFACES:
• Clean the surface by wiping with a soft, dry cloth.
• When the surfaces are very dirty, wipe with a soft cloth dipped in
some neutral cleanser diluted five or six times with water, and
wrung out well, and then wipe again with a dry cloth. Do not use
furniture wax or cleaners.
• Never use thinners, benzine, insecticide sprays and other
chemicals on or near this unit, since these will corrode the
surfaces.
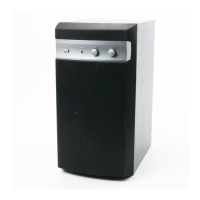
PANEL FACILITIES
FRONT PANEL
REAR PANEL
1 Power Indicator (POWER ON)
Lights green when the power has been switched ON.
NOTE:
• If you are planning on switching the unit OFF for a long period of
time, make sure to check that the indicator light has gone out after
switching OFF.
2 Power switch (POWER)
Switches the subwoofer between ON and OFF.
3 Volume knob (VOLUME)
Sets the subwoofer volume.
• Turn the knob slowly from the MIN position.
• With this unit, the bass level can be independently set, so do not
turn up the bass on the AV amplifier.
4 Crossover knob (CROSSOVER)
When using the subwoofer, set the upper frequency limit for the
subwoofer (50 Hz to 200 Hz) so that it complements the output from
your other speakers.
When using the bass management features of an AV receiver, set to
BYPASS ON in order to use the low-pass filter of the AV receiver for
high quality sound.
5 Bypass switch (BYPASS)
When set to ON, the audio signal is routed directly to the woofer unit,
bypassing the amplifier’s filter.
6 Phase switch (PHASE 0º /180º)
When set to 180º, the output phase becomes the reverse of the input
signal, and when set to 0º, it is in the same phase as the input signal.
• Normally, the switch is set to 0º.
But when the sound connection between the subwoofer and the
left and right speakers sounds unnatural, try switching to 180º
and set the switch in the position where the sound is natural.
• When using two or more subwoofers together, make sure that the
phase switch of all of them are set to the same position.
7 Line Level Input terminal (LINE LEVEL INPUT)
Connect to the SUBWOOFER PREOUT terminal of an amplifier or
receiver, with the specially provided RCA plug cord.
8 Line Level Output terminal (LINE LEVEL OUTPUT)
Used for connecting other equipment through the amplifier. The
signal output from this jack is not affected in any way by the settings
of the various controls on the unit.
9AC IN
• Connect the power cord to the powered subwoofer unit’s AC IN.
• Connect the power cord to a AC socket.
CONNECTIONS
Before making or changing any connections, switch off the power
and disconnect both this unit and the amplifier/receiver from the
AC outlet.
LINE LEVEL CONNECTION
This connection is for an amplifier or receiver equipped with a
SUBWOOFER PREOUT terminal. Connect to the LINE LEVEL INPUT
terminal on this unit, using the specially provided RCA plug cord.
NOTE:
• When connected to the PREOUT terminal for surround center
channel on the amplifier or receiver, the bass is heard only on the
center channel, so it will be insufficient.
OPERATION
For details regarding operating part functions, refer to PANEL
FACILITIES above.
1. Turn the POWER switch (2) ON.
• If the unit’s power cord is connected to a switched AC outlet on
the amplifier or receiver and the switch is left ON, the unit can be
turned ON/OFF together with the amplifier or receiver.
• If the unit cannot be connected to the amplifier or receiver, turn
the power to the amplifier or receiver ON before turning the power
to the unit ON. When turning the power OFF, turn the power to the
unit OFF before turning the power to the amplifier or receiver OFF.
2. Operate the amplifier or receiver and adjust the volume of the
other speakers.
3. Adjust the volume of the bass with the VOLUME knob (3).
• When necessary, operate the CROSSOVER knob (4) and PHASE
switch (6), and then adjust with the VOLUME knob (3).
4. Turn the POWER switch (2) OFF.
•The power indicator disappears.
POWER
VOLUME
MAX
MIN
AC IN
ON
OFF
200 Hz
50 Hz
CROSSOVER
BYPASS
PHASE
LINE LEVEL
INPUTOUTPUT
3
5
7
4
6
8
9
2
Rear Panel
Supplied RCA plug cord
TROUBLESHOOTING
Incorrect operations are often mistaken for trouble and malfunctions. If you think that there is something wrong with this component, check the
points below. Sometimes the trouble may lie in another component. Investigate the other components and electrical appliances being used. If the
trouble cannot be rectified even after exercising the checks listed below, ask your nearest PIONEER authorized service center or your dealer to carry
out repair work.
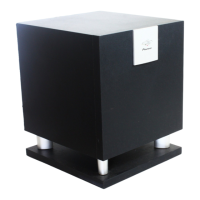
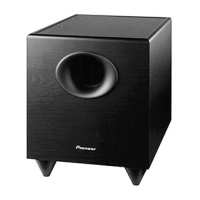
SPECIFICATIONS
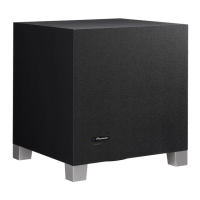
Cabinet ............................................................Bass-reflex, floor-standing type
Speaker..................................................................................... 30 cm cone type
Power Amplifier Continuous Power Output (RMS)
Taiwan................................................................................150 W/6 Ω (100 Hz)
All other models................................................................200 W/6 Ω (100 Hz)
Input (sensitivity at 100 Hz/impedance)
LINE LEVEL (RCA jack)..............................................................175 mV/50 kΩ
Output (Level at 100 Hz/impedance)
LINE LEVEL (RCA jack)................................................................175 mV/1 kΩ
Selectable CROSSOVER Frequencies ..................................... 50 Hz to 200 Hz
Outline Dimension ..........................360 mm (W) x 437 mm (H) x 455 mm (D)
Weight (without package)....................................................................... 15.2 kg
Power Requirements
Taiwan, Mexico, Middle Latin America models
...........................................................................110 V to 127 V~, 50 Hz/60 Hz
All other models............................................... 220 V to 240 V~, 50 Hz/60 Hz
Power Consumption
Taiwan, Mexico, Middle Latin America models ...................................155 W
All other models......................................................................................184 W
Accessories
Power cable: Taiwan, Mexico, Middle Latin America models ................ x 2
All other models ...................................................................x 1
RCA plug cord...............................................................................................x 1
Operating instructions
Specifications and design subject to possible modification without
notice, due to improvements.
Published by Pioneer Corporation.
Copyright © 2008 Pioneer Corporation.
All rights reserved.
SYMPTOM CAUSE REMEDY
1 No power is being supplied
(Indicator does not light up when
power switch is turned on.)
• Power supply plug is not correctly
inserted.
• Insert plug securely.
2No sound
(Indicator is lit.)
• Connection of accessory RCA plug
cord is wrong or disconnected.
• VOLUME knob is set to MIN.
• Check again and connect correctly.
• Turn clockwise slowly.
3 Sound is distorted. • Level is too high.
• Input level is too high.
• Turn the VOLUME knob counter-clockwise to lower the level.
• Turn the amplifier’s output level (volume, bass control, bass
boost) counter-clockwise to lower the level.
4 Howling noise occurs. • No power supplied to the amplifier.
• Subwoofer level is set too high.
• Connect an amplifier and supply power.
• Place the subwoofer a good distance from speakers. Turn the
VOLUME knob counter-clockwise to lower the volume.
5 Much noise when listening to
AM or FM broadcasts.
• The AM loop antenna or the FM indoor
antenna is close to this unit.
• Increase the distance between the AM or FM antenna (for
indoor use) and this unit.
Operating Instructions
Manual de instrucciones
S-RS3SW
POWERED SUBWOOFER
ALTAVOCES DE GRAVES SECUNDARIOS ENERGIZADOS
The exclamation point within an equilateral
triangle is intended to alert the user to the
presence of important operating and
maintenance (servicing) instructions in the
literature accompanying the appliance.
The lightning flash with arrowhead symbol,
within an equilateral triangle, is intended to
alert the user to the presence of uninsulated
"dangerous voltage" within the product's
enclosure that may be of sufficient
magnitude to constitute a risk of electric
shock to persons.
CAUTION:
TO PREVENT THE RISK OF ELECTRIC
SHOCK, DO NOT REMOVE COVER (OR
BACK). NO USER-SERVICEABLE PARTS
INSIDE. REFER SERVICING TO QUALIFIED
SERVICE PERSONNEL.
CAUTION
RISK OF ELECTRIC SHOCK
DO NOT OPEN
IMPORTANT
D3-4-2-1-1_En-A
WARNING
This equipment is not waterproof. To prevent a fire
or shock hazard, do not place any container filled
with liquid near this equipment (such as a vase or
flower pot) or expose it to dripping, splashing, rain
or moisture.
D3-4-2-1-3_B_En
WARNING
The voltage of the available power supply differs
according to country or region. Be sure that the
power supply voltage of the area where this unit
will be used meets the required voltage (e.g., 230 V
or 120 V) written on the rear panel.
D3-4-2-1-4_A_En
Before plugging in for the first time, read the following
section carefully.
WARNING
To prevent a fire hazard, do not place any naked
flame sources (such as a lighted candle) on the
equipment.
D3-4-2-1-7a_A_En
VENTILATION CAUTION
When installing this unit, make sure to leave space
around the unit for ventilation to improve heat
radiation (at least 25 cm at top, 15 cm at rear, and
10 cm at each side).
WARNING
Slots and openings in the cabinet are provided for
ventilation to ensure reliable operation of the
product, and to protect it from overheating. To
prevent fire hazard, the openings should never be
blocked or covered with items (such as newspapers,
table-cloths, curtains) or by operating the
equipment on thick carpet or a bed.
D3-4-2-1-7b_A_En
Operating Environment
Operating environment temperature and humidity:
+5 ºC to +35 ºC (+41 ºF to +95 ºF); less than 85 %RH
(cooling vents not blocked)
Do not install this unit in a poorly ventilated area, or in
locations exposed to high humidity or direct sunlight (or
strong artificial light)
D3-4-2-1-7c_A_En
If the AC plug of this unit does not match the AC
outlet you want to use, the plug must be removed
and appropriate one fitted. Replacement and
mounting of an AC plug on the power supply cord of
this unit should be performed only by qualified
ser vice personnel. If connected to an AC outlet, the
cut-off plug can cause severe electrical shock. Make
sure it is properly disposed of after removal.
The equipment should be disconnected by removing
the mains plug from the wall socket when left
unused for a long period of time (for example, when
on vacation).
D3-4-2-2-1a_A_En
CAUTION
The POWER switch on this unit will not completely
shut off all power from the AC outlet. Since the
power cord ser ves as the main disconnect device for
the unit, you will need to unplug it from the AC outlet
to shut down all power. Therefore, make sure the
unit has been installed so that the power cord can
be easily unplugged from the AC outlet in case of an
accident. To avoid fire hazard, the power cord should
also be unplugged from the AC outlet when left
unused for a long period of time (for example, when
on vacation).
D3-4-2-2-2a_A_En
POWER-CORD CAUTION
Handle the power cord by the plug. Do not pull out the
plug by tugging the cord and never touch the power
cord when your hands are wet as this could cause a
short circuit or electric shock. Do not place the unit, a
piece of furniture, etc., on the power cord, or pinch the
cord. Never make a knot in the cord or tie it with other
cords. The power cords should be routed such that they
are not likely to be stepped on. A damaged power cord
can cause a fire or give you an electrical shock. Check
the power cord once in a while. When you find it
damaged, ask your nearest PIONEER authorized
ser vice center or your dealer for a replacement.
S002*_En
Thank you for buying this PIONEER product. Please read through these operating instructions so you will know how to operate your model properly. After
you have finished reading the instructions, put them away in a safe place for future reference.
In some countries or regions, the shape of the power plug and power outlet may sometimes differ from that shown in the explanatory drawings.
However, the method of connecting and operating the unit is the same.
For Taiwan and Mexico exclusively
Taiwanese two pin flat-bladed plug
WARNING:
Do not climb or sit on this unit. Be especially
careful when children are around. The unit may be
damaged, or may fall over causing injury.
This product is for general household purposes. Any
failure due to use for other than household purposes
(such as long-term use for business purposes in a
restaurant or use in a car or ship) and which
requires repair will be charged for even during the
warranty period.
K041_En
English
XRC3384B_En_S-RS3SW.fm 1 ページ 2008年6月16日 月曜日 午後3時29分