Hydraulic Pump
Unit (HPU)
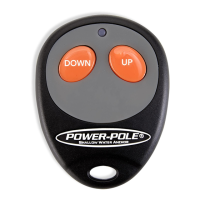
C-Monster 2.0 Controllers
LED
DOWN button
PROGRAM button
UP button
C-Monster 2.0 Controllers
PAIRING INSTRUCTIONS (All Controllers)
STEP 1: Press and hold the PROGRAM button on top of the unit
for 3 seconds (LED will turn GREEN/HPU will beep).
STEP 2: Press the UP or DOWN button on controller for one
second. When Paired, the GREEN LED will turn off
then flash steadily (HPU will also beep).
Pairing Dual Power-Poles: Repeat steps 1-2 to pair remote
to the other pump. Both pumps
can be programmed to a single
controller.
NOTE: The first time a remote is paired with a recently updated pump it may perform a firmware
update. Remote will blink for 1 minute. Do not interrupt power to pump or remote during
this process. Blinking will stop when update is finished.
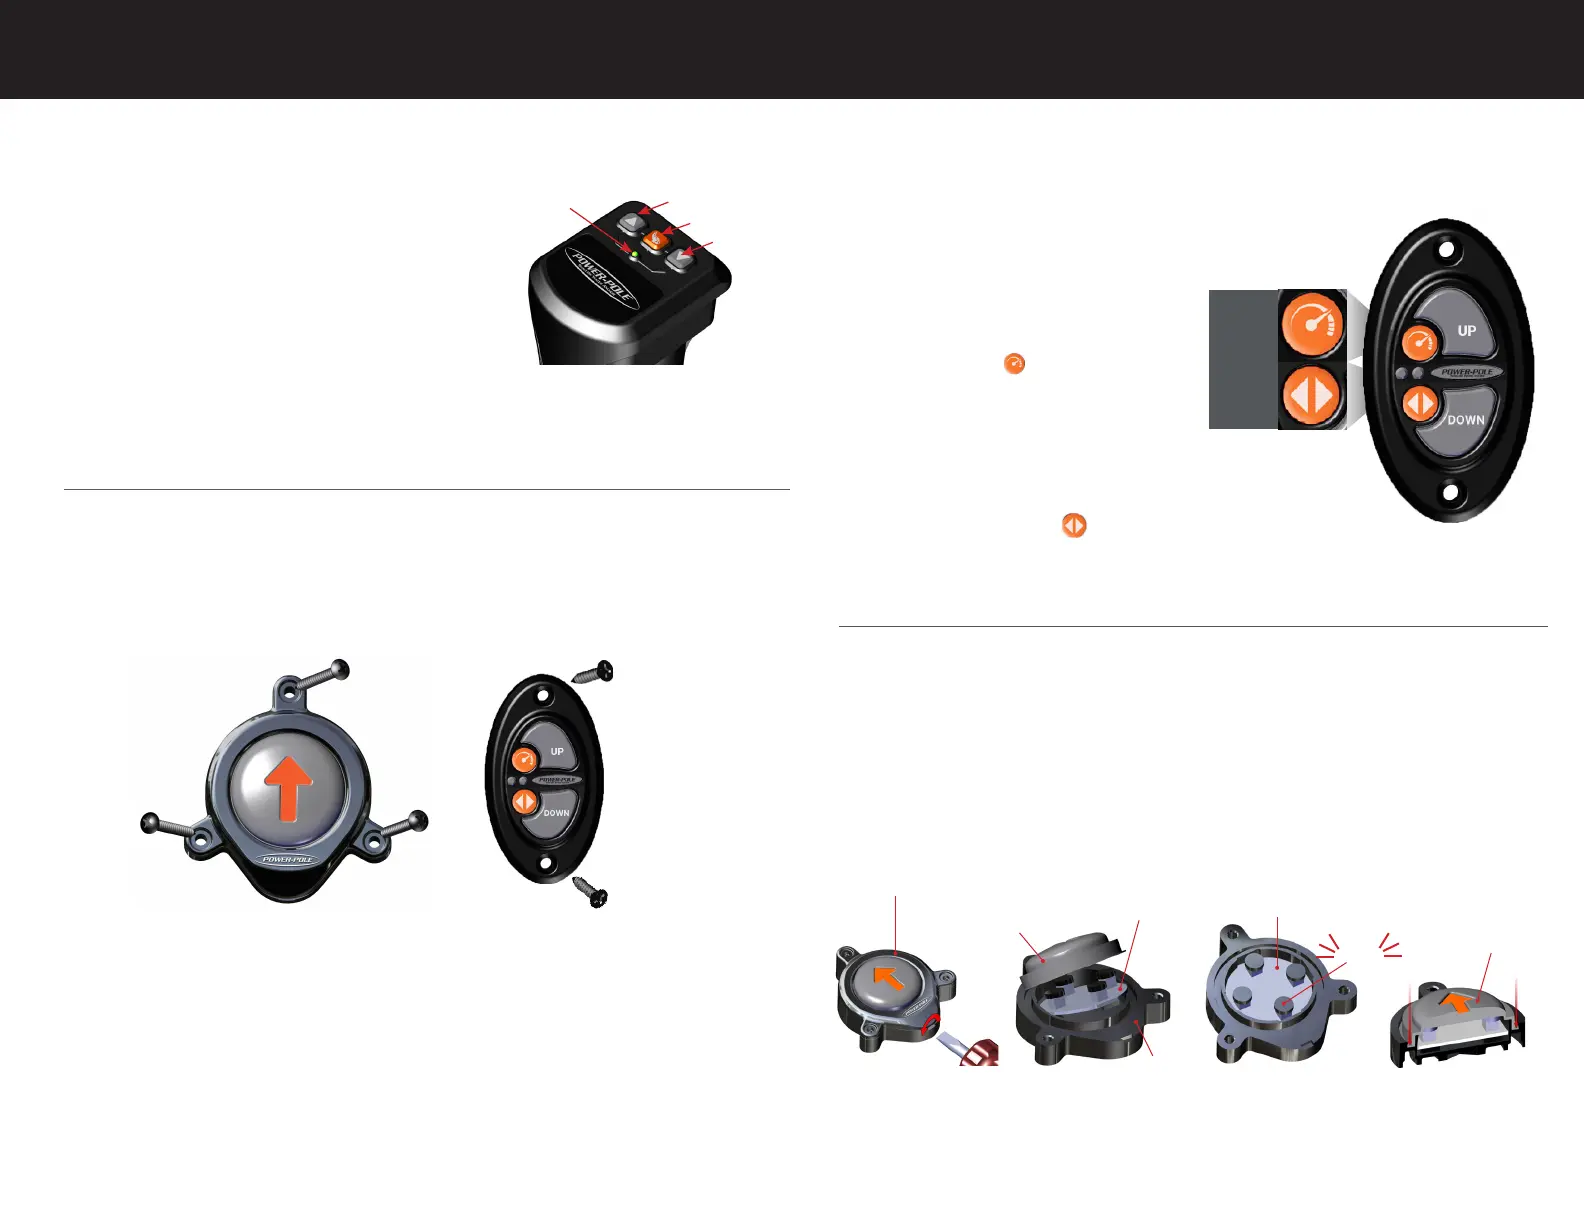
INSTALLATION INSTRUCTIONS (Dash and Foot Switches only)
STEP 1: Place switch flush in desired location and drill holes with a 1/8” drill bit/electric drill. Use
Switch holes as guide.
STEP 2: Fasten switches using the supplied screws and Phillips-Head Screwdriver.
NOTES:
• Switches must be mounted on flat surface.
• Do not overtighten screws.
• Dash Switch may be installed with screws or adhesive strip.
Foot Switch Install Dash Switch Install
Need help? Contact our Technical Support Team at 1 + 813.689.9932 Option 2
OPERATING INSTRUCTIONS (All Controllers)
• Press and hold the UP/DOWN button on any controller to raise/lower the
Power-Pole Anchor.
Auto Mode:
• Double tap the UP/DOWN button on any
controller.
• Can be changed to single tap via the
C-Monster app.
Speed Control (Dash switch Only)
• Press the SPEED button on the switch to
toggle through the 3 speed settings (slow,
medium, fast).
• All Power-Pole Anchors are programmed
to 70% speed. Maximum speed can be
changed in the C-Monster App.
Dual Operation
• Press the DIRECTIONAL button on Dash
Switch to toggle through the three settings (port, starboard, or simultaneous control).
• Only Dash Switch can operate port/starboard anchors seperately.
Fittings
Facing
SPEED
BUTTON
DIRECTIONAL
BUTTON
Battery Replacement (Foot Switch)
IMPORTANT: Make sure battery replacement is done in a dry location.
STEP 1: Remove screws using a Phillips-Head screwdriver.
STEP 2: Remove Foot Switch Cover using a Flat-Tip Screwdriver. FIG. 1
STEP 3: Remove Switch Membrane and Circuit Board from the base FIG. 2
STEP 4: Remove battery from holder on back of circuit board and replace with a CR2032 3v Lithium
Coin Battery.
STEP 5: Reassemble Foot Switch. Make sure black caps click when pressed. If caps don’t click, rotate
board 1/4 turn and reinstall. FIG. 3 & 4
Switch Membrane
Figure 4
Need help? Contact our Technical Support Team at 1 + 813.689.9932 Option 2
Switch Membrane
Circuit Board
Figure 2
Base
Circuit Board
CLICK
Figure 3Figure 1
Foot Switch Cover
 Loading...