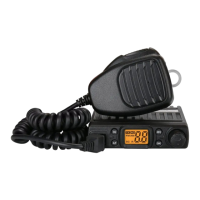
6
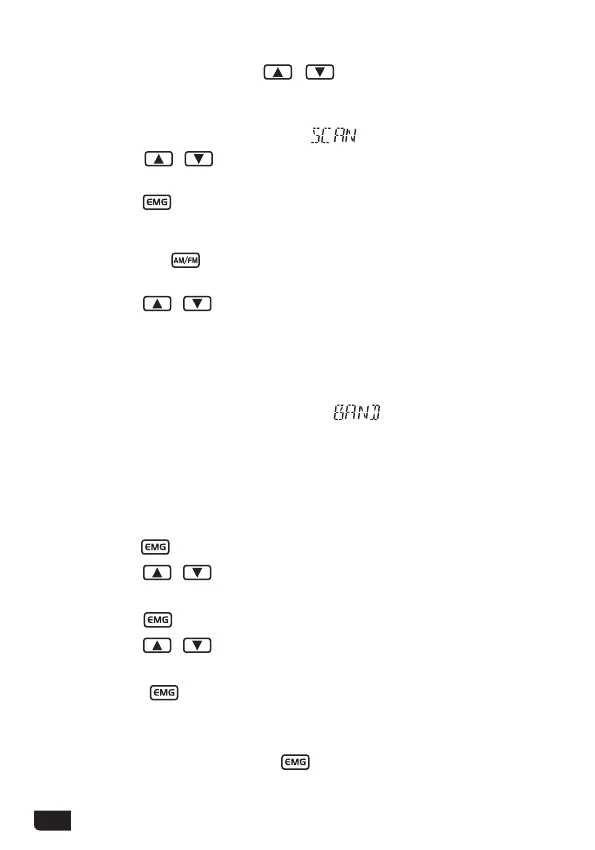
When the WX Scan function is active, "
" blinks on the LCD.
(2)
Short press / keys on the unit or
UP
/
DN
keys on the microphone
to change the scan direction.
(3)
Long press key to exit scan.
※WX Channels Scan (very long press)
(1) In WX mode, press and hold / keys on the unit or UP/DN keys
on the microphone for 3 seconds, or until a beep sounds, to start WX
Scan function.
Choose an optional 8Ω external speaker with 3.5 mm mono connector.
(1)
Long press key to enter the menu.
(2)
Short press / keys on the unit or
UP
/
DN
keys on the microphone
(3)
to select the menu to adjust.
Short press key to validate, the parameter blinks on the LCD.
(4)
Short press / keys on the unit or
UP
/
DN
keys on the microphone
to modify the value of the parameter.
(5)
Short press key again to store the chosen value. The parameter
stops blinking and if the function has more than one parameter, the next
parameter blinks.
(6)
Press
PTT
switch, or long press
key, or wait for 10 seconds to store
and exit the menu.
key while powering ON the radio, the current
(1) Press and hold
Frequency Band
(2) Short press /
keys on the unit or
UP
/
DN
keys on the microphone
3.10
External Speaker Installation
3.11
Menu Operations
3.9
Frequency Band Selection
to choose the desired Frequency B
and.
(3)
When the Frequency Band is selected, power OFF and power ON again.
Note: This function is valid only when the radio operates in CB mode 1 or
CB mode 2. All Citizen Band "Multi-Norms" are available. If operating in
HAM mode or HF mode, you can enter the menu and select the
option to change the Frequency Band (see page 9).
blinks on the LCD.
 Loading...