Move Change Setting
OK
MENU
Return
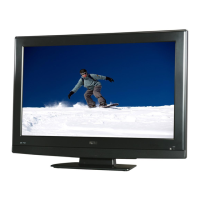
DVD mode of TV LED32C45RQD
TV LED32C45RQD has a built-in DVD player module, which
you can us e to watch DVD disk. The following opera tion guide
gives the DVD module instruction.
1. How to enter DVD mode for TV LED32C45RQD
Press INPUT button on remote control, select “DVD ” in the Source Select
menu (see page 7), then press OK or right arrow to enter DVD mode. The
DVD will star t playing aut omatically if there is a d isk in DVD mod ule. If not,
the TV wi ll displ ay a stan dby scree n as show n. And a “No Disc” message
will appear on screen.
Note: The TV will turn to DVD mode automatically when you insert a disk, no
matter which mode it is now.
2. Insert a disk to DVD player
Insert the DVD disk with reflector surface facing the front of TV.
Disk reflector surface facing the front of TV.
Note: Do not insert with much s trength. I nsert disk ge ntly
a nd the DVD
module will load in the disk automatically.
3. DVD control
You c an control the DVD playing w ith keypad on DVD module or with
remote control. For operating information, see the follow.
Keypad on DVD module
EJECT :
Ejects or loads the disk from DVD module.
STOP :
Stops the DVD playing.
PREV :
Goes back to the previous chapter of DVD.
PLAY/PAUSE
: Plays or pauses the DVD disk.
NEXT :
Skips to the next chapter of DVD.
ZOOM:
Zooms the size of screen.
About DVD control buttons on remote control, see the qu ick s tart guide
of accessories with your TV.
4. DVD basic operations
Play/pause the disk:
After inserting the disk to DVD module, the TV will
play DVD disk automatically. You can use P LA Y/ PAUSE button to
suspend the playing. Press again, the TV will restore playing.
Stop playing:
During playing, you can use STOP button to stop playing. If
you press STOP once, the DVD will be stopped briefly. Press STOP again, it
will stop completely and the disk in DVD module no longer wheels.
Eject the disk: You can press EJECT button to eject the disk from DVD
module. And press EJECT again, the DVD will load the disk renewedly.
*This function is enabled only when DVD mode is on.
Going backward or forwa
rd: You can press FR for fast review and FF
for fast forward. You can also press PREV to return to the previous chapter,
and press NEXT to skip to next chapter.
Press Q.MENU button on the remote and then you will see the Q.Menu
showing on your screen. Use up/down to choose the function you need:
Title Menu, DVD Menu, Zoom, Subtitle, Audio Language, Repeat, Repeat
A-B, Prev, Next, DVD Setup.
Title Menu: Choose Title Menu, you can reset the disk to the title menu.
It equals to ejecting and loading the disk again.
DVD Menu: Choose DVD Menu, you will return to the root menu of current
DVD function.
Zoom: Choose Zoom, you can zoom in the screen for 2 times, 3 times or
4 times from centre. This function provide a better view of the content locate
near screen centre.
Subtitle: Choose Subtitle, you can switch the available subtitles in DVD disk.
Audio Language: Choose Audio Language, you can switch the available
audio language in DVD disk.
Repeat: Choose Repeat, you can switch between chapter repeat, title
repeat and all repeat.
Repeat A-B: Choose Repeat A-B once to set the repeating origin and
Choose it twice to set the repeating end.
DVD-setup menu: Choose DVD Setup, a specific setup menu for DVD
will display on screen. This menu is especially prepared for DVD control.
8 9
9 10
1011
DVD Operations
Media Support Specification
Caution: Do not turn off the TV or disconnect USB storage device
while the TV
is playing back picture or music.
This may result in loss of data or damage to the USB storage
device, and RCA is not responsible for any damage to, or loss of,
data on the USB storage device.
Coverage - Labor
For a period of 12 months from d ate of purchase of your RCA
product, we will pay an author ized RCA service center the labor
charge to repair any defects in materials or workmanship in your
television.If your television is unrepairable we will provide you with a
refurbished unit of the same or better model.
Coverage - Parts
For a period of 12 months from d ate of purch
ase of you r RCA
produ ct, we will pay an a utho rize d RCA serv ice center for the
new,or at o ur option, refurbished repl aceme nt parts need ed to
repair any defects in material or workmanship in your television. If
your television is unrepairable we will provide you with a refurbished
unit of the same or better model.
Coverage - LED LCD Panel
For a period of 12 months from d ate of purchase of your RCA
que no son causadas por el producto.
- Danos en el producto debido a las imagenes de grabadas
en la pantalla.
- Productos comprados o prestar servicios fuera del pais
de compra original.
Ej: Comprado en Estados Unidos no puede prestar
servicios en Mexico/Comprado en Mexico no puede
prestar servicios en Estados Unidos.
- Productos modificados o incorporados a otros productos.
- Danos debidos a fenomenos de la naturaleza, incluyendo
pero no limitado a, danos por rayos o inundaciones.
- Las llamadas de servicio que no impliquen cualquier
defecto en materiales o mano de obra.
Uso Comercial Exclusion
Esta garantia limitada solo se aplica a los productos utilizados
para uso personal o, y no cubre todos los productos utilizados
con fines institucionales, comerciales o de alquiler.
ESTA GARANTIA LIMITADA ES EL UNICO Y EXCLUSIVO
DE GARANTIA APLICABLE A ESTE PRODUCTO. EN
CORP EE.UU., Inc., el fabricante de este producto, rechaza
cualquier otra garantia, expresada o implicada (INCLUYENDO
TODAS LAS GARANTIAS IMPLICITAS DE COMERCIAL
IZACION O IDONEIDAD PARA UN PROPOSITO
PARTICULAR). NO informacion verbal o escrita por parte
CORP DE EE.UU., Inc., sus agentes, contratistas
independientes, representantes de ventas, empleados,
comerciantes minoristas, mayoristas o cualquier otro tercero
DEBERAN crear una garantia ni aumentar. Ampliar o
modificar el alcance de esta garantia limitada.
Esta GARANTIA LIMITADA DEL UNICO Y EXCLUSIVO REMEDIO
PARA EL CONSUMIDOR DE REPARACION O REEMPLAZO
DEL PRODUCTO. EN CORP EE.UU., Inc. no sera
responsable por danos especiales, incidentales o
consecuentes resultantes DEL USO DEL PRODUCTO O
DERIVADOS DE UNA VIOLACION garantia expresa o
implicita de este producto.
ESTA GARANTIA LIMITADA Y RESPONSABILIDADES contenida en el
se rige por las Leyes del Estado de Indiana. SALVOPROHIBIDO POR
LA LEY APLICABLE, CUALQUIER GARANTIA IMPLICITA DE
COMERCIALIZACION O IDONEIDAD PARA UN PROPOSITO
PARTICULAR ESTARA LIMITADA A LIMITADA periodo de garantia (S)
mencionado anteriormente. Esta garantia le otorga derechos legales
especificos y USTED TAMBIEN PUEDE TENER OTROS DERECHOS,
QUE PUEDEN VARIAR DE ESTADO.
RCA es una marca registrada de SAS bajo licencia de
ON Corporation
ON Corp US, Inc.
10920 Via Frontera, Ste 540
San Diego, CA 92127, U.S.A.
2014 ON Corporation
RCA is a trademark of RCA Trademark Management
SAS used under license to ON Corporation.
RCA es una marcade RCA Trademark Management
SAS usada bajo licencia de ON Corporation.
What’s the most convenient way to view High Definition (HD)
video?
Conn ect an ante nna to t he TV I nput jack to view free loca l dig ital
channels. You may need to purchase an antenna. (See page 5 for more
information about antenna setup).
Visit www.an tenna web. org for assis tanc e in deciding what t ype of
antenna to use to receive the loc al digital channels available to you.
After entering your location, this mapping program tells you which local
analog and digital stations are available using a certain antenna.
Are there other ways to v iew High De finitio n(HD) video?
Besides using an antenna as mentioned above, you can also use a set-
top box to receive digital video. Contact yo ur cable service pro vider
or satellite provider to purchase digital
programming and have t hem
connect the box to ensure you are viewing channels in the best way.
How do I tell an analog channel from a digital channel?
Press the OK button to display the Channel Bar.
When no OSD
(On Screen Display) is used,
Look at the topright corner of the screen.
An “A” is displayed for an analog channel.A “D” is displayed for a digital
channel. Note: Since the analog TV inAmerica has been cut off, we
reserve analog TV function only for some unexpected use.
Why are there bars on my screen, and can I get rid of them?
Why does channel search find a lot of channels, but when I
try to tune to them, there’s nothing there?
Some channels don’t carry programming, such as video On Demand.
When channels are unavailable, your TV screen is blank or appears like
snow. You probably want to remove these channels from your channel
list. Remove these in the Channel List Menu. Go to page 8 for more
information.
Why does it take a long time when I search the channels
at first time?
If y ou ha ve bo th an alog and d igital channels, the TV is looking for all
available channels in the channel list. If you do have digital channels, the
TV is also searching for scrambled channels, non-scrambled channels,
and each sub-channel of that digital channel.
Identifying Problems
If there are any problems when using the product, please consult the
list below. If the list do es not solve the problem, call o ur Custo mer
Service Center immediately.
TV Problems
The TV can’t be turned on.
Make sure the AC cord is plugged in.
- Check the wall outlet, make sure the AC output works normally
and stably.
- The side panel may be locked (disabled). Use the remote control
to turn on the TV.
- Select the Keypad Lock function in the PARENTAL control Menu
and press OK to uncheck the locking status.
There is no picture or sound but the TV is on and there is a “No
Signal” sign on screen.
- Are you trying to use an input source with no device connected
to it? For using other video/audio device, make sure the external
The Remote control doesn’t work.
- There may be an AC power failure or the power cord unplugged
in.
- Something mi ght be blockin g between the remote control and the
remote sensor on the front panel of the TV. Make sure there is a clear path.
- The remote may not be aimed directly at the TV.
- The batteries in the remote may be weak, dead, or installed
incorrectly. Put new batteries in the remote.
You are experiencing problems with V-Chip/Parental Controls.
- If the rating limits don’t work, you must lock the settings. Go to the
Main Menu (press MENU on your remote), select PARENTAL co nt ro l to
check the settings.
What else can I do?
If you’ve been th rough the Trou bleshoo
ting section an d nothing has
fixed your problem, try rebooting your TV.
Note that af ter a reboot , you may need t o run your TV t hrough the
setup process again. To reboot, unplug the power cord from the wall
outlet or power strip.
Keep your TV unplugged for about 5 minutes. Then plug in the TV and
turn it on. See if the problem is fixed.
If the problem remains, then please visit the Customer Support Menu at
www.rca.com or updated FAQs or contact RCA Customer Support at
the support number provided in your Warranty card.
Note
A. The wall mount is not contained in the accessories sold with television.
We only provide the installing specifications but not the wall mount itself.
If you need the mount, please consult with the local dealer for a VESA
wall mount.
B. We st rong ly suggest to set the wall mount with equipmen ts of
specificati on we order ed. If not, inappr opri ate install ing
may cause
damage to device or people.
C. We suggest that you keep your TV at least 2.36 inches(60mm) from the
wall to prevent cable interference.
Warnings
1. Do n ot set up the wall mount by yoursel f. Please con tact
qualified professionals for installation.
2. The TV should not be mounted on walls or surfaces which have
an angle more than 10 degrees with vertical direction. Otherwise
the TV set may fall.
3. The walls for mounting must have enough strength to hold the
whole weight of TV set. For example, concrete wall and brickwork
are eligible. Do not place the mount on soft walls such as earth
walls and plasterboard.
device works normally first, then press INPUT and choose the right
input source.
- The Signal Type option may be set incorrectly. Go to page 8 for
detailed instructions.
- The channel may be blank. Try to search the channel again or
change another channel.
The sound is fine, but the picture is poor.
- If you can only get black and white pictures from external device
that you've connected to your TV, maybe it is due to the video
cables is not connected well, or they are connected wrongly.
Check the connection stability first, then check the correctness.
For AV input, the yellow video cable connects to the yellow Video
In jack on the side of your TV.
For Component input, the three Y, Pb, Pr video cables (red, blue,
and green) should be connect to the corresponding input jacks
on the side of your TV.
- Check the antenna connections. Make sure all of the cables are
firmly connected to the TV jack on side of your TV.
- Try adjusting the color features to improve.
There is no sound, but the picture is fine.
- The sound might be muted. Try pressing the MUTE button to
restore sound.
- For using
AV or Component, remember to connect the device’s left
and right audio output correctly. The left channel cable is white and
the
right channel cable is red. Please match
the cables and jacks according
to their colors.
- The sound settings may not be set correctly. Go to page 9 for
more information.
- If your audio source has only one jack or is a (mono) audio source,
make sure you have plugged the connection into the Audio In L jack
(white) on the TV.
The buttons on the side panel don’t work.
- The side panel may be locked (disabled). Use the remote control to
turn on the TV.
- Select the Keypad Lock function in the PARENTAL control Menu and
press OK to uncheck the locking status.
- Unplug the TV from the AC power for 10 minutes and then plug it back.
Turn the TV on and try again.
The TV turns off unexpectedly.
- The electronic protection circuit may have
been activated because of
a power surge. Wait 30 seconds and then turn the TV on again.
If this happens frequently, the voltage in your house may be abnormal.
If the other e lectroni c equipme nt in your hom e can’t work normally,
consult a qualified service personnel.
Can’t select a certain channel.
- The chan nel m ay be bloc ked o r not appr oved in th e PAR ENTAL
control Menu.
- The channe l may be skip ped in c hann el list in CHANNEL M enu.
Check the blocking and skipping status of channel.
The stereo sound performance is bad.
- It may be a weak station. Use the AUDIO Menu and set Analog Sound as
Mono.
A black box appears on the screen.
- Closed captioning might be on. Check Closed Caption in the SETUP
menu. Go to page 10 for more instructions.
Problems with the HDMI Connection.
- Make sure the HDMI device (DVD, video gamer, etc.) is turned on and the
cables are firmly connected.
If problems still occur, turn off your device and reconnect it. Reset the
power by unplugging the power cord and plugging it again.
- If a “No Signal” message appears on screen , the HDMI device
isn’t responding. Contact the manufacturer of the HDMI device for
further assistance.
- If you have black ba rs on each side of your pictu re (which
means the TV can not display a full-screen image), the device you
connected might have a switch or a menu option allowing you to
change the picture q uality output that will fix this. Choose either
720p or 1080i.
4. If spare parts of different specifications (such as screws) are
used duri ng mounting , consult with qua lifie d prof essi onal s to
make sure these parts are safe and effective.
5. Before attaching the base to wall, ensure the holes for anchors
are in keeping with the installing rules. Otherwise there may exist
some potential problems.
6. Do not place any heating source under your television. Or else,
it can cause fire.
7. Do not place the TV near anything dripping. Transducers and
high voltage wires should be kept far away from
the apparatus
too . Or el se, it ma y cause cr eep age, elec tri c shock or ba d
resonance.
8. Do not pla ce TV in a location where collision or vibration is
liable to happen.
9. In order to avoid unexpected falling of the TV set, do not put
any strong force on TV or wall mount after installing.
10. Be sure to unplug the TV before installing. Keep anything hard
or sharp away from the screen panel to prevent
the scuffing.
11. After installing, if there is any need to move the cabinet, please
contact the qualified professionals.
With USB Media Play, you can enjoy music and photo files stored
in a USB storage device on your RCA TV.
Connecting a USB storage device
- Connect a USB storage device to the USB port in the back of the TV.
- Press “INPUT” and select “USB”.
- “USB Media Play” menu will appear.
WARRANTY PERIOD(S) SET FORTH ABOVE.
THIS WARRANTY GIVES YOU SPECIFIC LEGAL RIGHTS
AND YOU ALSO MAY HAVE OTHER RIGHTS THAT VARY
FROM STATE TO STATE.
RCA is a trademark of RCA Trademark Management
SAS and used under license by
ON Corporation
Cobertura-Trabajo
Durant e un perio do de 12 mese s desde la f echa de com pra de su
producto RCA, pagaremos a un centro autorizado de servicio de RCA
el cargo de mano de obra para reparar cualquier defecto en
materiales
o mano de obra en el televisor.
Si su tele vi sor es ir re pa ra ble qu e l e pro po rci on ar a una un id ad
reacondicionada del mismo modelo o superior.
Cobertura / Recambios
Durant e un perio do de 12 mese s desde la f echa de com pra de su
producto RCA, pagaremos a un centro autorizado de servicio de RCA
para un reemplazar ya sea con partes nuevas o reacondicionadas, o a
nuestra opcion, para reparar cualquier defecto del material o mano de
obra en el televisor.
Si su televisor es irreparable que le proporcionara una unidad
reacondicionada del mismo modelo o superior.
Panel de Cobertura-LED LCD
Durant e un perio do de 12 mese s desde la f echa de com pra de su
producto RCA, pagaremos un centro autorizado de servicio de RCA
para un reemplazar la pantalla LED LCD, ya sea con pantalla nueva o
reacondicionada, o a nuestra opcion,
para reparar cualquier
defecto del
material o mano de obra en la pantalla de su televisor. Si su televisor
es irreparab le que le proporcionara una unidad reacondici onada del
mismo modelo o superior.-
Como Obtener Servicio
Para asistencia en Estados Unidos (E.U.A) si compro un aparato RCA
en E.U.A. favor dellamar al: 1-888-977-6722
o visite: www.rca.com
El represe ntante d e Servic io revisara sus opciones para e l servicio.
Para su comodidad le ofrecemos tres formas de obtener servicio de
garantia.
Usted pued e envi ar su p roduc to a la direcci on proporcio nada por
el represent ante de servici o, usted puede llevar su produ cto a u n
cen tro de se rvi cio autor iz ado , o pue de solici tar en el serv ic io
a
domicilio (admini strador de termina ra si el producto se encuent re en
funcionamiento en casa o debe ser llevado de vuelta a servicio local
tecnico para su reparacion).
El representante del Servicio le proporcionara las instrucciones para
el
servicio preferido.
Se requiere del comprobante de compra original.
Solo se les dara servicio a Domicilio a Televisores de 37 " pulgadas de
tamano y mas grandes.
Elementos no cubiertos por la garantia limitada Su
garantia limitada no cubre los siguientes temas:
- Un-instalacion, montaje y ajuste de controles del cliente
e instrucciones de funcionamiento.
- Las pilas y los fusibles de repuesto al cliente.
- Danos por uso indebido, abuso, negligencia o descuido
incluyendo pero no limitado a, los danos derivados
de la exposicion a la humedad, la humedad o la sal.
- Incapacidad para recibir la senal debido a los problemas
produ ct, we will pay an authorized RCA ser vice cent er for t he
new, or at our option, refurbished LED LCD panel needed to repair
any defects in material or workmanship in your television. If your
television is unrepairable we will provide you with a refurbished unit
of the same or better model.
How to Obtain Service
For assistance (U.S.A) - if you purchased RCA product in
U.S.A, please call 1-888-977-6722.
Or visit www.rca.com
The service repr
esentative will review your options for service.
As a co nven ienc e we offer three ways to obtain warran ty service .
You m ay mail y our product to the addres s provi ded by the servi ce
representative, y ou may take y our product t o an autho rized service
center, or you may request in home service (servicer will determine if
product is serviceable in home or must be taken back
to local service
cente r for repair). Service representa tive will suppl y
instr uction s for
preferred servi ce. At the t ime of ser vice proof of purchase such a s
origi nal receipt, will be required. Only 37” LCD size and above are
applicable for in- home-service.
Items Not Covered By Limited Warranty
Your limited warranty does not cover the following items:
-Un-installatio n, i nstallation and adjustment of customer controls and
operating instruction.
-Batteries and customer replacement fuses
-Damage due to misuse, abuse, negligence or neglect including but, not
limited to, damage resulting from exposure to moisture, humidity or salt.
-Inability to receive a signal due to problems not caused by the product.
-Damage to the product due to images burnt into the screen.
-P rod uc t purc hase d or serv ic ed outs id e of Coun tr y of Ori ginal
Purchase.
-i.e . Purchase d USA can not be s ervi ced in Mexico/ Purchase d in
Mexico can not be serviced in USA.
-Product modified or incorporated into other products.
-Damage due to acts of nature, including but not limited to,lightning
damage or flooding.
-S er vi ce call s whi ch do not in vo lv e a ny defe ct in mate rial s or
workmanship.
Commercial Use Excluded
This limited wa rranty only applie s to prod
ucts used for person al use
and does not c over any product u sed f or in stitutional, commercial or
rental purposes.
THIS LIMITED WARRANTY IS THE SOLE AND EXCLUSIVE
WARRANTY APPLICABLE TO THIS PRODUCT. ON CORP US, INC.,
THE MANUFACTURER OF THIS PRODUCT, DISCLAIMS ALL
OTHER WARRANTIES, EXPRESSED OR IMPLIED (INCLUDING ALL
IMPLIED WARRANTIES OF MERCHANTABILITY OR FITNESS FOR A
PARTICULAR PURPOSE). NO VERBAL OR WRITTEN INFORMATION
GIVEN BY ON CORP US, INC., ITS AGENTS, INDEPENDENT
CONTRACTORS, SALES REPRESENTATIVES, EMPLOYEES, RETAIL
DEALERS, WHOLE SALE DISTRIBUTORS OR ANY OTHER THIRD
PARTY SHALL CREATE A GUARANTY OR INCREASE. EXPAND OR
MODIFY THE SCOPE OF THIS LIMITED WARRANTY
.
THIS LIMITED WARRANTY PROVIDES THE SOLE AND EXCLUSIVE
REMEDY FOR THE CONSUMER OF REPAIR OR REPLACEMENTOF
THE PRODUCT. ON CORP US, INC. SHALL NOT BE LIABLE FOR
SPECIAL, INCIDENTAL OR CONSEQUENTIAL DAMAGES ARISING OUT
OF THE USE OF THEP RODUCT OR ARISING OUT OF A BREACH
EXPRESSED OR IMPLIED WARRANTY ON THIS PRODUCT.
THIS LIMI TED WARRA NTY AND THE DISCLAI MERS CONTAI NED
HEREIN ARE GOVERNED BY THE LAWS OF THE STATE OF INDIANA.
EXCEPT TO THE EXTENT PROHIBITED BY APPLICABLE LAW, ANY
IMPLIED WARRANTY OF MERCHANTABILITY OR FITNESS FOR A
PARTICULAR PURPOSE IS LIMITED TO APPLICABLE LIMITED
1213
1314
1415
LIMITACION DE GARANTIA
USB Media Play
Troubleshooting
Wall Mounting Unit Specification
Product Specification
LIMITATION OF WARRANTY
Limited Warranty for USA
Garantia limitada para EE.UU
Frequently Asked
Questions (FAQs)
Digital Caption Type
Press left/rig ht ar row to se lect digi tal c losed cap tion type:
Servi ce1, Serv ice2, Service3 , Service 4, Se rvice5, S ervice6.
Digital Caption Style
Press left/right arrow to go to digital closed caption style sub-menu,
to select the closed caption style. Select the item you want to adjust
in Digital CC Style menu with up/down arrows. After changing, you
can preview the caption style in the bottom.
• Mode: Decide whether you can change the settings on the CC
Display Style.
• CC Size: Set the CC font size (Default, Normal, Large, Small).
• CC Font: Set the CC font (Default, Font 0 - 7).
• CC Opacity Color: Set the CC opacity color (Default, Solid,
Flashing, Translucent, Transparent).
• Text Color: Set the CC text color (Default, White, Red, Green,
Blue, Yellow, Magenta, Cyan).
• CC Background Opacity: Set the CC background opacity (Default,
Solid, Flashing, Translucent, Transparent).
• CC Background: Set the CC background color (Default, White,
Red, Green, Blue, Yellow, Magenta, Cyan).
All reset
Press
OK
button to execute reset to TV system. All the settings
will be reset to factory default.
Note: The OSD’s appearance and color are referred to the actual
appliance.
Blue Back
Press
OK
button to select Blue Back on or off. If the Blue Back is
turned on, the TV will display a blue background when there is no
signal input.
No Signal Power Off
Press left/right arrow to select a time period (Off, 1 Min, 5 Min, 10
Min) for “No Signal Power Off”. The TV will shut off after that period
of time while no signal. We suggest you turn on this function when
Blue B ack is turned on. It ma y hurt the LED LCD pane l if b lue
screen is on for too long.
Parental Control
• When the Parental Control Menu is accessed from the Main Menu,
you need to enter password to unlock the menu function. Please
enter your four-digit password with numeric keys 0~9. Note: The
original password is “0000”.
• After unlocking, the items in parental control menu can be used.
Use arrow up/down to highlight the function you need and press
OK
or right arrow to use V-chip, Change Password, Keypad Lock
and Source Lock, Clear Channel List sub-menu.
Audio Menu
The Audio Menu lets you a djust audio outpu t. To a ccess the
Audio Menu, press MENU on the remote, and then select Audio
from the Main Menu. Press
OK
/down button to proceed to Audio
menu. Use up/down to choose the function you need, press
OK
or right arrow to adjust or enter a sub-menu.
Sound Mode
Choose the pres et sound mod e of your TV:
Standard, Soft, User, Dynamic. Only in User mode you can adjust
Bass, Treble, Balance.
• Bass: Adjust the bass component of TV sound.
• Treble: Adjust the treble component of TV sound.
• Balance: Adjust the balance bet
ween the left and right channel.
Audio Language
Select digital TV audio language type: English, French or Spanish
(only available for DTV channel).
Analog Audio Output
Select analog TV audio sound type: Stereo, Mono or SAP (only
available in TV mode).
Digital Audio Output
Set the audio output type as Off, PCM or Raw. Please set this
option according to your power amplifier.
Surround
Creates a 3D sound surround from standard stereo material, with
deep and rich enhancement.
Audio Only
Press
OK
button to activate audio only mode. The TV will
output only
sound and the LED LCD panel will be turned off. To restore normal
playing, hold POWER button for three seconds.
Auto Volume
Set auto volume control on/off.
Equalizer Settings
The seven-band graphic equalizer allows you to adjust the audio
frequency settings. You can select one of the equalizer presets
(Off, Pop,
Rock, Jazz) or create your own personal preset (User).
Press the left or right arrow to select the frequency (100Hz, 250Hz
500Hz, 1KHz, 2KHz, 4KHz, 10KHz). you want to adjust. Use the
up or down arrow to adjust.
Channel Menu
The Channel Menu enables you to search, view and edit channels.
It is available in TV mode only. Press MENU and choose CHANNEL
from the Main menu. Press the
OK
/down button to proceed to
CHANNEL menu.
Quick Menu
The Quick Menu contains menus and provides you a quick way to
approach the main settings that may be most possibly and frequently
approached. Press MENU on the remote and then you will see the
Quick Menu showing on your screen. Press the down button to
proceed the Quick Menu. Use up/down to choose the function you
need, press OK to enter a sub-menu and press left/right arrow to
adjust a sub-menu.
US V-Chip
Press
OK
to en ter US V-Chip ratings m enu, w hich contains two
sub-me nus: T V rating and Movi e Rati ng.
Change PIN
Change the PIN of parental menu.
Movie Rating
Use arrow keys to select the rating level you want to block, press
OK
to lock/unlock the rating level. If you have blocked a lower level
rating, the higher ratings will be blocked too. For ex ample, when
PG-13 is block ed, R , NC-17 a nd X will be b locked at the same
time.
TV Rating
Similar with Movie Rating. After adjusting, press MENU to return
or press EXIT to exit the menu.
Canada V-Chip
Press
OK
or right arrow to enter Canada V-Chip ratings menu,
which contains two sub-menus: English Rating and French Rating.
English Rating
Press
OK
to enter English rating menu. Use arrow keys to select the
rating level you want to block, press
OK
to lock/unlock the rating
level. If you have blocked a lower level rating, the higher ratings will
be blocked too. For example, when PG is blocked,14+ and 18+ will
be blocked at the same time.
French Rating
Press
OK
to enter French rating menu. Similar with English Rating.
Note: These ratings are available only if the broadcaster is sending
rating informatio
n.
Picture Menu
The Picture Menu contains menus and controls to configure the
way the picture appears. The Picture Menu options apply to the
video for the main TV and VIDEO INPUT selections. All pic ture
options can be applied to each input.
Press MENU on the remote. Select Picture from the Main menu.
Press the OK/down button to proceed to PICTURE menu.
Use up/down to choose the function you need, press OK or right
arrow to adjust or enter a sub-menu. the detailed explanation are
shown below. If available, use the text at the bottom of each screen
for help.
Use up/down to choose the function you need, press
OK
or right
arrow to adjust or enter a sub-menu. explanation are shown below.
Sleep Timer
Set the sleep timer(Off, 5, 10, 15, 30, 60, 90, 120, 180, 240 Min).
The TV will automatically enter standby mode after times up.
Time Zone
Showi ng the co untry ’s time z one. you can S et Time z one O ff
Easte rn, Centr al, M ountain, Pacific, A laska , Hawaii, Samoa,
Newfo undland, Atlan tic.
Picture Mode
Choose the preset visual mode of your TV:
Standard, Movie, User, Dynamic, Power Saving. (Only in User mode
you can adjust Brightness, Contrast, Color, Tint and Sharpness.
Changes to Power Saving mode can decrease the power
consumption.)
• Brightness: Adjust the brightness of picture.
• Contrast: Adjust the contrast of color.
• Color: Adjust the richness of color.
• Tint: Adjust the balance between red and green level (only
available in NTSC signal).
• Sharpness: Adjust the sharpness level of picture.
Color Mode
This option allows you to select one of three automatic color
adjustments: Cool for a bluer palette of picture colors; Normal or
Warm for a redder palette of color.
Screen Size
Screen Size: Select a screen aspect ratio. (Available ratio: Wide,
Cinema, Zoom, and Normal.) Please choose the ratio that applies
to your video signal format best.
Noise Reduction
Set noise reduction as Off/low/Medium/High.
Note: Noise reduction helps to reduce the picture “static” or any
type of interference. This feature is especially useful for providing a
clearer picture in weak analog signal conditions.
Dynamic Contrast
Set dynamic contrast Off/low/Medium/High.
Video Style
If you connect the HDMI/DVI port of PC to HDMI jack of the TV
and the video signal is 1080p, please choose the compatible
video style: Video, Graphic.
Use up/down to choose the function you need, press
OK
or right
arrow to adjust or enter a sub-menu. The detailed explanation are
shown below.
Auto Scan
Execute an auto channel search.
Show / Hide
Enter sub-menu and press OK to show or hide the TV channel.
Channel List
Displays a channel list. It shows the current channels. Press
OK
to
go to TV channel directly in sub-menu.
Signal Type
Select your TV signal type: Air or Cable.
DTV Signal( In DTV Mode)
Display how strong your TV signal is.
Auto Clock
Select auto clock on/off. Auto clock helps you synchronize your
TV time to standard time (from DTV signal).
Clock
Set your TV time manually (needs to turn off auto clock). press up/
down and left/right arrow to config the current time.
Wake Up
Set the Wake Up time for your TV. after enters menu, you can
use the up/down and left/right arrow on the remote control to
adjust it.
OSD Display Duration
Set the time how long to display OSD menu(5 Sec, 15 Sec, 30 Sec,
45 Sec, 60 Sec).
Setup Menu
The Setup Menu lets you config the TV with your preferences. Select
SETUP from the Main Menu. Press
OK
/down button to proceed to
SETUP menu.
Input Block
This option allows you to lock or unlock the input source. The
source blocked can not be chosen from input list unless you input
the correct parental password. Use up/down arrow to select the
source, press
OK
to lock or unlock it.
V-Chip
Press
OK
to enter V-Chip sub-menu, the detail as follow:
Block Unrated Show
Block all the unrated program.
Clear Downloadable Data
Activate or downloadable rating data. if available.
Use up/down to choose the function you need, press
OK
or right
arrow to adjust or enter a sub-menu. The detailed explanation are
shown below.
Menu Language
To choose your menu language, press the left/right arrow until
the language you need appears. Available languages:
English, French and Spanish.
Menu Transparency
To choose your menu transparency mode, press the left/right
arrow until the transparency you need appears: 0%, 25%, 75%,
100%.
Closed Caption
Press
OK
to enter closed caption sub-menu, the detail as follow.
Directed to Children 7
Years and Older
All Children
TV-MA
TV-14
TV-PG
TV-G
TV-Y7
TV-Y
FV Fantasy Violence
Age-Based Ratings
Mature Audience Only
Parents Strongly Cautioned
Parents Guidance Suggested
General Audience
D
Sexually Explicit Dialogue
L Adult Language
S Sexual Situations
V Violence
Content Themes
No children under age 17.
Adults only.
G
PG
PG-13
R
NC-17
X
DetailRating
Rating
General Audience (no restrictions).
Parental guidance suggested.
Parents strongly cautioned.
Restricted. Children under 17
should be accompanied by an adult.
PICTURE
Picture Mode
Color Mode
Screen Size
Noise Reduction
Dynamic Contrast
Video Style Video
Move Select
OK
MENU
Return
Low
Low
Wide
Warm
Time Menu
The Time Menu lets you change the TV time s ettin gs. To
access the Time Menu, press MENU on the remote, and then
select Time from the Main Menu.
Lock M enu
The Lock Menu enables you to lock program with special content,
panel key board and input source. Press MENU on the remote and
choose Lock Menu from the Main Menu. Press the down button to
proceed the Lock Menu. The menu image and explanation are
shown below.
QUICK MENU
Picture Mode
Sound Mode
Closed Caption
Sleep Timer
Channel List
Move Select
OK
MENU
Return
Off
CHANNEL
Auto Scan
Show / Hide
Channel List
Signal Type
Move Select
OK
MENU
Return
Air
LOCK
Parental
Control
Change PIN
Input Block
V-CHIP
Keypad Lock
Clear Channel List
Execute
Change your 4-digit PIN
Keypad Lock
Select this option to block or unblock the TV’s side panel buttons
so that they can’t be used.
Clear Channel List
This option allows y ou to execute Clear Channel List function.
This function will reset the whole TV system to factory default (not
only reset OSD menu).
Caption Display
Press left/right arrow to select caption display cc on or cc off.
DTV Signal
Good
Programming generally considered acceptable for
children 8 years and over to watch on their own.
Programming intended for children under age 8.
18+
14+
PG
G
C8+
C
DetailRating
Adult programming
Programming contains themes or content
which may not be suitable for viewers under age of 14.
Parental Guidance
General programming, suitable for all audiences.
General
18ans+
16ans+
13ans+
8ans+
G
DetailRating
Programming restricted to adults.
Programming is not suitable for
children under the age of 16.
Programming may not be suitable for
children under the age of 13.
Programming generally considered acceptable for
children 8 years and over to watch on their own.
Playing back Photo files
- Press arrow ( ) to select “Photo” and press “OK”.
- The file or folder list will show up. Press arrow( ) to select a
file or folder. Press “OK” , and you will be given several options to
view photo files.
- You can directly open and playback the file. View thumbnails for
photo preview, or play slideshow.
Playing back Music files
- Press arrow ( ) to select “Music” and press “OK”.
- The file or folder list will show up. Press arrow( ) to select a
file or folder. Press “OK” to playback the music file you selected.
Playing back Movie files
- Press arrow ( ) to select “MOVIE” and press “OK”.
- The file or folder list will show up. Press arrow( ) to select a
file or folder. Press “OK” to playback the movie file you selected.
Playing back Text files
Similar to the photo menu. You can use TEXT menu to access and
display text on your RCA TV.
Most digital video is sent in a 16/9 format which fills your screen, but
is sometimes sent in 4/3 which does not fill your screen. It depends
on how the station or device connected to your TV is formatting the
video. If there are bars on the screen, Check Screen size in the picture
mode to try a different format that may eliminate the bars. Some bars
can't be r emove d bec ause of th e way the forma t is sent by th e
broadcaster. The format changes as you choose screen size type in the
picture mode and the format type is displayed at the bottom of the screen.
For more information on screen size, go to page 9.
ARC
Adopted in TV output of digital audio, can be connected to the
device supporting ARC, transmit the TV sound to the device.
Remote
select your remote: Off, remote1 or remote2. this is for special
purpose.
Off
Remote
USB 2.0
PHOTO MUSIC MOVIE
TEXT
Supported Files
Supported USB storage/file system format
Photo
USB Storage USB flash drive
File System format FAT32
Music
JPG/JPEG files
WAV files
Movie MPG files
General setup page
Press Q.MEN U but ton o n the remot e to displ ay Q.M enu. Use u p/down
and O K butt on to ente r DVD Setup menu . The re exi st th ree s ub-men us
in DV D Setu p men u, th e first one is Ge neral Setup . Pre ss up /down arrow
to se lect t he it em yo u want to a djust and press OK bu tton to act ivate it.
After activ ating , use up/do wn ar row t o set item value . Whe n you are
satis fied wi th th e adj ustmen t, pr ess B ACK b utton to re turn to the uppe r
level of ge neral setu p menu . Pre ss BA CK bu tton r epeat edly, you c an ex it
the D VD Set up me nu. T o exit setu p men u dir ectly, pres s EXI T butt on.
TV Display
Set t he TV displ ay sh ape.
OSD Lang
Set t he DVD OSD langu age as Engl ish, Frenc h or S panis h.
Last Memory
Set i t on t o mem orize the l ast p oint. Duri ng pla ying the D VD, if you chang e
to an other mode and t hen co me ba ck to DVD mode, it ca n pla y
autom atical ly fr om th e last stop poin t.
Note: We su ggest you turn o ff th e las t mem ory fu nctio n unl ess yo u rea lly
need it. To turn on t his fu nctio n may influ ence t he li fetim e of fl ash m emory
of DV D modu le.
B. Speaker setup page
Press Q.MEN U but ton o n the remot e to displ ay Q.M enu. Use u p/down
and O K butt on to ente r DVD Setup menu and then p ress left/ right arrow
to ch oose S peake r Set up Pag e. Th e ope ratin g meth od is simi lar wi th
the G eneral Setu p Pag e.
Downmix
This option is p reset as St ereo. That mean s the DVD p layer will outpu t a
two-c hannel audi o sig nal (L /R) t o TV front speak ers ( left/ right) .
C. Preference page
Press Q.MEN U but ton o n the remot e to displ ay Q.M enu. Use u p/down
and O K butt on to ente r DVD Setup menu and then p ress left/ right arrow
to Pr eferen ce Pa ge. T he ope ratin g met hod i s simi lar w ith t he Gen eral
Setup Page.
TV Type
Set t he TV type as PA L, Aut o or NTSC.
Note: Ameri can D VD st andard is N TSC s ystem , so w e sug gest you se t
theTV Type as NT SC. I n addi tion, you can a lso se t it as PA L to w atch
some disks with PAL s ystem, or s elect Auto for c onven ience .
Audio
Set t he DVD audi o lan guage.
Subtitle
Set t he DVD subt itle langua ge.
Disc Menu
Set t he DVD disk menu langu age.
Parental
Set t he par ental cont rol ra ting as KI D SAF , G, P G, PG 13, P GR, R, NC17
or AD ULT. T o cha nge t his op tion, you need passwo rd, a nd th e orig inal
one i s“0000 ”.
Default
Reset the D VD se tup m enu op tions as f actor y defa ult.
5. DVD Q.MENU
6. DVD Setup Menu
Notice: Specifications and cabine t d esign are subject to chang e w ithout
notice.
Humidity
RF input
Video input
Audio input
Audio output
Storage Humidity : Less than 85%RH
(No condensation)
Operation Humidity : Less than 80%RH
(No condensation)
AC 100-120V, 60Hz
Cable/Antenna × 1
AV × 1
AV × 1
HDMI × 2
1920 × 1080
Component × 1
Headphone × 1, Digital Audio Out × 1
Power Supply
Connection
Interface
Resolution
With stand
Without
stand
With stand
Without
stand
480i, 480p, 720p, 1080i, 1080p
28.9”W × 19.2”H × 6.9”D
28.9”W × 17.4”H × 3.2”D
15.4LBS(7.0KGS)
12.8LBS(5.8KGS)
less than 42W
Component/HDML mode
Dimensions
Weight
Power Consumption
Diagonal Display Size
Television System
Channel Coverage
Temperature
31.5 inches
American TV standard
Operating Temperature is
Storage Temperature is
ATSC/NTSC system
VHF : 2~13 UHF : 14~69
CATV : 1~135
-20℃ ~
+
60℃
0℃ ~
+
50℃
-4℉ ~
+
140℉
+
32℉ ~
+
122℉
Model
LED32C45RQD
Model Unit Dimension (unit:mm) Screw
LED32C45RQD VESA 200 x 100 M6 screws, length 10mm
Channel Bar
Press the OK button on the remote control, when OSD (on-screen
display)is not used, the channel bar will appear on the Bottom of the
screen. It displays the current channel’s information. The following list
describes the items on the channel bar.
Adjust the OSD Screen
The OSD (On Screen Display) menu enables you to approach to the
TV functions.
To use OSD menu system, press OK button on remote control, then
use left/right arrow to highlight an option from QUICK, CHANNEL,
PICTUR E, AUDIO, TIME, SETUP or LOCK and press OK/down
button.
Press the up and down arrow to move to a different option within
each menu. If necessary, press OK or right arrow to display the
choices of the option you’ve highlighted. If available, use the text at
the bottom of each screen for help. To return to the previous menu,
press the MENU button.
To exit the OSD menu:
• Press the EXIT button. The menu will clear from the screen.
• Press the MENU button repeatedly until the menus disappear.
Adjusting Volume
Press the VOL+/VOL- button on the remote control to adjust the
volume. If you want to switch sound off, press MUTE. When OSD
(On Screen Display) is not used, the arrows left/right can also work
as VOL-/VOL+ buttons.
EPG (Electronic Program Guide)
Press EPG button on the remote control, the electronic program
guide will appear in the center of screen. The electronic program
guide gives the TV program playing project. You can use left/right
arrows to switch pages.
OSD Menu Operations
Jan-01 07:10 Sat
4:3/CC
480i/480i
English/Stereo
Displays current program date and time.
Di sp l ay s t he scree n as pe ct rat i o.
Display the CC status (on or off).
If the channel is Dolby Digital AC-3, the
double-D symbol is displayed.
Displays the signal resolution.
Displays whether the current channel is
being broadcasted in stereo or mono. If
the current channel is digital, this space
will be SAP (Second Audio Program)
language.
ATSC-1
D14-1/A2
English
480i
Air
DTV ATV
4:3
Jan-01 07:10 Sat
D14-1 ATSC-1
Stereo
480i
Air
CC
Jan-01 07:10 Sat
A2
If the channel is analog, A is displayed. If
it’s a digital channel, D is displayed. For
example, in the pictures above, A2 is an
analog channel, and D50-1 is a digital
channel ( -1 is a sub-channel number).
Display the current TV signal type.
Note: Manuf actured und er license from Dolby Laboratorie s. Dolby an d
the double- D symbol ar e trademark s of Dolby Laboratorie s.
 Loading...