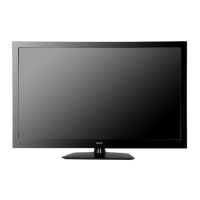
M{'_del Numbeh
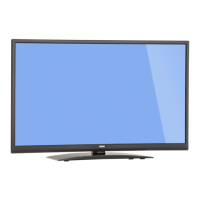
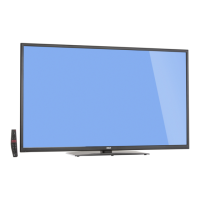
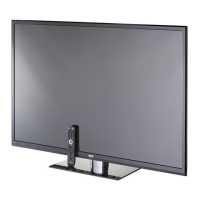
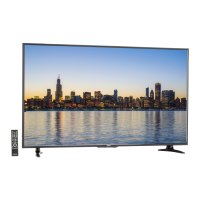
LED46C4_;RQ
Please register your product at www,rca.com
Please keep your sales receipt and keep the record of
the serial number and the date of purchase in order to
receive warranty parts and service.
The serial number is located at the back of the TV.
Serial Number / Ndmero de serie de TV
Date of Purchase / Fechade la compra
Made for Today.
www.rca.¢om
Part No.: RN0346R0117
Child Safety Guide ........................................................... 1
Caution and Warning ...................................................... 2
FCC Notice ...................................................................... 2
Safety Precautions ......................................................... 2
Preparation for Your New TV ......................................... ,'_
Check Accessories ........................................................... 3
Setup TV Table Stand ........................................................ S
Select TV Location ............................................................ S
Conneetion and Using ........................................................ S
TV Stand Installation ....................................................... 3
TV Signal Connection ..................................................... .4
Cable Connections .......................................................... 4
Side Panel Connections ................................................. .4
Cor/neetff_g AV Cempesite Video device ................................. 4
Conneeting YPbPr Cornponent device ................................... ,5
Conneeting HDMI device .................................................... 5
How to Obtain Various Kinds of Input Sources ......................... ,5
TV Jacks Explanation ..................................................... 5
Keypad and Front Panel ................................................. _
Panel Buttons .................................................................. 6
Front Panel ...................................................................... 6
Remote Control instructions .......................................... _
ff_serting Batteries in the Remote .......................................... _:_
Remote Control Reeeption Angle .......................................... 6
Learning about Remote Control .................................... 6
Remote Control Buttons ..................................................... _
Initial Setup ...................................................................... 7
Basic Operations ............................................................. 7
Turning On and Off ............................................................ 7
Choosing TV Channel ........................................................ .7
Selecting Input Source ....................................................... 7
Charlnel Bar ..................................................................... 7
Adjusting Volurrle .............................................................. 7
EPG (Electronic Program Guide) ........................................... 8
OSD Menu Operations .................................................... 8
Adjust the OSD Screen ...................................................... 8
Picture Menu ................................................................... S
Sourld Menu .................................................................... S
Channel Menu ................................................................. 9
Parental Menu ................................................................. 9
Setup Menu ................................................................... 10
Others Menu .................................................................. 10
Frequently Asked Questions (FAQs) ........................... .11
Troubleshooting ............................................................ 11
V-Chip Rating Explanations ......................................... .12
US V-Chip Rating Systern .................................................. 12
Canadiarl English Rating System ......................................... 12
Canadian French Rating System ......................................... 12
Wall Mounting Unit Specification ................................ .13
USB Media Play ............................................................. 13
Product Specification ................................................... .I 3
Warranty Card ................................................................ 14
Congratulations on your purchase!
As you enjoy your new product, please keepthese
safely tips in mind:
TH_ ISSUE
* ]he home I_eaereNerla nmen expe er'_e isa glow r'g rend and large_flat panel
displays arepopula_purchases Howeve, fiat panel d splaysare no always
suppo ted o_ he p_operstandser _stalledaccord ngto themanutadurer's
recommenda ons
• lat panel d splayslhat are irapprop_iotelysiluated on d_esses,bookcases,shelves,
desks,s _eakorschestso cats may k_llowr and cause inury
• 1heco/sume elect or'ics ndusfy is cor_mted o r_akinghere ent_ turmen
enioyablea_d sak,
• One sze does NO1 i_all ollow the manufaduer'srecomrreMatons l_r the safe
ns aliaJonand useofyour flat panel d splay
• CaMully _eadand undes'und all e _closedi_st_uctons fo_prope use of this
product
• Do_"tallow childrento climb o_ or play wih furnitureand _elevs on sets
• Dora place fla_panel displayso_ furnik_reha can easly be sed as sleps,s_chas
a chestof drawe s
• Re_'emberhat ch Idrencan oecorneexcied wile waichi_g a program, especially
on a "larger han liM' lat paneldisplay Care should be taen o place o install
he display where il canno be pushed, pulled ove_,or kneckeddown
• Care should be aken b roue all cods aM cables cunneced o the lat panel
d splay sotat t_ey can,_otbe pulled orgrabbed by cur ousch Idren
WALL_{}U_T|_G: IF YOUDECIDETOWALLMOUNT
YOURFLATPANELDISPLAY,ALWAYS:
• Use a rr,our_ttat has bee_ _ecorrmendedby he display rr,a_wfacurerand/o_
lisledby an ndeperdenl labo_ab y (suc',as UI, CSA, fTI)
• Follow all nslructionssupdied byhe display and wall mountmanubctures
• If yout_aveanydoubts abou your abihy Io saely ns!all you_fla panel display,
contac yeur <,ailer about prdessionalinstallatbn
• Make surethat the wall where yeuare meun_ng thedisplay s app_opr ote Some
wall mountsarenot des gnedo be mou_td b walls w'th seel studsor old cnde_
block construcion Ifyou a_eunswe,contac a professenal installe
• A mJnmm of _wopeople are _equ ed !or nsallation Flat paneld splays
can be heavy
www.CE.org/safety
iMuchas gracias per su use del presente producto!
Cuando usted disfruta de su nuevo producto, per
favor tenga en cuenta los consejos de seguddad:
POSJBLES PROBLEMEAS
La experiencia de entretenimiento de cine en casa es una tendencia
creciente y los grandes monitores de pantalla plana son muy populares. Sin
embargo, los men]totes de pantalla p_anano se han _nsta_adosiempre en los
soportes adecuadoso insta_adode acuerdo conlas recomendacionesdefabricante.
• Los monitores de pantalla plana que se han instalado inadecuadamente en
tocadores,estanterias, estantes, escritorios, oradores, ba01es o cartes se
pueden caer ycausar e_da_ocorporal.
] AL FABR_CANTE LE IMPORTA!
• Laindustda electr6nica del consumidor esta comprometida a hacer el
entretenimiento de casa agradable y seguro
AJUSTAR HASTA SEGURIDAD
• Un tamafio file NO es adecuado pararedes, Siga las recomendaciones de
Fabdcantepara la instalaci6n seguray el use de sumonitor de pantalla plana,
Lea con cuidado y entienda _odas lasinstrucciones adjuntas para el use
propio de este producto.
• No permita a los nifios a subir al equipo o jugar con muebles y televisiones.
• No cloque los monitores de pantalla plana en el mueb_eque se puede usar
f_cilmente cemo escal6n, asi come una c6moda,
" Recuerde quelos nifios pueden llegar a ser excitados al ver una programaci6n,
especialmente en el monitor de pantallaplana "mas grande que vida".E_cuidado
se tiene que empezar per poner o instalar el monitor donde no se
puede empujar,detener al costado del camino ni echar abajo.
• El cuidado se tiene que empezar perencaminar todos los cordones y cables
conectados al monitor de panta_laplanapara que no se puedan tirar o agarrar
per los nifios cudosos.
MONTAJE DE PARED: SI USTED DECIDE A MONTAR SU
MONITOR DE PANTALLA PLANA A LA PARED, SIEMPRE:
Use unamontura que seha recomendado per el fabricante de monitor y/o
IJstadoper un laboratofio independiente (come UL, OSA,ETL).
Siga todas las instrucciones ofrecidas per el fabricante de monitor y
montaje de pared
• Si usted tiene cualquier duda sobre su habilidad para instatarseguramente
su monitor de pantalla pJana,contacte a su distribuidor para la instaJaci6n
profesionah
• Compruebe que la pared adonde se esta montando eJmonitor es adecuada.
Algunos montajes de la pared no sondise_ados para set montados aparedes
con tachones de acero o la vieja construcci6n de bloque de ceniza Si usted
esta inseguro,contacte a un instalador profesionaL
Per Iomenos dos personas se requieren para la instaJaci6n.Los monitores
de pantalla plana puede ser pesados.
www.CE.org/safety
CAUTION
Caution: To reduce the risk of electric shock, do not
remove cover or back. No user-serviceable parts inside.
Refer servicing to qualified service personnel.
2
WARNING:
TO REDUCE THE RISK OF FIRE OR ELECTRIC SHOCK, DO NOT
EXPOSE THIS APPLIANCE TO RAIN OR MOISTURE.
CAUTION:
CHANGES OR MODIFICATIONS NOT EXPRESSLY APPROVED
BY THE PARTY RESPONSIBLE FOR COMPLIANCE WITH THE
FCC RULES COULD AVOID THE USERS AUTHORITY TO
OPERATE THIS EQUIPMENT.
FCC Information
This equipment has been tested and found to comply with the limits for
a Class B digital device, pursuant to Part 15 of the FCC rules. These
limits are designed to provide reasonable protection against harmful
interference in a residential installation. This equipment generates, uses
and can radiate radio frequency energy and, if not installed and used in
accordance with the instructions, may cause harmful interference to
radio Communications. However, there is no Guarantee that
interference will not occur in a particular installation. If this equipment
does cause harmful interference to radio or television reception, which
can be determined by turning the equipment off and on, the user is
encouraged to try to correct the interference by one or more of the
following measures:
- Reorient or relocate the receiving antenna.
- Increase the separation between the equipment and the receiver.
- Connect the equipment into an outlet on a circuit different from
that to which the receiver is connected.
- Consult the dealer or an experienced radio/TV technician for help.
1. Read these instructions.
2. Keep these instructions.
3. Heed all warnings.
4. Follow all instructions.
5. Do not use this apparatus near water. For example, do not use
near a laundry tub, in a wet basement, or near a swimming pool,
and the like.
6. Clean only with dry cloth.
7. Do not block any ventilation openings. Install in accordance with the
manufacturer's instructions. Slots and openings in the cabinet back
or bottom are provided for ventilation, to ensure reliable operation
of the TV and to protect it from overheating. These openings must
not be blocked or covered. The openings should never be blocked
by placing the TV on a bed, sofa, rug, or other similar surface.
8. Do not install near any heat sources such as radiators, heat
registers, stoves, or other apparatus (including amplifiers) that
produce heat.
9. Do not defeat the safety purpose of the polarized or grounding-type
plug. A polarized plug has two blades with one wider than the other.
A grounding-type plug has two blades and a third grounding prong.
The wide blade or the third prong is provided for your safety. If the
provided plug does not fit into your outlet, consult an electrician for
replacement of the obsolete outlet.
10. Protect the power cord from being walked on or pinched
particularly at plugs, convenience receptacles, and the point where
they exit from the apparatus.
11. Only use attachments/accessories specified by the manufacturer.
12. Use only with cart, stand, tripod, bracket, or table specified by the
manufacturer, or sold with the apparatus. When _ .,_1_.
cart is used, use caution when moving the
cart/apparatus combination to avoid injury from
tip-over. A TV and cart combination should be
moved with care. Quick stops, excessive force,
and uneven surfaces may cause the TV and cart
combination to overturn.
13. Unplug this apparatus during lightning storms or when unused for
long periods of time. For added protection for this TV receiver
during a lightning storm, or when it is left unused for long periods
of time, unplug it from the wall outlet and disconnect antenna or
cable system. This will prevent damage to the TV due to lightning
and power line surges.
14. Refer all servicing to qualified service personnel. Servicing is
required when the apparatus has been damaged in any way, such
as power-supply cord or plug is damaged, liquid has been spilled
or objects have fallen into the apparatus, the appratus has been
exposed to rain or moisture, does not operate normally, or has
been dropped.
15. This TV should be operated only from the type of power supply
indicated on the rating label. If customer is not sure the type of
power supply in your home, consult your appliance dealer or local
power company. For TV remote control battery power, refer to the
operating instructions.
16. The TV set shall not be exposed to dripping or splashing. No
objects filled with liquids, such as vases, shall be placed on the TV
set.
17. Never push objects of any kind into this TV through openings as
they may touch dangerous voltage or other electrical parts that
could result in fire or electric shock. Never spill liquid of any kind
into the TV.
18. Unplug the TV from the wall outlet before cleaning. Do not use
liquid or aero cleaners. Use a damp cloth for cleaning.
19. This TV should never be placed near or over a radiator or heat
resource. This TV should not be placed in a built-in installation such
as a bookcase or rack unless proper ventilation is provided or the
manufacturer's instructions have been adhered to.
20. Do not place this TV on an unstable cart, stand, tripod, bracket, or
table. The TV may fall, causing serious injury to someone, and
serious damage to the appliance.
21. Do not attempt to service this TV by yourself because opening or
removing covers may expose you to dangerous high voltage or
other hazards. Refer all servicing to qualified service personnel.
22. This device complies with Part 15 of the FCC Rules. Operation is
subject to the following two conditions: (1) this device may not
cause harmful interference, and (2) this device must accept any
interference received, including interference that may cause
undesired operation.
23. WARNING: To prevent injury, this apparatus must be securely
attached to the floor/wall in accordance with the installation
instructions.
24. To reduce the risk of electric shock, the grounding of center pin of
plug must be maintained.
25. If an outside antenna or cable system is connected to the TV, be
sure the antenna or cable system is grounded to provide some
protection against voltage surges and built-up static charges.
Section 810 of the National Electrical Code, ANSI/NFPA NO.70,
provides information with respect to proper grounding of the mast
and supporting structure, grounding of the lead-in wire to an
antenna discharge unit, size of grounding conductors, location of
antenna discharge unit, connection to grounding electrodes, and
requirements for the grounding electrodes. (See figure A)
LEAD IN
W_RE
GROUND CLAMP
ANTENNA
DISCHARGE UNIT
(NEC SECTION 810 20)
GROUNDING CONDUCTORS
(NEC SECTION 810 2/)
ELE I:: GROUNDING
EQUIPMENT ELECTRODE SYSTEM
(NEC ART 250 PARTH)
Figure A
Safety Strap
Caution: Pushing, pulling or climbing on the TV may cause the TV
falling. Do not let chlidren climb or hang on the TV. Always place the TV
on a sturdy, level, stable surface that can hold the weight of TV. And if
possible, secure the TV according to the instruction below (Note: The
fastening components such as screws are not supplied with TV).
Step one: Insert the M6 mounting screws into the upper two wall
mounting screw holes and fasten them (Figure B).
Step two: Insert anchors to wall and connect the bolts and anchors
with ropes or chains (Figure C).
Figure B Figure O
Before Turning On TV
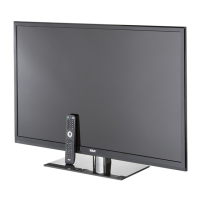
Check Accessories
Check the accessorie, s that are packed with your 1_/.
:t _1_[I]11:[1(I] _I I I{I] I
PARTNO.: RE20QPSO
1
SCREWS
i _- M4 x 12mm, 6pcs
Part# RS01TM412H
4_bscrews
"_ M4 x 14mm, 4pcs
Part# RS01 PWA414HT
%
_TZ::T................
c::::::::_::::::::::::::
iiiiiiE_i............
USER'S GUIDE QUICK START GUIDE PATENT CARD
Setup rv Table Stand
Please refer to TV Stand Installation guide in next page to carry out
stand installing.
Select rv Location
Select a flat, stable table to place your TV set. Please follow the Safety
Instructions when placing the TV.
Connection and Using
After placing your TV properly, you can connect the TV with power
supply and cable components. For further information, see page 4 to
page 5.
Note." Above accessories are subject to change without notice.
3
TV LED46C45RQ is packaged with the TV stand separated from the
cabinet. To setup the TV table stand, please carry out the installation
according to the instructions below.
Step One
Place the TV faced down on a soft cloth or cushion to prevent the LED
LCD panel from being damaged.
The LED LCD panel can be
scratched easily, so please:
1. Choose an absolutely flat
surface to place the TV on.
2. Use soft cloth or cushion to
face the TV panel.
Do not put TV on the table
directly.
s unplug the AC cord first
when installing/removing the stand.
Step Two
Take the neck. Please align the screw holes of the neck and the TV, and
then insert the 6 screws into the 6 holes on the neck and tighten them.