Station presets
To store a station as preset:
1. Tune to a radio station.
2. Press STORE.
• An available preset location
(e.g.
) shows on the display.
3. Press << or >> (or RECALL) to select
a desired preset location (01 - 20).
4. Press STORE.
• shows on the display as
confi rmation.
• You can save up to 20 preset
stations.
To recall a preset station:
1. In radio mode, press RECALL.
• The existing preset station number
shows on the display.
2. Press << or >> (or RECALL) to select
a desired preset station.
General controls
Clock
Clock
Wash ng o n
Oregon
Ar zona
New Mexco
Tex a s
Oklahoma
Kansas
Co o ado
U ah
Nevada
Ca fo nia
daho
Montana
No th Dako a
Neb aska
M nneso a
owa
M ssou i
Arka sas
Mss ss ppi
A bama
Lous ana
F o da
Georg a
W sconsn
l no s
nd ana
Oh o
M chgan
New e sey
New York
Conn
R I
ass
N H
Mane
Wyom ng
Pennsyvan a
Vi g na
V g n a
W s
Deaware
Md
a o na
No h Ca oi a
u h
O mpa
Boi e
H ena
Sat Lake C y
Pe e
Che enn
ncon
St P ul
Des M nes
Madson
Lan ng
H r i bu
re on
ovdence
H o d
on o d
Abany
M n pe er
Aug s a
son Ci y
Pho n x
n a Fe
Den er
O ah ma Ciy
A s n
Je er on C y
Li e Ro k
a kson
Sprng e d
nd napo
Mon ome y
Coumbus
h e on
C umb a
A l n a
Rchmo
Rae gh
A napo s
os n
Washington DC
To eka
w Yok
Chi ago
Mami
Ph adel ha
D t o
H us o
Da as
Sea e
L s Veg s
os Angees
San F a c co
S c amen o
Memphs
New O eans
St Lou
B on
Roug
Saem
Bi ma ck
Sou h Dako a
Tennessee
Ken ucky
Nashv e
ankor t
Pacific Mountain Central Eastern
Summer
W nter
W nnpeg
Saska oon
Reg na
Yukon
Terr tory
Alberta
S skatchewan
Man toba
Ontario
British
Columbia
Quebec
New oun and
Northwest Territories
Nunavut
Pacific Atlantic
Hawaii-
Aleutian
Alaska
Mountain Central Eastern
Summer W nter
Atlantic
Puerto Rico
(AST)
(EST)(CST)(MST)(PST)
(HST)
(AKST)
(AST)
(EST)(CST)(MST)(PST)
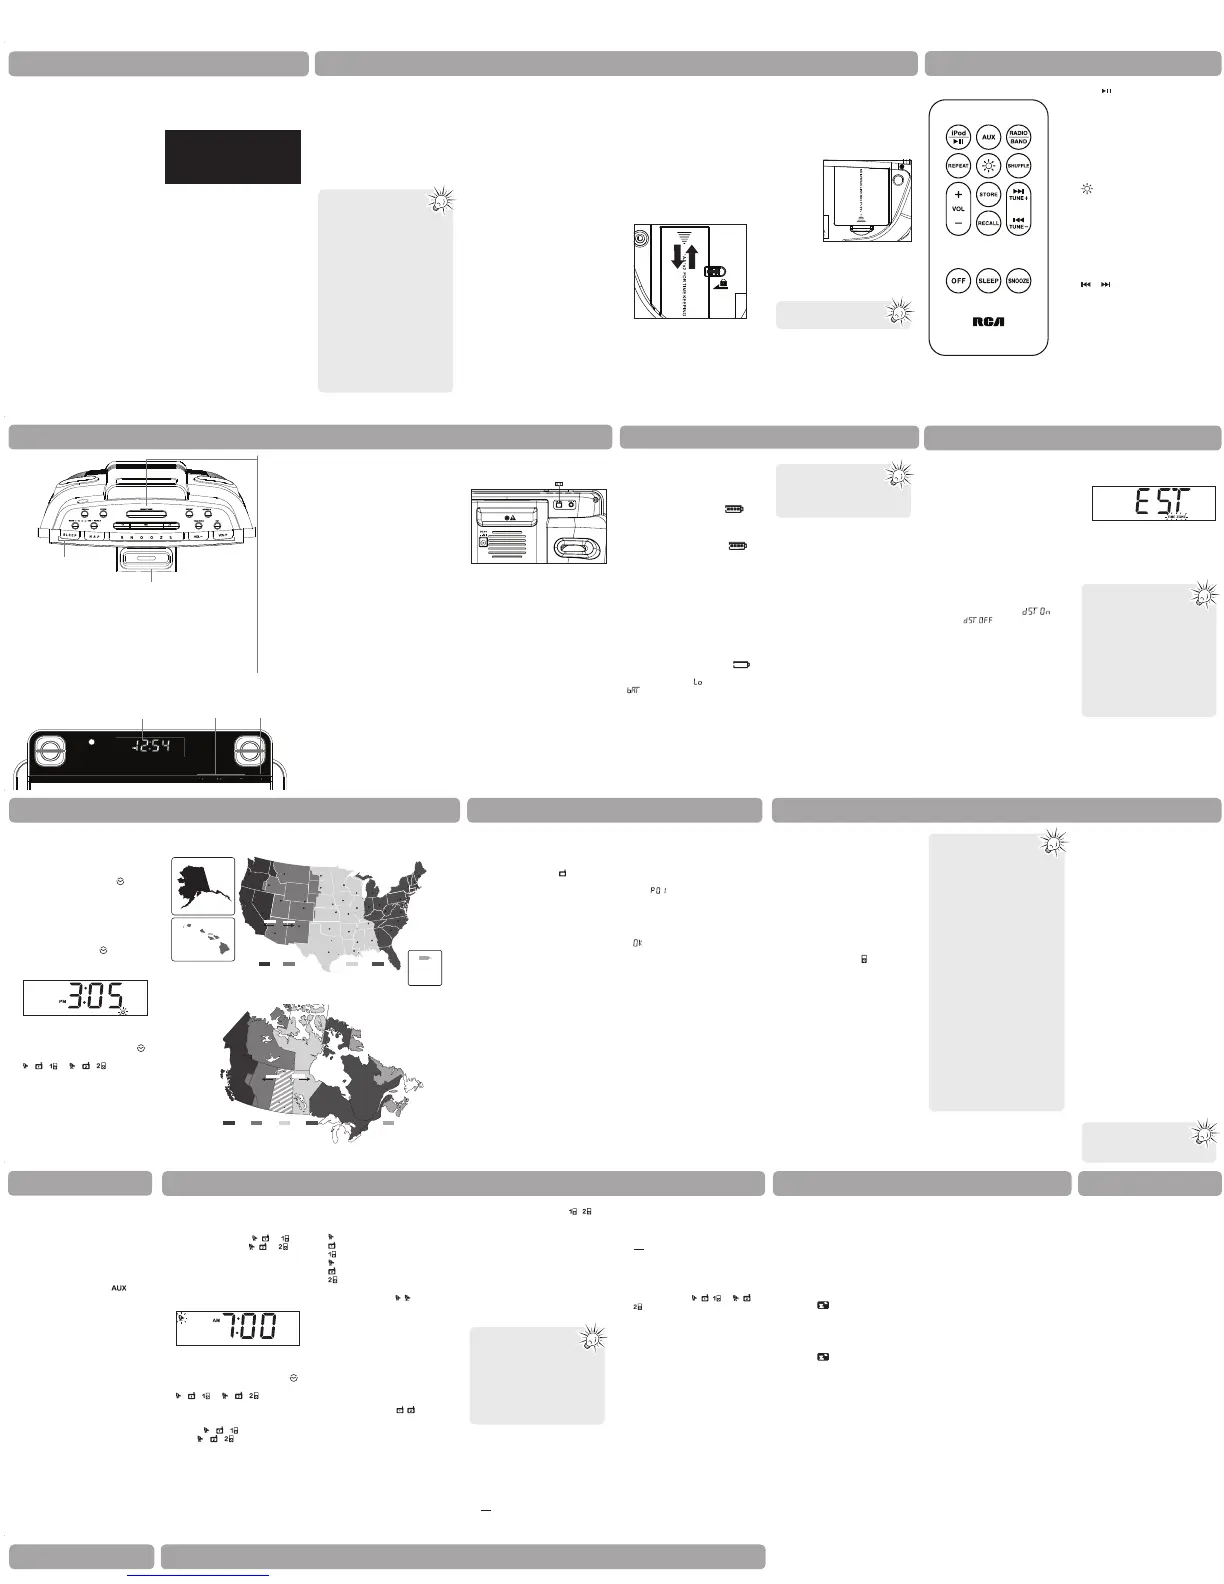
Canadian time zones
US time zones
Radio iPod/iPhone
Setting clock manually
In case the memory holding batteries
are accidentally removed, set the clock
manually as below:
1. Press SET on the top of the unit
until the clock setting icon
fl ashes on the display.
2. Press << or >> on the top of the
unit to set the clock time. The time
decrements or increments follow by
a faster rate when you press and
hold the button.
• The clock setting icon
fl ashes
when you are setting the time. AM
or PM icon also lights beside the
time.
3. To save and exit the clock setting,
wait for about 5 seconds or press
SET until the clock setting icon (
) is off and the wake setting icons (
/ / or / / ) are either
off or stop fl ashing.
Listening to the radio
To turn on or off radio:
1. Press RADIO on the front of the
unit to turn on the radio.
• The radio mode icon (
) lights on
the display.
2. Press OFF to turn off the radio, or
press AUX or iPod to select another
sound mode.
To select radio band:
• In radio mode, press RADIO to
select the radio band (AM/FM).
• The selected radio band icon lights
on the display.
To tune frequency:
• Press << or >>. The selected
frequency shows on the display.
• Press and hold to automatically
search for the next available station.
Antenna
Built-in AFC
The Built-in Automatic Frequency
Control (AFC) works only on FM. It helps
reducing drift on FM reception and
keeping the radio locked in on the FM
station to which it is tuned.
AM Antenna
For AM reception, connect the AM
antenna loop to the back of the radio.
Stretch out the antenna cord to its
fullest length and rotate the antenna
for better reception.
Listening to iPod/iPhone
To connect iPod/iPhone:
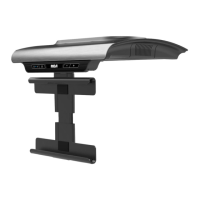
1. Push the universal dock for iPod/
iPhone on the front of the unit to
open it.
2. Place the appropriate adapter
provided with your iPod/iPhone and
then place your iPod/iPhone on the
universal dock for iPod/iPhone.
To select iPod/iPhone mode:
• Press iPod on the front of the unit
to select the iPod mode.
• The iPod mode icon (
) lights on
the display.
• Playback from the iPod/iPhone starts
automatically.
• If no iPod/iPhone is connected
in the iPod mode, the unit will
exit the iPod mode and turn off
automatically.
To control the playback:
1. During playback, press iPod to
pause the playback and press again
to resume.
2. Press << or >> to skip to the
previous or next fi le.
• Press and hold << or >> to search
backward or forward.
3. Press SHUFFLE to play the fi les in
random order in the iPod/iPhone.
Press again to cancel the function
(shows on the iPod/iPhone display).
4. Press REPEAT to select a repeat
playback mode (repeat 1 or repeat
all). Press REPEAT until no repeat
mode is selected (shows on the
iPod/iPhone display) to cancel the
repeat playback.
To charge the iPod/iPhone:
• You may charge the battery of your
iPod/iPhone through the universal
dock for iPod/iPhone while the unit
is turned off (standby mode) or in
the AUX, Radio (FM band only) or
iPod mode. Charging control should
be operated on the iPod/iPhone. It
is not necessary to charge in iPod
mode, unless you are listening to
the iPod/iPhone.
Auto clock set
You do not have to set the clock time as
a built-in automatic time set system is
equipped in this clock powered by 2 AA
batteries (included and installed).
To get the clock time shown
correctly:
1. Plug for power
• Plug in the AC/DC adaptor into an
AC power outlet.
2. Select daylight saving
• Press and hold DST on the top of
the unit to turn on/off in areas
observing/not observing such time
change.
• A confi rmation message
(on) or (off) shows on the
display when you make a selection.
3. Select your time zone
• Press TIME ZONE repeatedly on the
top of the unit to cycle through the
time zones (EST > CST > MST > PST
> AKST > HST > AST > EST...). The
default time zone is Eastern (EST)
(refer to the maps on the right).
• The selected time zone shows on
the display briefl y with TIME ZONE
icon fl ashes on the display.
• Your clock is now set and ready
for use.
WARNING: Please avoid playing with
these buttons after entering the Clock/
Alarm set mode.
Battery Level
Battery icon
• This clock radio can be powered by
4 AA batteries (not included). When
the unit is disconnected from the
AC power and operates by the 4 AA
batteries, the battery icon
will
be lighted to indicate the unit is
operating on battery.
• When the unit is reconnected to the
AC power, the battery icon
will not be displayed to indicate the
unit is operating on AC power.
• LCD backlight and touch control
keys on the front panel will be
turned on for a while when the
keys are pressed.
• iPod/iPhone charging is not
available when operating by
batteries.
Low Battery Level
When the battery level of the 4 AA
batteries is low, the battery icon
will be fl ashing as an indication. At the
same time, the text “
” and
“ ” will be fl ashing alternatively for
a while. The Radio, iPod and AUX mode
cannot be accessed. Replace with new
batteries to resume opearation.
When the battery level drops even
lower, the unit will be shut down.
AM ANT – Connect to the AM loop
antenna
AUX IN – Auxiliary input jack
DC jack – Connect to the power
adapter
AM loop
antenna socket
Back view
Be sure to replace with new
batteries with the AC power
connected. Otherwise, the
memory of time and alarm settings
may be lost.
• When the N-hance App is
running, the clock will be
synced to the clock time
on the iPhone or iPod.
• The time on your iPhone is
provided by your mobile phone
service. The time on your iPod
is provided from iTunes during
the last connection to your
computer. Please note that it
is possible to have up to 59
seconds time difference between
your RCA clock display and your
iPhone or iPod time display.
iPod/iPhone charging is
not available when dock
is operating under battery
power.
Made for:
• iPhone 4 16GB, 32GB
• iPhone 3GS 8GB, 16GB,
32GB
• iPhone 3G 8GB, 16GB
• iPod touch 4th generation 8GB,
32GB, 64GB
• iPod touch 3rd generation 32GB,
64GB
• iPod touch 2nd generation 8GB,
16GB, 32GB
• iPod touch 1st generation 8GB,
16GB, 32GB
• iPod nano 6th generation 8GB,
16GB
• iPod nano 5th generation 8GB
or 16GB
• iPod nano 4th generation
(video) 8GB, 16GB
• iPod nano 3rd generation
(video) 4GB, 8GB
• iPod classic 80GB, 120GB, 160GB
• iPod nano 2nd generation
(aluminum) 2GB, 4GB, 8GB
• iPod nano 1GB, 2GB or 4GB
• iPod 5th generation (video)
30GB, 60GB, 80GB
• iPod mini 4GB, 6GB
• iPod 4th generation 20GB, 40GB
• iPod 4th generation (color
display) 20GB, 30GB, 40GB, 60GB
Universal dock for iPod/iPhone
(push to open or close)
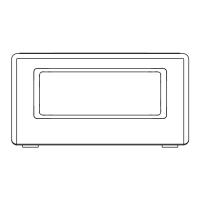
Top view
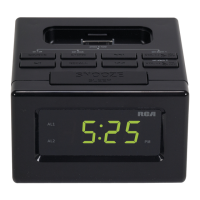
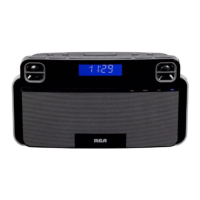
Front view
Off
(standby
mode)
Sound source selectionDisplay
RECALL – Recall preset radio stations
STORE – Save radio stations as presets
BRIGHTNESS – Adjust display brightness
REPEAT – Select repeat playback mode for iPod/iPhone
SHUFFLE – Select random playback mode for iPod/
iPhone
WAKE 1 – Activate or change Wake 1 settings
WAKE 2 – Activate or change Wake 2 settings
<< or >> – Search radio frequencies; skip or search music
fi le in iPod/iPhone; adjust clock time, wake time and
snooze period
SET – Enter setting mode for setting clock time, Wake 1
time or Wake 2 time
TIME ZONE – Time zone selection (refer to “Clock”)
DST – Daylight saving time (refer to “Clock”)
SLEEP – Refer to “Sleep
function”
NAP – Refer to “NAP function”
SNOOZE – Turn off the wake
function momentarily; turn off
the sleep function
VOL – / VOL + – Adjust volume
 Loading...