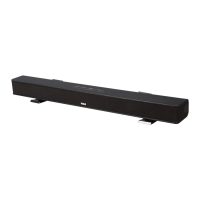
Home Theater Sound Bar
RTS735E
User Manual
Safety Precautions
It is important to read this user manual prior to using your new product for the first
time.
FCC INFORMATION
This device complies with Part 15 of the FCC rules. Operation is subject to the following
two conditions:
(1) This device may not cause harmful interference, and
(2) This device must accept any interference received, including interference that may
cause undesired operation.
NOTE: This equipment has been tested and found to comply with the limits for a Class B
digital device, pursuant to part 15 of the FCC Rules. These limits are designed to provide
reasonable protection against harmful interference in a residential installation. This
equipment generates, uses, and can radiate radio frequency energy and, if not installed
and used in accordance with the instructions, may cause harmful interference to radio
communications. However, there is no guarantee that interference will not occur in a
particular installation. If this equipment does cause harmful interference to radio or
television reception, which can be determined by turning the equipment off and on,
the user is encouraged to try to correct the interference by one or more of the following
measures:
• Reorientorrelocatethereceivingantenna.
• Increasetheseparationbetweentheequipmentandreceiver.
• Connecttheequipmentintoanoutletonacircuitdifferentfromthattowhichthe
receiver is connected.
• Consultthedealeroranexperiencedradio/TVtechnicianforhelp.
WARNING:Changesor modicationstothisunitnotexpresslyapprovedbytheparty
responsible for compliance could void the user’s authority to operate the equipment.
FOR CUSTOMERS IN CANADA
This apparatus complies with the Class B limits for radio noise emission set out in radio
interference regulations.
This Class B digital apparatus complies with Canadian ICES-003.
Cet appareil numérique de la classe B est conforme à la norme NMB-003 du Canada.
Warning:
• TheACadapterisusedasdisconnectdeviceanditshouldremainreadilyoperable
during intended used. In order to disconnect the unit from the mains completely, the
AC adapter should be disconnected from the mains socket outlet completely.
• TheACadapterofunitshouldnotbeobstructedORshouldbeeasilyaccessedduring
intended use.
• Minimum10cm(4inches)distancesaroundtheunitforsufcientventilations.
• Theventilationshouldnot be impededbycoveringtheventilationopeningswith
items such as newspaper, table-cloths, curtains, etc.
• Nonakedamesourcessuchaslightedcandlesshouldbeplacedontheunit.
ON SAFETY
• Shouldanyobjectsorliquidsfallintotheunit,disconnectthepowersupplyandhave
the unit checked by qualified personnel before any further operation.
• Theunitshallnotbeexposedtodrippingorsplashingandthatnoobjectslledwith
liquid, such as vases, shall be placed on the unit.
ON USE
Never use the unit where it would be subject to:
- Heat sources such as radiators or air ducts.
- Direct sunlight.
Please read and save for future reference
Some of the following information may
not apply to your particular product;
however, as with any electronic product,
precautions should be observed during
handling and use.
1. Read these instructions.
2. Keep these instructions.
3. Heed all warnings.
4. Followallinstructions.
5. Do not use this apparatus near
water.
6. Clean only with a dry cloth.
7. Do not block any ventilation
openings. Install in accordance with
the manufacturer’s instructions.
8. Do not install near any heat sources
such as radiators, heat registers,
stoves, or other apparatus (including
amplifiers) that produce heat.
9. Do not defeat the safety purpose of
the polarized or grounding-type. A
polarized power plug has two blades
with one wider than the other. A
grounding type power plug has two
blades and a third grounding prong.
The wide blade or the third prong is
provided for your safety. When the
provided power cord does not fit
into your AC power outlet, consult
an electrician for replacement of the
obsolete outlet.
10. Protect the AC power cord from being
walked on or pinched particularly
at the power plug, convenience
receptacles, and the point where
theyexitfromtheapparatus.
11. Only use attachments/accessories
specified by the manufacturer.
12. Use only with the
cart, stand, tripod,
bracket, or table
specified by the
manufacturer, or sold
with the apparatus.
When a cart is
used, use caution
when moving the cart/apparatus
combination to avoid injury from tip-
over.
13. Unplug this apparatus during
lightning storms or when unused for
long periods of time.
14. Referallservicingtoqualiedservice
personnel. Servicing is required when
the apparatus has been damaged in
any way, such as the AC power cord is
damaged, liquid has spilled or objects
have fallen into the apparatus, the
apparatus has been exposed to
rain or moisture, does not operate
normally, or has been dropped.
IMPORTANT SAFETY INSTRUCTIONS
• Point the remote control at the REMOTE
SENSOR located on the unit (see Front Panel
illustration for precise location).
• When there is a strong ambient light
source, the perform ance of the infrared
REMOTE SENSOR may be degraded, causing
unreliable operation.
• The recommended effective distance
for remote operation is about 16 feet (5
meters).
TO CHANGE REMOTE BATTERY
1. Open the battery door.
2. InsertoneCR2032(3V)sizebattery.
Remote Control
BATTERY REPLACEMENT
When the battery becomes weak, the operating distance of the remote control is
greatly reduced and you will need to replace it.
Note: If the remote control is not going to be used for a long time, remove the battery
to avoid damage caused by battery leakage corrosion.
Warning:
• Donotdisposeofbatteryinre;batterymayexplodeorleak.
• Donotexposebatterytoexcessiveheatsuchasbrightsunshine,reorsimilarheat
sources.
• Possibilityofexplosionifbatteryisincorrectlyreplaced.Replacewithonlythesame
or equivalent type.
Caution: When discarding battery, environmental problems must be considered and
local rules or laws governing the disposal of the battery must be strictly followed.
Portable Cart
Warning
1. STANDBY/ONbutton
2. AUX 1 button
3. AUX 2 button
4. LINEINbutton
5. VOL+/-button
6. BASS+/-button
7. TREBLE+/-button
8. MUTE button
Accessories
Remote control (with battery) ..............................................................................................x1
AC power adapter .....................................................................................................................x1
Audio Cable ................................................................................................................................x1
Please locate the included accessories.
Toorderreplacementunits,visithttp://www.RCAav.com
USING THE REMOTE CONTROL
REMOTE CONTROL
SOUND BAR
Take out the plastic sheet before
operating the Remote Control.
Re
m
ove
b
e
fore
u
s
e
Location of Controls
1. STANDBY/ONbutton
2. SOURCE button
3. STANDBY/ONindicator
Indicator ON: Unit is in standby mode.
Indicator OFF: Unit is turned on.
4. AUX1/LEVELindicator
5. AUX2/LEVELindicator
6. LINEIN/LEVELindicator
7. VOLUME+/-button
8. AUX2L/Rjack
9. AUX1L/Rjack
10. DC IN jack
11. Remote Sensor
12. STAND
13. LINEIN3.5mmjack
Configuring the Stands for Wall-mount Applications
Connections
Basic Operation
AVCMULTIMEDIA(“AVC”)makesthefollowinglimitedwarranty.Thislimitedwarrantyextendto
the original consumer purchaser and is limited to non-commercial use of the product.
One Year Parts & Labor Warranty
AVCproductspurchasedintheUnitedStatesarewarrantedtobefreefromdefectsinmaterials
or workmanship for a period of one year from the date of their original retail purchase. If the unit
fails to conform to this warranty, we will service the product using new or refurbished parts and
products,atAVC’ssolediscretion.
Duringa period ofone yearfrom theeffectivewarrantydate,AVCwill provide,whenneeded,
service labor to repair a manufacturing defect at its designated Service Center. To obtain warranty
serviceintheUnitedStates,youmustrstcallourCustomerSupportCenterat1-800-506-5746
or1-877-252-6873,duringthehourslistedintheboxbelow.Thedeterminationofservicewillbe
madebyAVCCustomerSupport.PLEASEDONOTRETURNYOURUNITTOAVCWITHOUTPRIOR
AUTHORIZATION. New or remanufactured replacements for defective parts or products will be
usedforrepairsbyAVCatitsdesignatedServiceCenterforoneyearfromtheeffectivewarranty
date. Such replacement parts or products are warranted for an additional one year from the date
of repair or replacement. The Customer will be required to ship the unit to the Service Center
indicated at the time Customer Support is contacted to make the necessary repairs. The customer
is responsible for all transportation charges to the service facility.
Packaging and Shipping Instruction
WhenyousendtheproducttotheAVCservicefacilityyoumustusetheoriginalcartonboxand
packingmaterialoranequivalentasdesignatedbyAVC.
LIMITED WARRANTY
Your Responsibility
(1) You must retain the original sale receipt to provide proof of purchase.
(2) These warranties are effective only if the product is purchased and operated in the U.S.A. or
Canada.
(3)Warranties extend only to defects in material or workmanship,and do not extend to any
product or parts which have been lost or discarded, or damage to product or parts caused by
misuse, accident, improper operation or maintenance, or use in violation of instructions provided
withtheproduct,ortoproductwhichhasbeenalteredormodiedwithoutauthorizationofAVC,
or to products or parts thereof which have had the serial number removed or changed.
Out of Warranty
Intheeventyourproductrequiresrepairafterthelimitedwarrantyperiodhasexpired,please
contact our Customer Support Center at 1-800-506-5746, 1-877-252-6873 or www.RCAav.
com
Hours: Monday–Thursday: 9am–7pm, Friday: 9am–5pm, Saturday: 9am–NOON Eastern time.
Important: You are responsible for any transportation, shipping or insurance relative to the
return of product to our Product Returns Cente
All warranties implied by state law, including the implied warranties of merchantability and fitness
foraparticularpurpose,areexpresslylimitedtothedurationofthelimitedwarrantiessetforth
above.Withtheexceptionofanywarrantiesimpliedbystatelawasherebylimited,theforegoing
warranty is exclusive and in lieu of all other warranties, guarantees, agreements and similar
obligations of manufacturer or seller with respect to the repair or replacement of any parts. In no
eventshallAVCbeliableforconsequentialorincidentaldamages.
Noperson,agent,distributor,dealerorcompanyisauthorizedtochange,modifyorextendthe
terms of these warranties in any manner whatsoever. The time within action must be commenced
toenforceanyobligationofAVCarisingunderthewarrantyorunderanystatute,orlawofthe
United States or any state thereof, is hereby limited to one year from the date of purchase. This
limitation does not apply to implied warranties arising under state law.
This warranty gives you specific legal rights and you may also have other rights, which may vary,
from state to state. Some states do not allow limitation on how long an implied warranty lasts,
when anaction maybe brought, or the exclusionor limitation of incidental orconsequential
damages, so the above provisions may not apply to you.
For more information on other products and services, please visit our web site at www.RCAav.
com.
Important:Alsokeepyour“BillofSale”asproofofpurchase.
Serial no ................................................................... Invoice no ..................................................................................
Date purchased ..................................................... Dealer name .............................................................................
FORSERVICEANDREPAIR,PLEASEVISITwww.RCAav.com
AUX 1 OR AUX 2
Use the supplied Audio cable to connect
AUX 1 or AUX 2 on the Sound Bar (rear
panel)totheAUDIOOUTofyourTV,Set-
TopBoxorBlu-ray/DVDPlayer.Besureto
match connector colors.
LINE IN
Plug one end of a 3.5mm cable (not
included) into the LINE IN jack (side
panel) on the Sound Bar into your iPad®,
iPhone®, iPod® or other audio devices.
1. Press STANDBY/ON
button to turn on the
unit - the Standby/
ON indicator on top of
Sound Bar will turn off.
2. Press SOURCE to select
AUX 1, AUX 2 or LINE
IN source (input). The
LEDslocatedontopof
Sound Bar will indicate
the currently-selected
source.
3. Press VOLUME +/- ,
BASS+/-orTREBLE+/-
to adjustVolume, Bass
or Treble levels. When
adjustingVolume,Bass
or Treble, the three
LEDs will temporarily
display the current
level setting (see
illustration).
Caution:
• WerecommendthatWall-mountingbecarriedoutby aprofessional.Thestands’
“key-holes” are intended for use with #8 (Imperial) or M4 (Metric) pan head
screws. Additional or alternative parts may be needed for certain types of wall
constructions.
• Make sure that the wall-mount is xed securely enough so that it meets safety
standards.
• Allowatleast2”(5cm)separationinalldirectionsbetweentheSoundBarandother
AVequipment(suchasyourTVorSet-TopBox).
• Itisrecommendedthatallcables(ACadapterandAudiocables)beconnectedto
the Sound Bar before placing it on the wall.
For Freestanding For Wall-mount
Specifications and external appearance are subject to change without notice.
Need more help?
Please visit online help at www.RCAav.com
Troubleshooting
Limited Warranty
SOLUTIONS
• Makesureitispluggedin.
• PresstheSTANDBY/ONbuttonlocatedonthetopoftheSound
Bar,andchecktoseeiftheSTANDBY/ONindicatorturnsoff.
• PresstheVOL+buttonlocatedonthetopoftheSoundBar.
• Ensurethe source you’veselectedisoutputtingaudio. If you’re
using“audioout”fromyourTV,pleaseensureyourTViscongured
tooutputaudio(seeTV’smenusettings).
• EnsureyourAVconnectionsareproperlymade(ensureyoudon’t
have any loose connections).
• Ensure you’ve selected the correct source (input) - the LEDs
located on the top of the Sound Bar will indicate the currently-
selected source (input).
• Pleaseensureyou’veremovedtheplasticsheetfromthebattery
compartment. If battery is weak, please replace the battery and
ensure the new battery is installed correctly.
• Pleaseensurethereisnothingblockingtheremotesensoronthe
front of the Sound Bar.
PROBLEMS
The unit does
not switch on.
I have no sound.
The remote
control doesn’t
work
Power Supply
USING THE AC ADAPTER
Using an AC adapter other than the one supplied with the unit may damage the unit.
Caution:
• Beforeuse,ensuretheratedvoltageoftheadaptermatchesyourlocalvoltage.
• Theincluded ACadapter is for use with this unit only. Do not use it with other
equipment.
• Ifyouarenotgoingtousetheunitforalongtime,disconnecttheACadapterfrom
the wall outlet.
• WhenevertheACadapterispluggedintoawalloutlet,theACadapterwilldraw
some power, even when the Sound Bar is turned off.
Printed in China
Press VOLUME, BASS or TREBLE +/- buttons
to adjust levels
MAX
MIN
VOLUME, BASS and TREBLE Level Indicators
Blu-ray/
DVD Player
Set-Top Box
iPod
®
or other
Audio Devices
TV
The Sound Bar can be placed freestanding on a table or mounted on a wall. If you
choose to mount the Sound Bar on a wall, please follow instructions below for
removing the stands.
Using a screwdriver, remove the stands from their original configuration (freestanding)
as shown and re-attach to the Sound Bar in the configuration as shown (for wall-
mount).
RTS735E IB ENG_SPA.indd 1 2/28/2012 11:00:59