2
D
DD
D
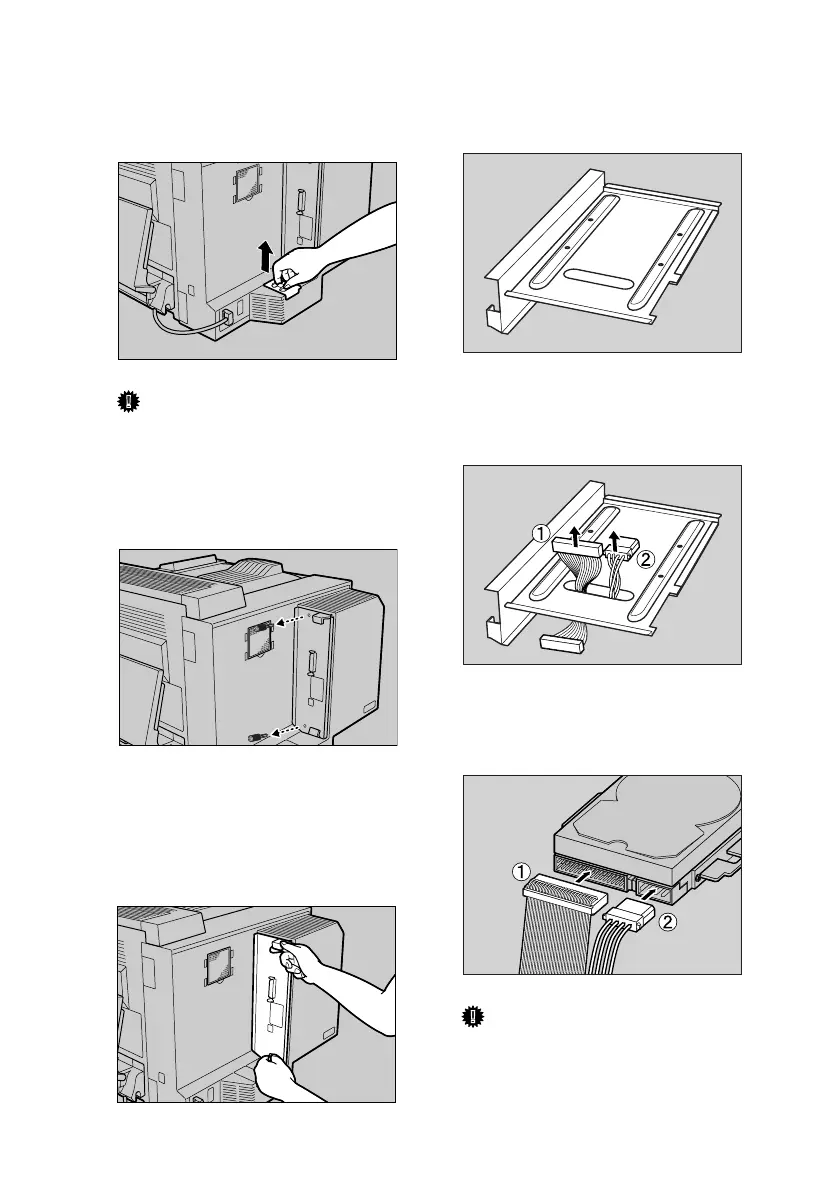
Remove the other dustproof filter
cartridge by lifting it up.
Important
❒ Do not shake the removed car-
tridge. Dust may fall out.
E
EE
E
Remove the two screws fastening
the controller board onto the back
of the printer.
The removed screws are used in
step
L
to refasten the controller
board.
F
FF
F
Use the handles to pull the con-
troller board slowly out.
Install the printer hard disk on the
back of the controller board.
G
GG
G
Pass the flat cable (A
AA
A) and power
cable (B
BB
B) up through the hole in
the controller board.
H
HH
H
Connect the flat cable (A
AA
A) and
power cable (B
BB
B) to the printer
hard disk.
Important
❒ The shape of the power cable's
plugs differ. Insert the larger
plug in the direction shown.
ZESH760J
ZESH750J
ZESH751J
ZESP406J
ZESP996E
ZESP035J
HardDisk-2003-F_FM.book Page 2 Thursday, August 21, 2003 2:00 PM
 Loading...