TBS 247 ©2006 Roland Corporation U.S.
www.BOSSUS .com
Page 1
Welcome
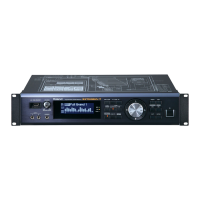
Congratulations on your purchase of the BOSS
BR-600. This TurboStart contains step-by-step
instructions that will quickly introduce you to the
BR-600’s major features.
Listening to the Demo Song
Here’s how to load and listen to the demo song:
1. Press the PAD button until it’s not lit.
2. Press UTILITY.
2. Cursor to “SEL,” and then press ENTER.
3. Turn the TIME/VALUE dial until you see
“01:Lydia.”
4. Press ENTER.
5. After the song loads, press PLAY, and then use
the faders to raise and lower the individual track
levels.
Creating a New Song
To create a new song of your own, use the following
steps;
1. Press the PAD button until it’s not lit.
2. Press UTILITY.
3. Cursor to "NEW,' and then press ENTER.
4. Turn the TIME/VALUE dial to select HiFi(MT2).
5. Press ENTER.
6. When you see “Are You Sure?” press ENTER.
Playing the Built-In Drum Patterns
1. Press the PAD button until it’s not lit.
2. Press ARRANGE.
3. Turn up the RHYTHM fader as well as the
MASTER Fader.
4. Press PLAY.
5. Press EXIT.
Note: When the RHYTHM ON/OFF button is lit, the
rhythm arrangement plays whenever the song plays.
Using the Drum Pads
A unique feature of the BR-600 is its velocity-
sensitive drum pads. To hear them, use the following
steps:
1. Press the PAD button until it’s lit.
2. Raise the RHYTHM and MASTER faders.
3. Tap the drum pads to hear their sounds.
To Change to a Different Kit
1. Make sure the PAD button isn’t lit.
2. Press RHYTHM ON/OFF button so it’s lit.
3. Press PATTERN so it’s lit.
4. Press RHYTHM EDIT.
5. Cursor to "KIT," and then press ENTER.
6. Turn the TIME/VALUE dial to change drum kits.
Recording with the Built-In
Microphones
The BR-600 has two built-in microphones that allow
you to record without external microphones. Use the
following steps to record using the built-in
microphones:
1. Press the MIC button—Tracks 1 and 2 blink red.
2. Turn up the MIC 1 knob until your input signal
causes the peak light to occasionally light.
3. Cursor down so that you’re seeing signal on the
input meter.
4. Turn up the REC LEVEL knob until you se the
INPUT level reaching just slightly over -6 db.
5. Press REC, and then PLAY to begin recording.
6. When you’re finished recording, press STOP.
Note: To listen back, press ZERO to return to the
beginning of song, raise the faders for Track 1 and 2,
and press PLAY.
Applying Loop Effects
1. Press the PAD button until it isn’t lit.
2. Press PAN/EQ/LOOP FX.
3. Cursor to "REV," and then press ENTER.
4. To apply reverb to the signal you want to record,
cursor to “In Send:” and turn the TIME/VALUE
dial to increase or decrease the amount of
reverb you hear added to the input signal.
5. To apply reverb to an already-recorded signal,
press the button under the track it’s recorded on,
and then turn the TIME/VALUE dial to increase
or decrease the amount of reverb you hear
added to that track’s sound.
Note: The instructions for applying Chorus or Delay
are identical except in Step 3, where you should
cursor to “CHO/DLY” instead of “REV.”