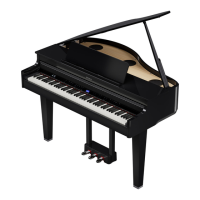
Attach the Legs to the Piano
1. Position the legs
2
in place beneath the piano unit.
2. Place a spring washer
b
and a plain washer
a
in that
order onto each hex socket head cap bolt
c
. Use the
hex wrench
d
to fasten the leg
2
to the piano unit
(at four points) with the bolts
c
.
* Do not tighten bolts
c
excessively. Stop tightening when the
spring washer
b
becomes at.
a
b
c
Tighten as much as
you can by hand,
and then use a hex
wrench to rmly tighten.
2
3. Fasten the two other legs
2
to the piano unit in the
same fashion.
Attach the Lyre Assembly
1. Place a spring washer
b
and a plain washer
a
in that
order onto each hex socket head cap bolt
c
. Use the
hex wrench
d
to fasten the lyre assembly
3
to the
piano unit (at four points) with the bolts
c
.
* Do not tighten bolts
c
excessively. Stop tightening when the
spring washer
b
becomes at.
a
b
c
Tighten as much as
you can by hand,
and then use a hex
wrench to rmly tighten.
3
Attach the Other Parts
1. Use two screws
e
to fasten the headphone hook
f
.
f
e
2. Connect the pedal cord to the Pedal jack, and fasten
the pedal cord with the single cable fastener.
Cable fastener
Pedal cord
Don’t remove the two cable fasteners or the belt
that holds the AC adaptor in place.
NOTE
The pedal cord plug may be damaged if you rotate it while the plug
is only halfway inserted.
Check the illustration above to make sure that the plug faces
correctly before you insert it.
Do not rotate while plug is inserted!
Assembly Procedure
Leaet For a Dealer or a Qualied Professional Installer
© 2023 Roland Corporation
*5100078294-01*
To assure that assembly is carried out properly, make sure to read these instructions before you begin the assembly. Please keep these instructions
close at hand, so you can refer to them whenever you need.
¹ This leaet is for a dealer or a qualied professional installer. The customer should not attempt to assemble
the instrument.
¹ Save this leaet together with the Owner’s Manual so that it will be available for reference by a piano
specialist when disassembling the piano.
¹ Please consult your Roland dealer to assemble the piano. Roland cannot warrant the safety of the assemble operation, if this operation is
carried out by the customer.
¹ Before moving the unit, close the keyboard cover, music rest, and the top lid. Next disconnect the power cord and raise the pedal adjuster.
With the help of enough people to carry the unit safely, lift the unit in a horizontal position and carry it while taking care not to drop it on
anyone’s foot.
When you have decided where to place the unit, rotate the adjuster so that it contacts the oor.
¹ Make sure to keep screws and any other small parts in a safe location that is out of the reach of small children, so such small parts won’t
accidentally get swallowed.
* Do not use a power tool (e.g., an electric screwdriver) to assemble this instrument. Doing so may damage the screws.
* After rmly tightening all the screws, place the unit at a location that is level and sure to remain stable. The unit must never be placed on top of
deep-pile carpet. Otherwise, you risk causing damage to the pedals due to instability and unnecessary movement.
* The surface of the piano unit and the stand are very delicate; handle with care to avoid scratching them.
* Do not place the piano unit directly on the oor. Doing so will damage the connectors and headphone hook on the bottom of the piano.
Parts Check
1
Piano unit 1
2
Legs (stand) 3
3
Lyre assembly 1
a
Plain washers 16
b
Spring washers 16
c
Hex socket head cap
bolts (M8 x 30)
16
d
Hex wrench 1
e
Screws (M4 x 16) 2
f
Headphone hook 1
a
d
e
f
b
c
2
2
2
3
1
1 1

 Loading...