Programmed checking and play
1.
Press the MEMORY/CHECK switch to confirm program-
ming during stop mode.
When the MEMORY/CHECK switch is pressed once, the
programmed track numbers appear sequentially on the
CD display.
2.
Press the PLAY/PAUSE switch. Play will begin from the
first programmed track.
3.
When the last programmed track has played, the player
will go to stop mode.
The programmed memories will remain.
Note:
The programme is cleared in the following cases:
- When the STOP switch is pressed in the stop mode
- When the EDIT switch is pressed in the stop mode
When the OPEN/CLOSE switch is pressed
- When other source is selected
- When the power is switched off
Adding onto a programme
If you want to add more programme numbers to the next
free memory position during stop mode, select the track
number then press the MEMORY/CHECK switch.
It is impossible to change the programmed entry or to add
a programme between the previous programmes.
Note:
You may find that the unit accidentally functions incor-
rectly, even if you press the appropriate switch(es). When
this occurs, turn the player off. After a few seconds, turn the
player on and resume operation.
RECORD OR VIDEO EQUIPMENT PLAY
1.
Press the PHONO or VIDEO FUNCTION switch.
2.
Adjust the volume, BALANCE and GRAPHIC EQUAL-
IZER controls to the desired sound level and sound
equalization.
COMPACT CASSETTE
Note:
Do not use any endless tape with this unit.
Inserting and removing the cassette
Open the cassette compartment lid by pressing the STOP/
EJECT button. Insert the cassette placing the exposed
section of tape at the bottom. Close the lid.
Press the STOP/EJECT button, to remove the cassette.
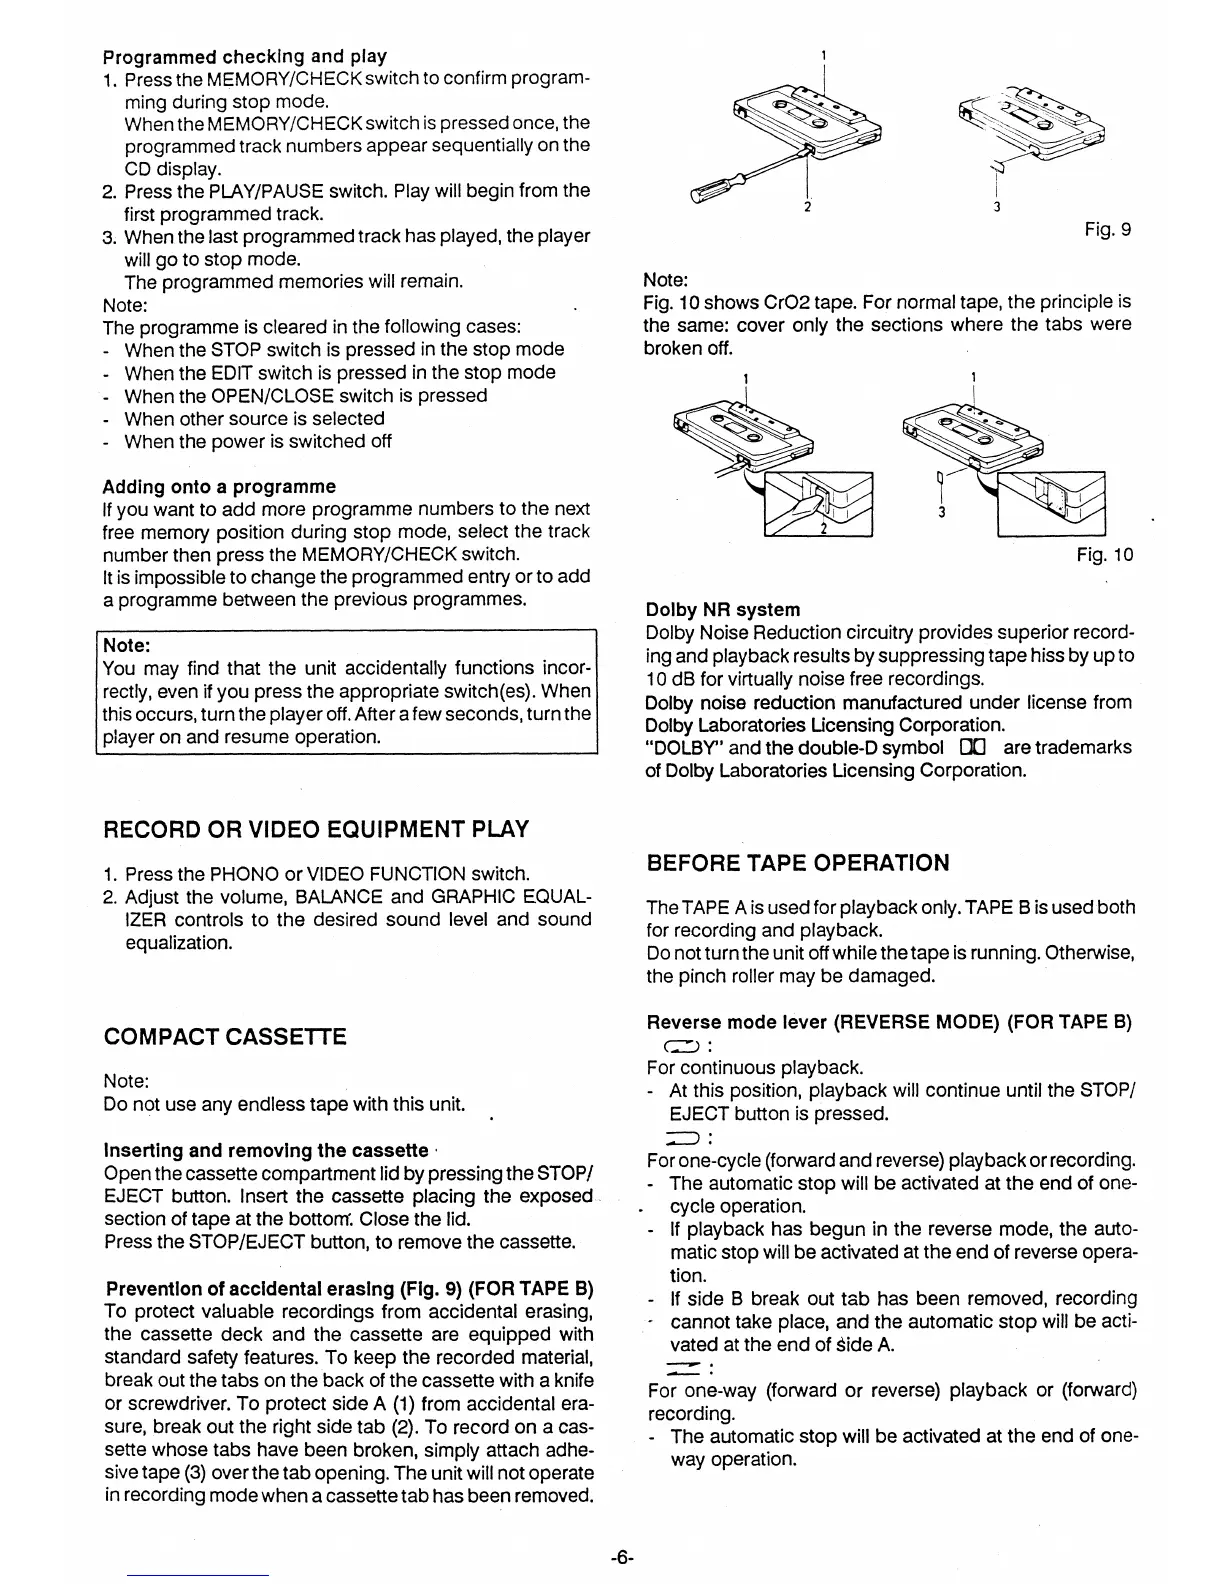
Prevention of accidental erasing (Fig. 9) (FOR TAPE B)
To protect valuable recordings from accidental erasing,
the cassette deck and the cassette are equipped with
standard safety features. To keep the recorded material,
break out the tabs on the back of the cassette with a knife
or screwdriver. To protect side A (1) from accidental era-
sure, break out the right side tab (2). To record on a cas-
sette whose tabs have been broken, simply attach adhe-
sive tape (3) over the tab opening. The unit will not operate
in recording mode when a cassette tab has been removed.
3
Fig. 9
Note:
Fig. 10 shows Cr02 tape. For normal tape, the principle is
the same: cover only the sections where the tabs were
broken off.
Fig. 10
Dolby NR system
Dolby Noise Reduction circuitry provides superior record-
ing and playback results by suppressing tape hiss by up to
10 dB for virtually noise free recordings.
Dolby noise reduction
manufactured under license from
Dolby Laboratories Licensing Corporation.
"DOLBY"
and
the double-D symbol
DO
are
trademarks
of Dolby Laboratories Licensing Corporation.
BEFORE TAPE OPERATION
The TAPE A is used for playback only. TAPE
B
is used both
for recording and playback.
Do not turn the unit off while the tape is running. Otherwise,
the pinch roller may be damaged.
Reverse mode lever (REVERSE MODE) (FOR TAPE B)
C.
-
1) :
For continuous playback.
- At this position, playback will continue until the STOP/
EJECT button is pressed.
) :
For one-cycle (forward and reverse) playback or recording.
- The automatic stop will be activated at the end of one-
.
cycle operation.
- If playback has begun in the reverse mode, the auto-
matic stop will be activated at the end of reverse opera-
tion.
If side B break out tab has been removed, recording
cannot take place, and the automatic stop will be acti-
vated at the end of side A.
..•••••••11.11.
•
For one-way (forward or reverse) playback or (forward)
recording.
- The automatic stop will be activated at the end of one-
way operation.
-6-
 Loading...