Setting the RF output channel
If channel 3 is already occupied for
broadcasting,
1
Set your TV to channel 4.
2
Insert a pre-recorded tape into
this unit.
3
Press [OUTPUT] on the unit so
that the VCR OUTPUT light is lit.
• If noise appears on the TV
screen, press
[VCR/TV] on the remote control.
4
Press [PLAY B] once.
5
After a few seconds, press [PLAY B] on the unit
for 3 seconds.
• The RF output channel will change to channel 4
from channel 3 and you will see a playback pic-
ture.
• When a picture does not appear on the TV screen,
repeat step 4).
6
Press [STOP
CC
] to stop playback.
Initial Programming
1
Press [POWER] and the
language menu will appear.
2
Press [▲] or [▼] to select
language for VCR on-screen
display. Then press
[B].
3
Press [B] again to begin channel
programming. “AUTO SET UP”
will flash.
4
Please wait for a few minutes.
After scanning, the tuner stops on
the lowest memorized channel.
• For details, refer to the Instruction Manual.
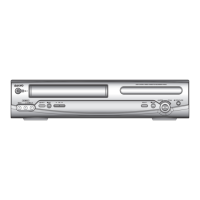
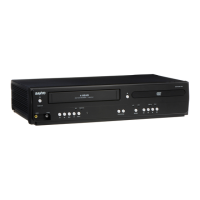
DVD Player & Video Cassette Recorder
DVW-7200
Thank you for buying Sanyo.
This guide will enable the quick and easy
setup of your new DVD+VCR, simply follow
the procedures inside.
For further details of features, please refer to
the instruction manual.
Is Everything In The Box?
• Remote control
(NA230UD)
with two AA batteries
• RF cable • Audio/Video
cables
• Instruction
manual
1 Connecting
DEW CAUTION
Condensation can form inside the unit when it is suddenly moved from a cold place to a warm or
humid environment. In any such circumstance do not use this unit approximately 2 hours allowing
complete elimination of any condensation.
AUDIO IN
VIDEO IN
ANTENNA
INPUT
R
L
DIGITAL
AUDIO OUT
COAXIAL
ANT-OUT
ANT-IN
AUDI O
OUT
DVD VCR
DVD/VCR
S-VIDEO
OUT
COMPONENT
VIDEO OUT
VIDEO IN
AUDIO OUT
VIDEO OUT
L
LY
R
AUDIO IN
L
R
R
CB/
P
B
CR/
P
R
AUDIO IN
VIDEO IN
ANTENNA
INPUT
R
L
Rear of TV
RF Cable
Video Cable
Audio Cable
RF Cable
Antenna
Rear of this unit
2
Setting the RF Output Channel and Initial Programming
123
456
789
0 +10
STOP
PLAY
POWER
ZOOM
DISPLAY
SPEED
AUDIO
OPEN
CLOSE
DVDVCR
SLOW
EJECT
PAUSE
VCR TV
SKIP CH.
A
-
B
REPEAT
ANGLE
SUBTITLE
T-S E T
MODE
SEARCH
MODE
CLEAR
C.RESET
ENTER
MENU
TOP MENU
SETUP
REC OTR
RETURN
DVD/VCR select button
Select the output source (DVD or
VCR) to view on the TV screen.
To use a VCR, first press
[VCR].
To use a DVD, first press
[DVD].
3 Setting the Clock
1
Press [MENU] and the MAIN
menu will appear.
• If the clock is not set, the
“CLOCK SET” screen appears
when you press
[MENU]. In this
case, go to step 3).
2
Press [o] or [p] to select the
“CLOCK SET” menu. Press
[B]
and the “CLOCK SET” menu will
appear.
3
Press [o] or [p] to select the
month. Press
[B].
4
Press [o] or [p] to select the
day. Press
[B].
5
Press [o] or [p] to select the
year. Press
[B].
6
Press [o] or [p] to select the
hour. Press
[B].
7
Press [o] or [p] to select the
minute. Press
[B].
8
Press [o] or [p] to select
the “AM” or “PM”.
9
Press [B] when finished.
- M E N U -
B TIMER PROGRAMMING
AUTO REPEAT [OFF]
CHANNEL SET UP
CLOCK SET
LANGUAGE SELECT
AUDIO OUT
TV STEREO [ON]
SAP
CLOCK SET
MONTH DAY YEAR
1 0 / – –– – – –
HOUR MINUTE AM/PM
– – : – –– –
- M E N U -
TIMER PROGRAMMING
AUTO REPEAT [OFF]
CHANNEL SET UP
B CLOCK SET
LANGUAGE SELECT
AUDIO OUT
TV STEREO [ON]
SAP
CLOCK SET
MONTH DAY YEAR
1 0 / 0 3 2 0 0 5
HOUR MINUTE AM/PM
– – : – –– –
• • • •
CLOCK SET
MONTH DAY YEAR
1 0 / 0 3 MON 2 0 0 5
HOUR MINUTE AM/PM
0 5 : 4 0 P M AM
B PM
Printed in China 81VMN20406--- /
H9880UD/H988AUD ★★★★★
Need help? Call
1-800-813-3435
Weekdays 7:30 AM – 4:00 PM Central Time
LANGUAGE SELECT
B ENGLISH [ON]
FRANÇAIS
ESPAÑOL
CH 01
AUTO SET UP
Inserting the Batteries
Your REMOTE CONTROL HANDSET
is powered by two
AA type batteries.
1
To insert them, push the tab back-
wards and lift off the cover of the
handset.
2
Put the two batteries into the compartment mak-
ing sure the + and – are correctly positioned.
3
Replace the cover.
• Quick
start guide
TIP:
• To change the on-screen language for
DVD function, refer to page 20 in the
Instruction Manual.
CLOCK SET
MONTH DAY YEAR
1 0 / 0 3 – – – –
HOUR MINUTE AM/PM
– – : – –– –
H9880UD_QG.qxd3 04.12.28 19:08 Page 1