- 11 -
CAUTION
Do not drop a lamp assembly or touch a glass
bulb! Glass can shatter and may cause injury.
CAUTION
For continued safety, replace with a lamp
assembly of same type.
Allow a projector to cool for at least 45 minutes
before you open Lamp Cover. Inside of a
projector can become very hot.
ORDER REPLA
CEMENT LAMP
Replacement Lamp can be ordered through your dealer. When ordering a Projection Lamp, give the
following information to the dealer.
● Model No. of your projector : PLC-XF46N / PLC-XF46E
● Replacement Lamp Type No. : POA-LMP100
(Service Parts No. 610 327 4928)
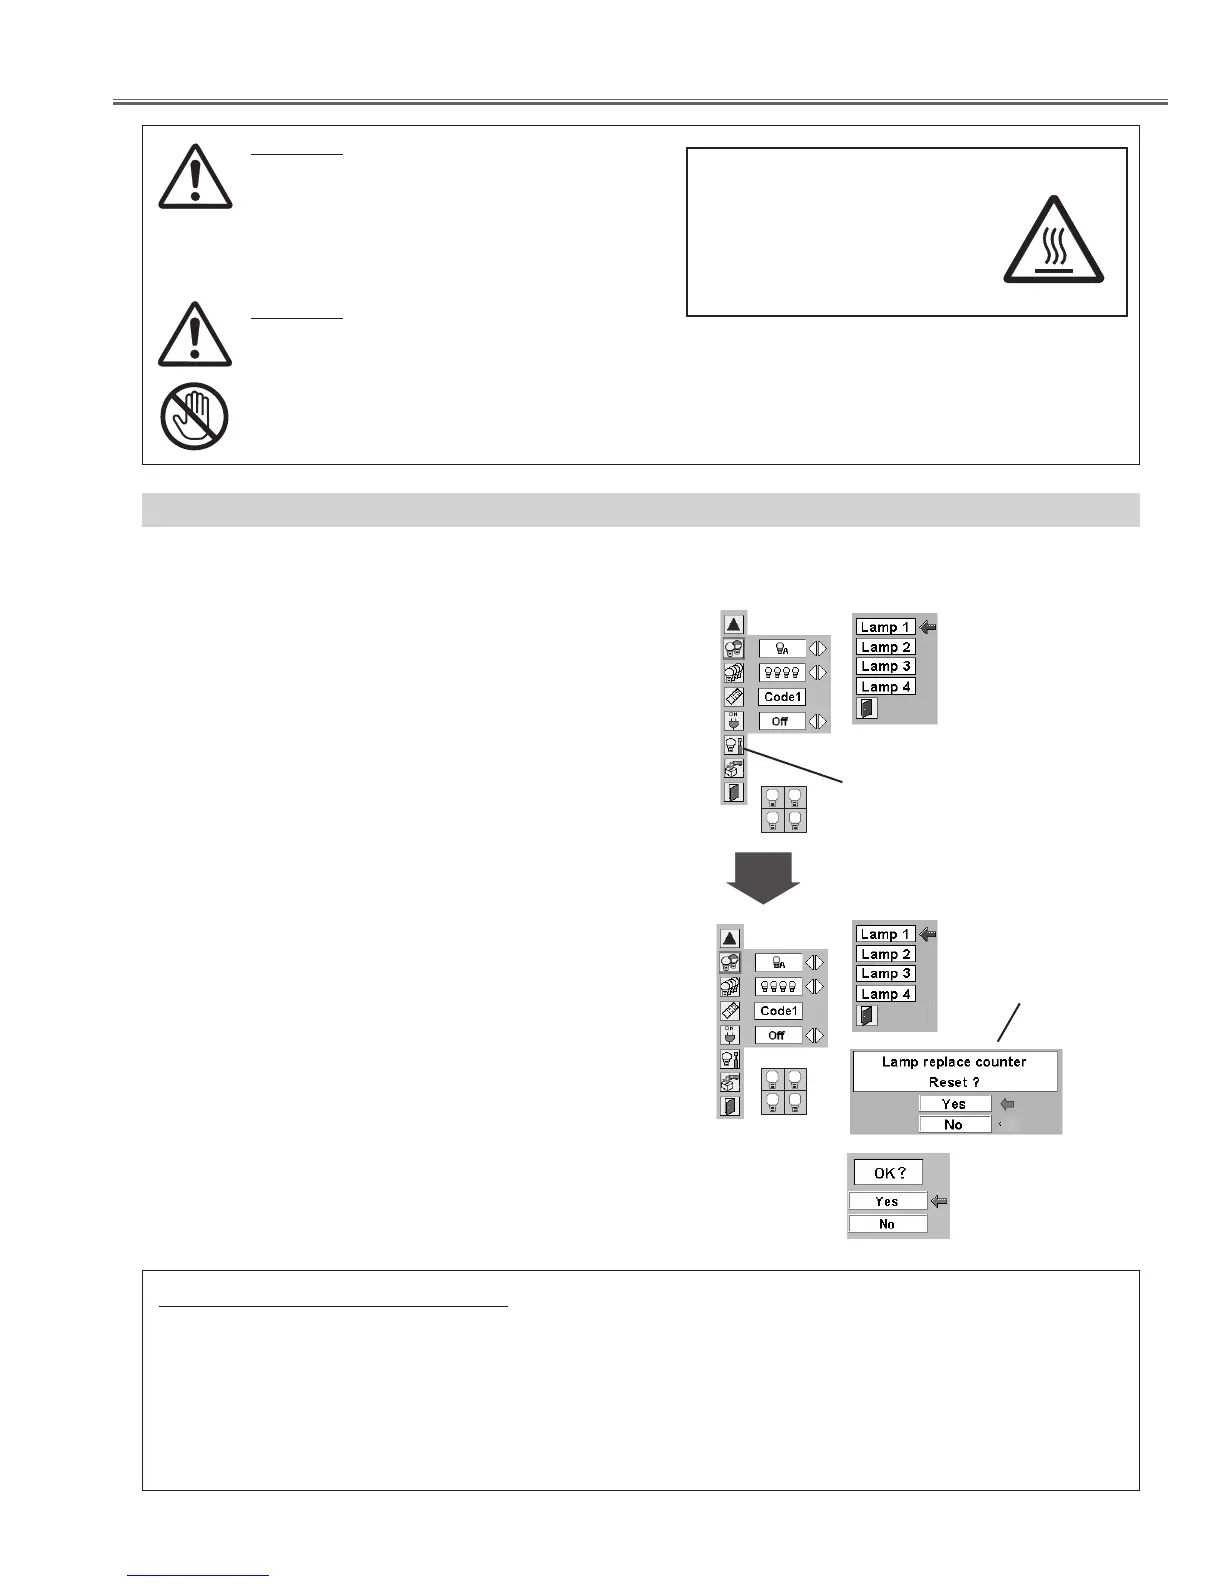
Lamp Replacement
Move pointer to Lamp counter reset and
then press SELECT button. Move
arrow to replaced lamp number (Lamp
1, Lamp 2, Lamp 3 or Lamp 4) and then
press
SELECT button.
Be sure to reset Lamp Counter when Lamp Assembly is replaced. When Lamp Replace Counter is reset, LAMP
REPLACE indicator stops lighting.
Turn projector on, press MENU button and ON-SCREEN
MENU will appear. Press POINT LEFT/RIGHT button(s) to
move a red frame pointer to SETTING Menu icon.
1
Press POINT DOWN button to move a red frame pointer to
“Lamp counter reset” and then press
SELECT button.
2
Do not reset Lamp Replace Counter except after Projection lamp is
replaced.
Another confirmation dialog box appears and select [Yes] to
reset Lamp Replace Counter.
4
Move arrow to replaced lamp number (Lamp 1, Lamp 2, Lamp 3
or Lamp 4) and then press
SELECT button. Message "Lamp
replace counter Reset?" is displayed. Move pointer to [Yes] and
then press SELECT button.
3
NOTE: Be sure to reset correct lamp number otherwise LAMP
REPLACE indicator continues lighting.
Message "Lamp replace
counter Reset?" is
displayed. Move pointer
to [Yes] and then press
SELECT button.

 Loading...