T/049A/SBL340
5
th
January 2017
SBL340
Locate the rubber seal behind the Digital Lock and using the fixing bolts secure the top and bottom of the Lock to the
door.
Before final tightening ensure the Lock is vertical and test mechanism to ensure that it is moving freely.
Do not excessively tighten the Lock and seals to the door as it could damage the operation of the mechanism.
Applying the Intumescent Seals
IMPORTANT: In order for this unit to maintain its fire rating status and be suitable to be installed on a fire rated door Intumescent
Seals must be used. A 2mm self-adhesive mono-ammonium phosphate (Interdens) intumescent seal is recommended.
The intumescent seal need only to be fitted if morticing the keeper in to the door frame.
Using the intumescent seal affix one 2mm intumescent layer behind the rear of the striker prior to installation.
Fixing Keeper
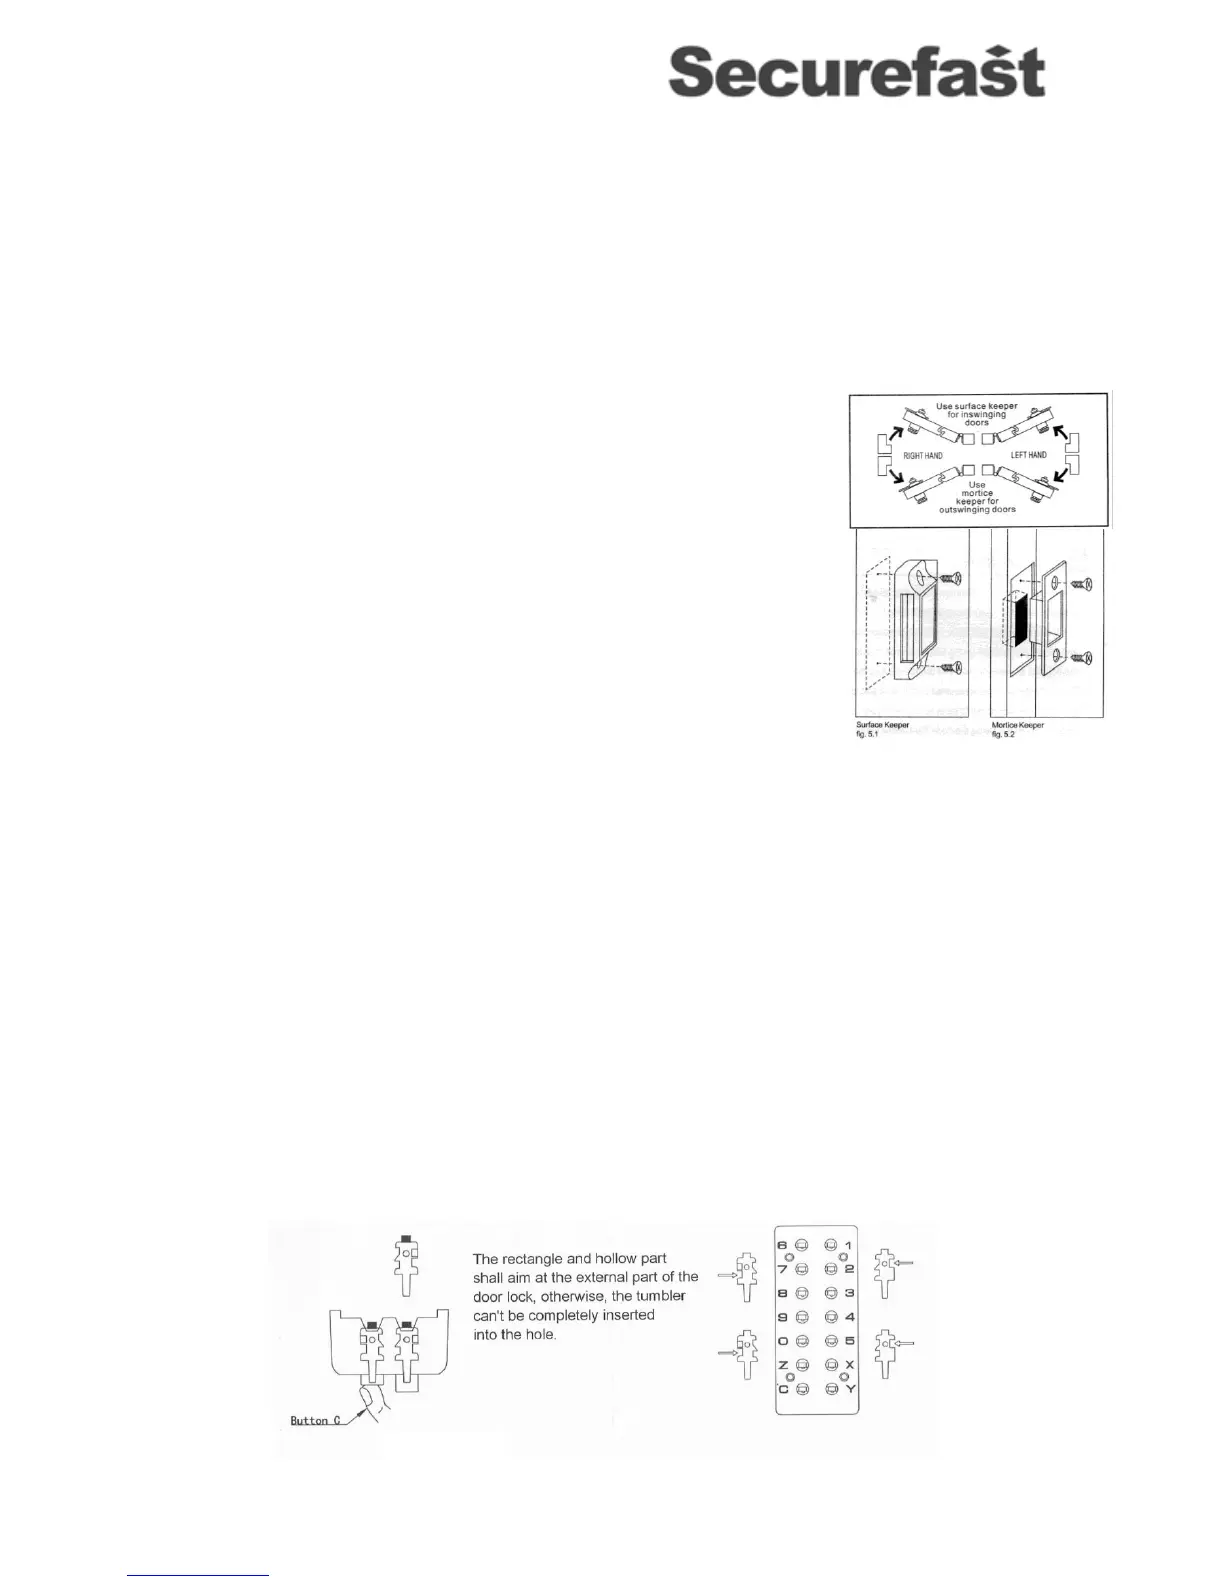
NOTE: Firstly, determine which keeper will best suit your frame and fitting. Generally, surface
mounted keepers are best used for in swinging doors and mortice keepers for out swinging doors.
Once you have determined which keeper will suit your installation. Position it on the
frame so that it is in line with the deadbolt; ensuring there is sufficient engagement.
If fixing a surface mounted keeper simply mark the positioning of the fixing holes. Drill
the holes and secure using wood screws supplied. (Figure 5.1)
Fix the keeper with one screw first. Test the Lock to see if it works and is latching and
locking correctly. If not proceed with any necessary adjustments before securing
completely.
If no adjustments are to be made completely secure keeper with second screw.
If fixing a mortice keeper, draw around the outside profile and mark the two fixing holes.
(Figure 5.2)
Remove the keeper and cut a 1mm rebate to allow it to sit flush within the door frame.
Drill or cut a recess, at the correct position, to allow the back of the keeper to sit within
the frame.
Drill the two, marked, holes for securing keeper
Fix the keeper with one screw first. Test the Lock to see if it works and is latching and locking correctly. If not proceed
with any necessary adjustments before securing completely
If no adjustments are to be made completely secure keeper with second screw.
Changing the Code
IMPORTANT: Keep the Lock on a flat surface at all times when removing the plate to gain access as there are a lot of small
components inside. You should NEVER remove the ‘C’ tumbler.
On the reverse of the Digital Lock remove the 4 screws retaining the metal plate.
There are 5 Red Keyed tumblers, 8 Blue Keyless tumblers and 1 Clear tumbler (‘C’ Button).
NOTE: With the spare tumblers you can either increase the number of digits in the code to 6 or 7 or decrease to
3.
Press the ‘C’ button and hold it at all times during the process; using the tweezers you can remove one or more of the
keyed & keyless tumblers.
Re-insert the tumblers (putting the Blue tumblers in the slots corresponding with the buttons you do not wish to use and
the Red in those you do wish to use) to produce the desired code.
NOTE: The keyed and keyless tumblers vary in shape therefore it is essential that they are reinserted in the
correct orientation as shown below in Figure 5.
Once the tumblers are refitted make a note of the new code and replace and secure the metal plate with the 4 screws.
Check the code functions before refitting to the door.
 Loading...