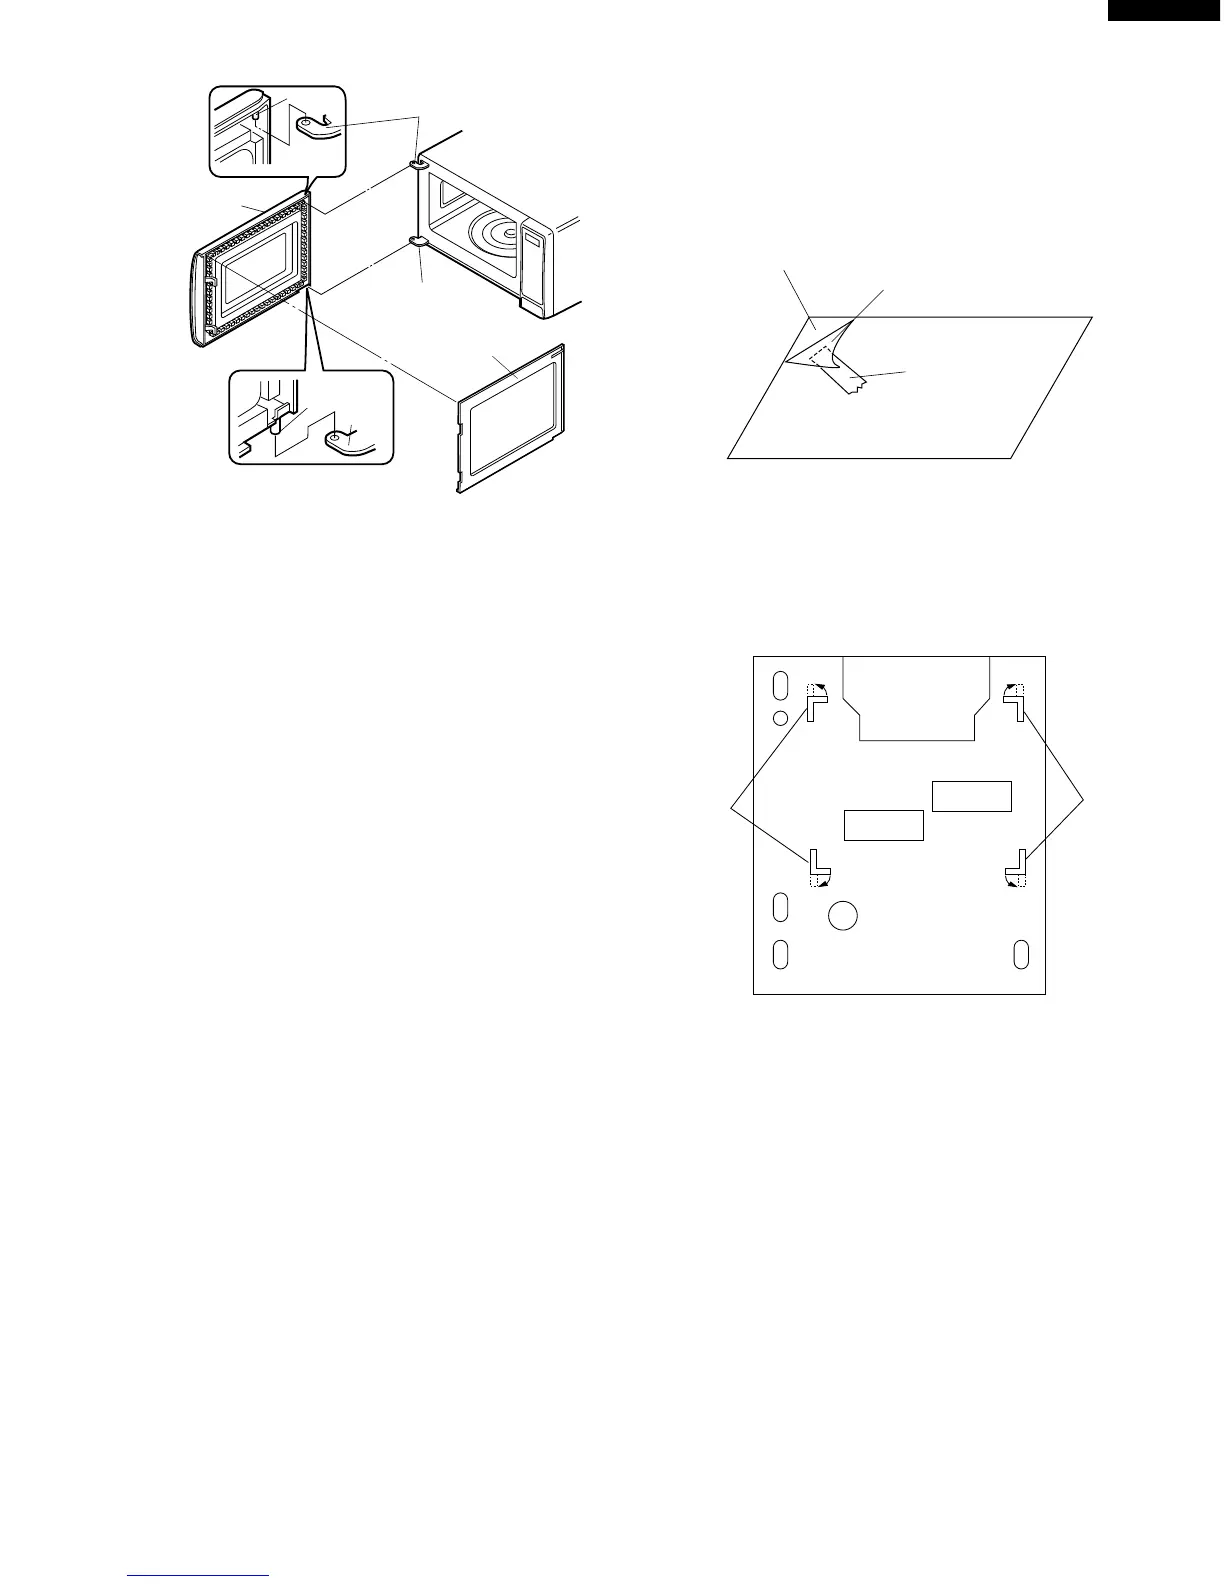
5
R-390Aw
R-390AK
Pin
Pin
Upper oven hinge
Lower
oven
hinge
Lower oven
hinge
Choke cover
Door assemby
Figure C-8. Door Replacement
DISPLAY UNIT LAMPS REMOVAL
Figure C-10. Back side view of display unit
1. Disconnect oven from power supply and remove outer
case.
2. Discharge high voltage capacitor.
3. Remove the control panel assembly from the oven,
referring to "CONTROL PANEL ASSEMBLY REMOVAL".
4. Remove the five (5) screws holding the display unit and
the power unit to the control panel frame.
5. Remove the display unit and the power unit from the
control panel frame.
6. Remove the solder holding the tab (near capacitor C11)
of LCD vessel to the printed wiring board.
7. Make the four (4) tabs of LCD vessel straight.
8. Release the LCD vessel from the printed wiring board.
9. Now, the two (2) lamps LMP1 and LMP2 can be found.
10.Remove the solder holding the lamps LMP1 and LMP2
to the printed wiring board.
11.Now, the lamps LMP1 and LMP2 are free.
SEALER FILM
Installation
1. Put the adhesive tape on the backing film of the sealer
film as shown in Fig. C-9.
2. Tear the backing film by pulling the adhesive tape.
3. Put the pasted side of the sealer film on the door panel
Sealer film
Backing film
Adhesive tape
Figure C-9. Sealer film
 Loading...