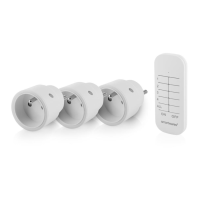
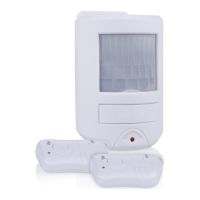
EN Remote controlled socket set
NL Schakelset met afstandsbediening
FR Kit de prise contrôlé par télécommande
PL Zestaw zdalnie sterowanych gniazdek
CS Sada zásuvky na dálkové ovládání
SH4-99565AT-FR
SK Sada diaľkovo ovládaných zásuviek
EN Instruction manual
PREPARATION BEFORE USE
Insert battery
• Open the battery lid at the back of the remote (1) by turning it
counter clockwise.
• Insert the battery with the negative polarity downward.
To check if the battery is inserted correctly, briefly press a button on
the remote. If the LED flashes, then the battery is inserted successful.
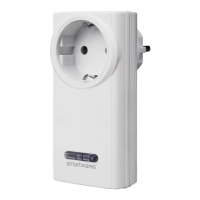
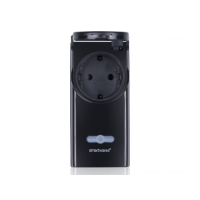
• Insert the receiver into the wall outlet.
PAIRING THE REMOTE TO THE RECEIVER
• Press the button on the receiver (2) for 3 seconds. When the LED
starts to blink, the receiver is in pairing mode.
• Press any of the ON buttons on the remote. If the LED stops
blinking and is constantly lit, the pairing was successful.
OPERATING RECEIVERS
A. Press the ”ON” button on the remote control to turn on the
receiver.
B. Press the “OFF” button on the remote control to turn off the
receiver.
C. Press the ”ON” button beneath ALL (on the remote control) to turn
on all paired devices at the same time.
D. Press the ”OFF” button beneath ALL (on the remote control) to
turn off all paired devices at the same time.
Disconnecting a remote
A. Press and hold the button on the receiver for 3 seconds (3) and
then release it. During this operation the LED starts to blink. Your
receiver is now switched into the pairing mode. Attention
: the LED
should blink only after releasing the button. If the LED starts to
blink while holding the button, there will be no pairing.
B. Perform one of the following steps:
– Press an ”OFF” button on the row on the remote you wish to
disconnect from a receiver. During this operation the LED on
the receiver blinks quickly and then turns off.
– Press the ”OFF” button next to ALL (on the remote) to
disconnect all links. During this operation the LED on the
receiver turns off.
To remove all pairing memories on the receiver:
• Press and hold the button for more than 6 seconds (3).
NL Gebruiksaanwijzing
VOORBEREIDING VOOR GEBRUIK
Batterij plaatsen
• Open het batterijdeksel aan de achterzijde van de
afstandsbediening (1) door het deksel tegen de klok in te draaien.
• Plaats de batterij met de negatieve pool naar beneden.
Als u wilt controleren of de batterij correct is geplaatst, drukt u kort op
een knop op de afstandsbediening. Als het ledlampje knippert, is de
batterij correct geplaatst.
• Doe de ontvanger in het stopcontact.
DE AFSTANDSBEDIENING KOPPELEN MET DE
ONTVANGER
• Houd de knop op de ontvanger (2) 3seconden ingedrukt. Als het
ledlampje begint te knipperen, staat de ontvanger in de
koppelingsmodus.
• Druk op een van de knoppen ON op de afstandsbediening. Als
het ledlampje stopt met knipperen en blijft branden, is het
koppelen gelukt.
DE ONTVANGERS BEDIENEN
A. Druk op de knop ON op de afstandsbediening om de ontvanger
in te schakelen.
B. Druk op de knop OFF op de afstandsbediening om de
ontvanger uit te schakelen.
C. Druk op de knop ON onder ALL (op de afstandsbediening) om
alle gekoppelde apparaten tegelijkertijd in te schakelen.
D. Druk op de knop OFF onder ALL (op de afstandsbediening) om
alle gekoppelde apparaten tegelijkertijd uit te schakelen.
De verbinding met een ontvanger verbreken
A. Houd de knop op de ontvanger 3seconden ingedrukt (3) en laat
deze los. Tijdens deze bewerking gaat het ledlampje knipperen.
De koppelingsmodus van de ontvanger is nu actief. Let op
: Het
ledlampje mag pas gaan knipperen nadat u de knop hebt
losgelaten. Als het ledlampje al gaat knipperen terwijl u de knop
ingedrukt houdt, wordt de koppelingsmodus niet geactiveerd.
B. Voer een van de volgende stappen uit:
– Druk op een knop OFF op de rij van de afstandsbediening
waarvoor u de verbinding met een ontvanger wilt verbreken.
Tijdens deze bewerking knippert het ledlampje op de
ontvanger snel. Daarna wordt het uitgeschakeld.
– Druk op de knop OFF naast ALL (op de afstandsbediening)
om alle koppelingen te verbreken. Tijdens deze bewerking
wordt het ledlampje op de ontvanger uitgeschakeld.
Alle opgeslagen koppelingen verwijderen op de ontvanger:
• Houd de knop meer dan 6seconden ingedrukt (3).
FR Manuel d'instructions
PRÉPARATION AVANT UTILISATION
Insérer la pile
• Ouvrir le couvercle du compartiment à piles à l'arrière de la
télécommande (1) en le tournant dans le sens inverse des
aiguilles d'une montre.
• Insérer la pile avec la polarité négative vers le bas.
Pour vérifier si la pile est correctement insérée, appuyer brièvement
sur une touche de la télécommande. Si la LED clignote, la pile est
insérée correctement.
• Insérer le récepteur dans la prise murale.
APPARIEMENT DE LA TÉLÉCOMMANDE AU RÉCEPTEUR
• Appuyer pendant 3 secondes sur la touche du récepteur (2).
Lorsque la LED commence à clignoter, le récepteur est en mode
appairage.
• Appuyer sur l'une des touches ON de la télécommande. Si la
LED cesse de clignoter et est allumée en permanence, cela
signifie que l'appairage a réussi.
RÉCEPTEURS DE COMMANDE
A. Appuyer sur la touche «ON» de la télécommande pour allumer
le
récepteur.
B.
C.
D.
Appuyer sur la touche «OFF» de la télécommande pour
éteindre le récepteur.
Appuyer sur la touche «ON» sous ALL (sur la télécommande)
pour allumer tous les appareils couplés en même temps.
Appuyer sur la touche «OFF» sous ALL (sur la télécommande)
pour éteindre tous les appareils couplés en même temps.
Déconnexion d'une télécommande
A. Appuyer sur le bouton du récepteur et le maintenir enfoncé
pendant 3 seconde (3), puis le relâcher. Pendant cette opération,
la LED commence à clignoter. Votre récepteur est maintenant en
mode d'appairage. Attention
: la LED ne doit clignoter qu'une fois
le bouton relâché. Si la LED commence à clignoter lorsque vous
maintenez le bouton enfoncé, le mode appariement n'est pas
activé.
Specifications:
Battery: 3VDC, type CR 2032 (incl.)
Radio Frequency: 433.92Mhz
Maximum output: 0dBm
Maximum range: 30m
Maximum power: 2300 W
AC input Voltage: 230V ~ 50Hz
Remote control (SH4-90152)
FR plug (SH
4-90268FR)