BATTERY CHARGING:A plug in battery charger is provided
which operates off 120V/60hz household current. When
recharging, disconnect battery from wiring harness, install
charger in household outlet and connect battery to
charger. If battery is weak charge for 48 hours. Charge bat-
tery for 72 hours if completely discharged.
Note: Continuous Charging will not damage battery.
MOWING PROCEDURE
Vary speed to suit grass conditions. Set the engine speed
high for tall, thick grass or lower for sparse grass. Push
hand propelled models at a speed that is comfortable but
will allow even cutting without stalling. On self propelled
models, set ground SPEED CONTROL lever in desired for-
ward speed setting, then grip the WHEEL DRIVE control
and hold against handle to engage clutch for forward mo-
tion. Releasing the WHEEL DRIVE control stops forward
motion. The mower can be hand pushed forward or in
reverse for trimming with the WHEEL DRIVE control
released. The ground speed can be changed to a new set-
ting at any time when in motion. Use low speed setting and
clutch for down-hill braking.
MOWINGIVACUUMING HINTS: The cutting deck should be
level under all conditions. As a general rule, never cut more
than 1/3 off the height of the grass. If for example, the
grass has grown to 4 inches tall, set the mower height lat-
ches in the lowest position which establishes the cutting
height at approximately 3" (see cutting height chart)
thereby, cutting about 718" off the grass and staying well
within the 1/3 off limit. If you want the grass shorter, wait a
few days then recut to the lower height. If cut too short, the
grass will expend more energy for development of new leaf
structures and less for a healthy root system and will be
more subject to burning. On the other hand, if allowed to
grow too long, the lower portion will be shaded and, as a
result will discolor. In dry periods, allow the grass to grow
longer than you normally would. NOTE: Do not mow across
an area where dry type fertilizer has just been spread as
most of the fertilizer will be vacuumed up.
Change your mowing pattern from time to time for a
smoother cut lawn. Finely chopped clippings add nutrients
to the soil to promote grass growth, however if the clipp-
ings become too heavy, they mat to form thatch which
prevents proper breathing and holds moisture. If thatch is
particularly heavy, the Thatcherizer accessory described
on the back page will do an effective job of dislodging the
decaying matter. To prevent grass disease from thatch,
vacuuming and bagging is recommended for most cut-
tings along with an occasional broadcasting of the clipp-
ings into the lawn for nutritive value. Your Snapper can be
quickly converted back and forth from bagging to side
discharge with the accessories.
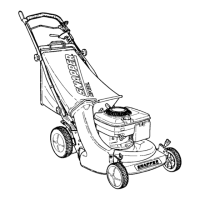
EMPTYING GRASS CATCHER BAG
To install the KWIK-N-EZY grass catcher on the mower,
slide the connector down over the adapter flange then
lower the support flame hooks onto the middle handle (see
figure 4). When the catcher becomes full, stop engine and
lift the support hooks up over the handle then lift the con-
nector off and continue lifting while moving the catcher
forward until the bagclears the mower. To empty the bag,
raise the connector end up and release the handle of the
door flap. Shake the catcher back and forth to dump the
clippings.
TO EMPTY IN TRASH BAG: Use the following procedure to empty
clippings in trash bag. After removing catcher from mower, place
connector erid on ground, open door flap, slip trash bag over the
catcher, turn catcher over so that large opening is down inside
bag, !ift catcher by connector and door handles and shake until
clippings are dUmped in the trash bag.
m 4 _
t
Position Q
®
ltll(l/
_ Highest
Cutting
Height
)
®
®
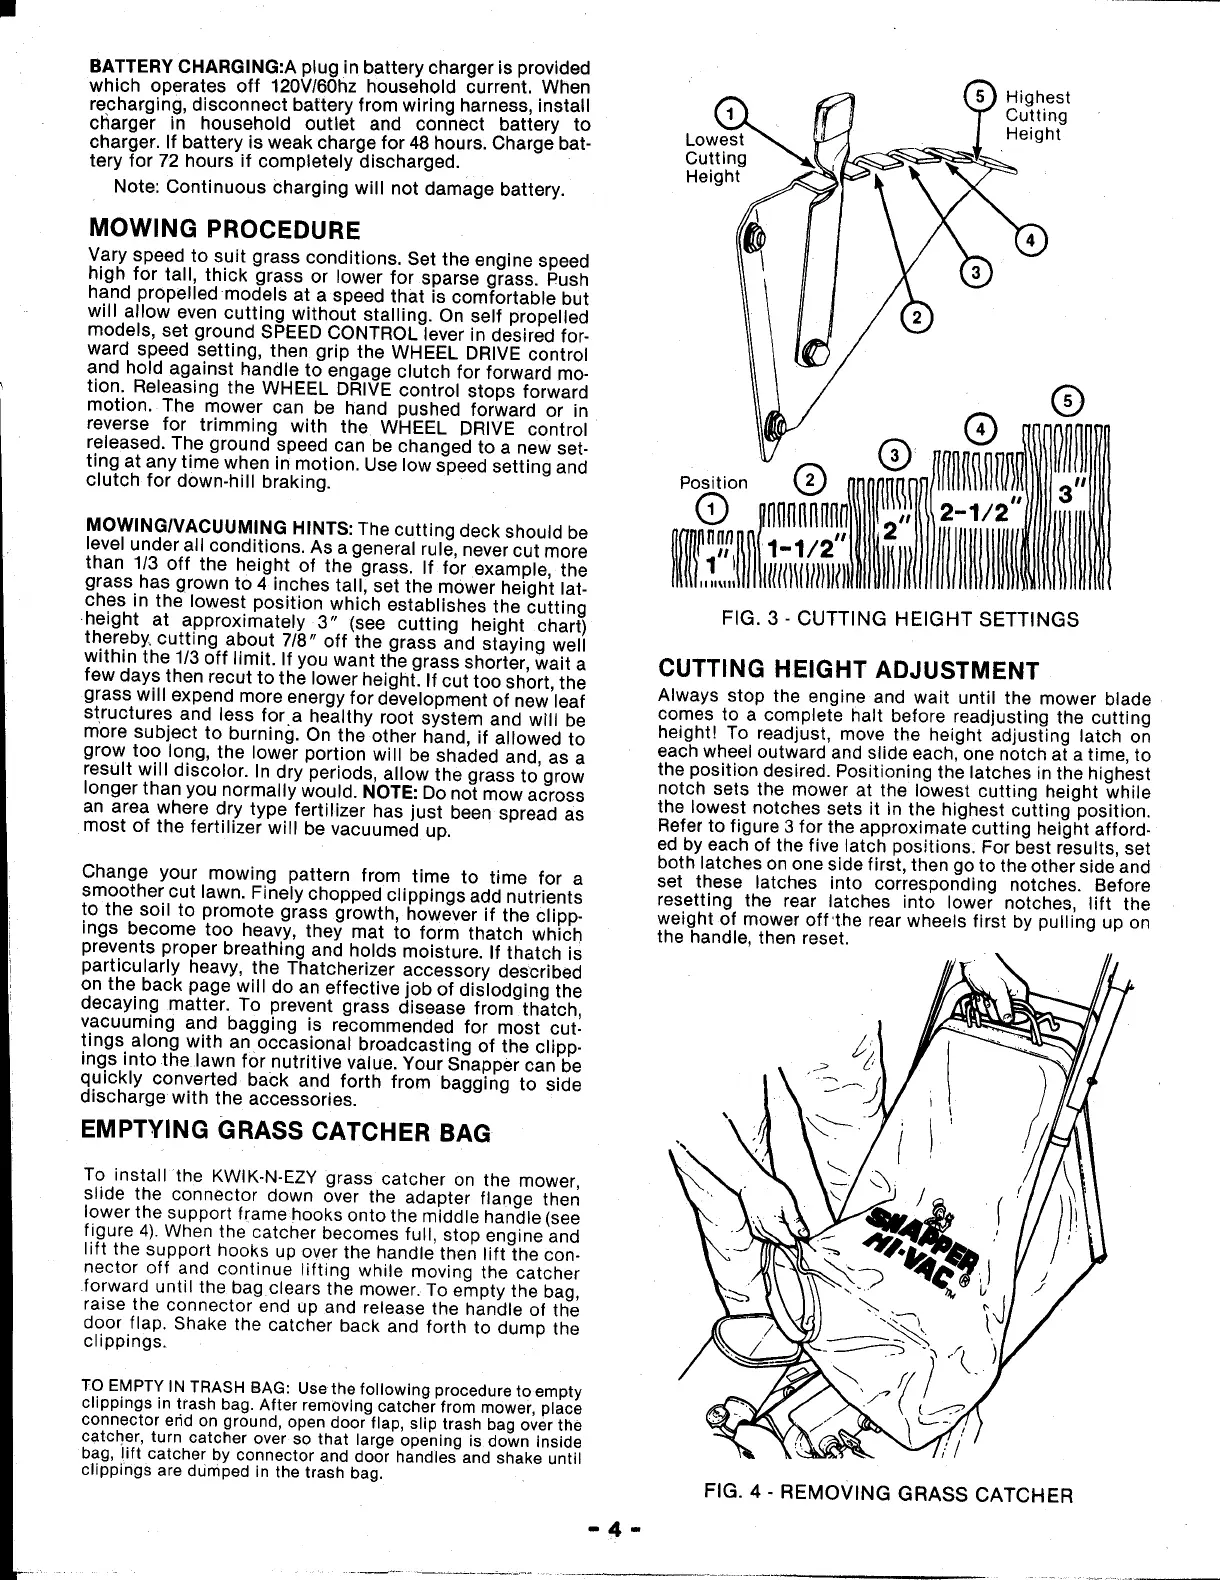
FIG. 3 - CUTTING HEIGHT SETTINGS
CUTTING HEIGHT ADJUSTMENT
Always stop the engine and wait until the mower blade
comes to a complete halt before readjusting the cutting
height! To readjust, move the height adjusting latch on
each wheel outward and slide each, one notch at a time, to
the position desired. Positioning the latches in the highest
notch sets the mower at the lowest cutting height while
the lowest notches sets it in the highest cutting position.
Refer to figure 3 for the approximate cutting height afford.
ed by each of the five latch positions: For best results, set
both latches on one side first, then go to the other side and
set these latches into corresponding notches. Before
resetting the rear latches into lower notches, lift the
weight of mower off'the rear wheels first by pulling up on
the handle, then reset.
FIG. 4 - REMOVING GRASS CATCHER
 Loading...