POLY V-BELT
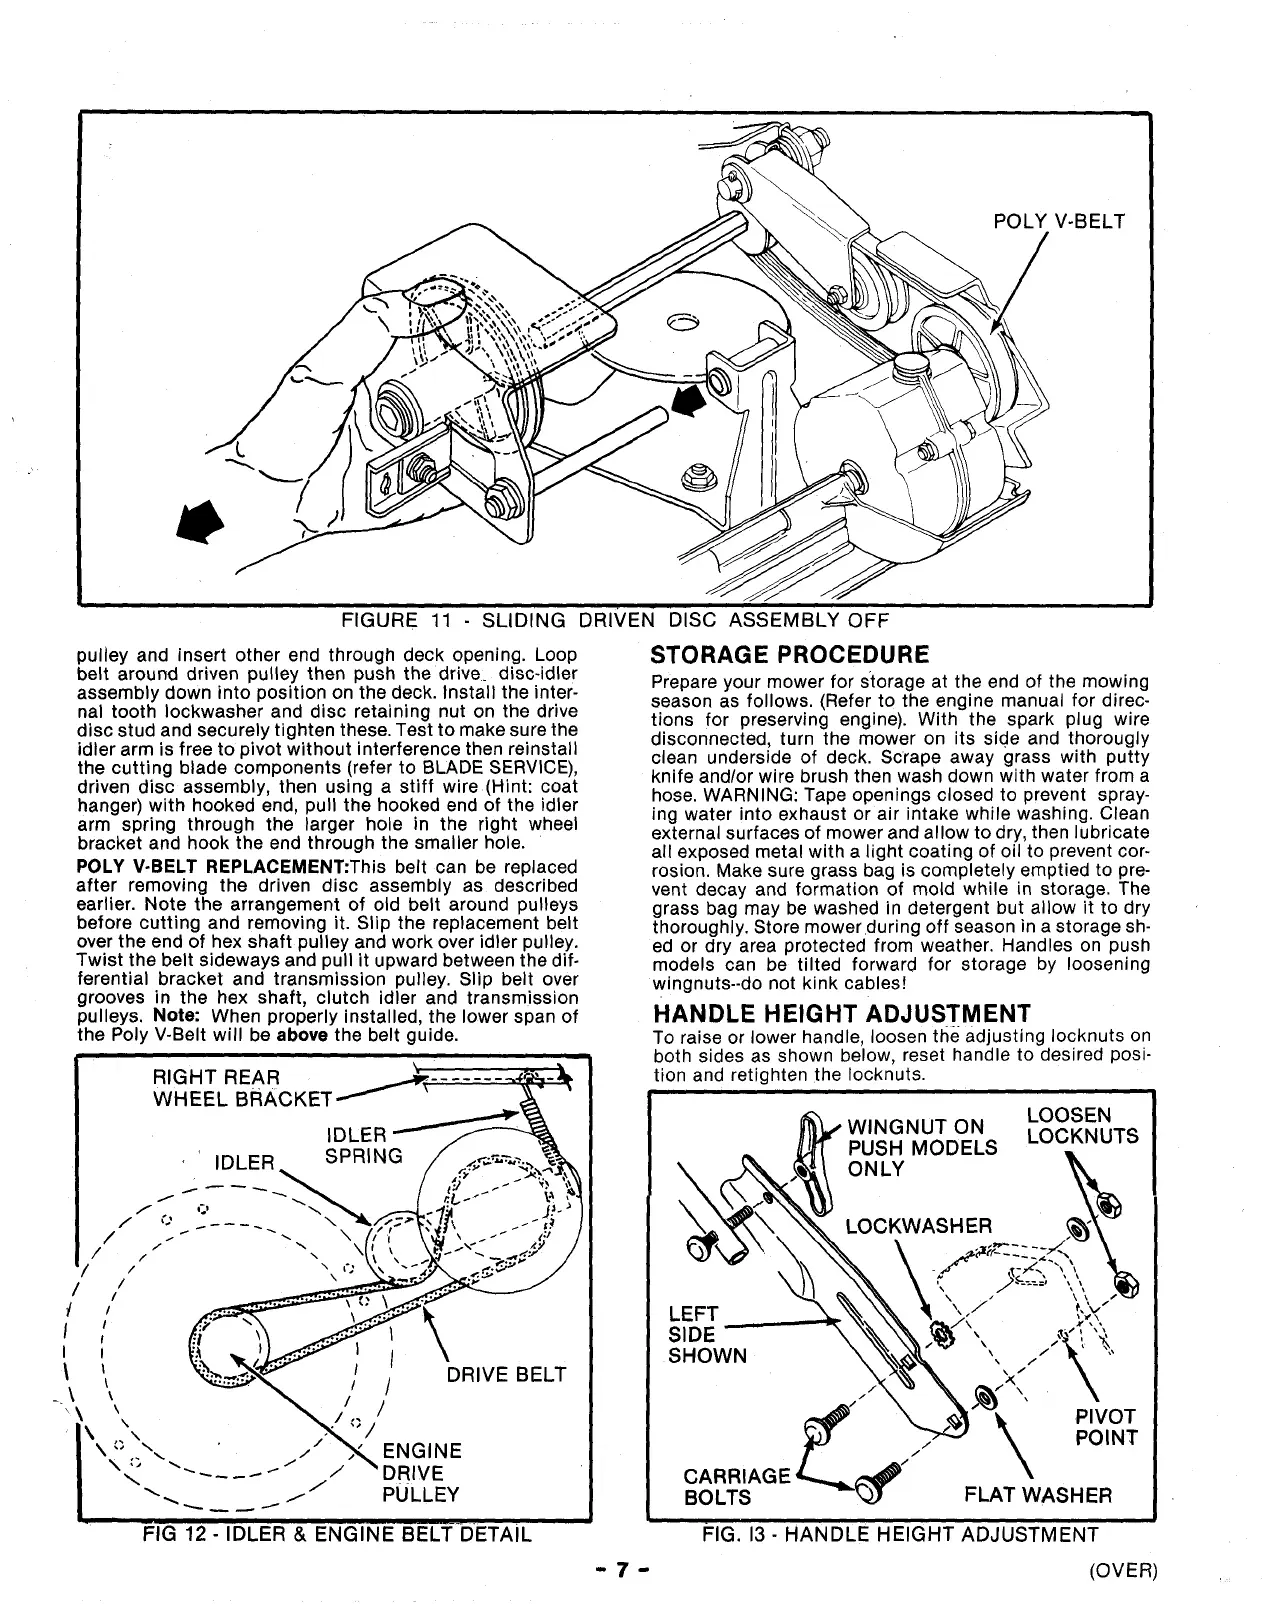
FIGURE 11 - SLIDING DRIVEN DISC ASSEMBLY OFF
pulley and insert other end through deck opening. Loop
belt around driven pulley then push the drive, disc-idler
assembly down into position on the deck. Install the inter-
nal tooth Iockwasher and disc retaining nut on the drive
disc stud and securely tighten these. Test to make sure the
idler arm is free to pivot without interference then reinstall
the cutting blade components (refer to BLADE SERVICE),
driven disc assembly, then using a stiff wire(Hint: coat
hanger) with hooked end, pull the hooked end of the idler
arm spring through the larger hole in the right wheel
bracket and hook the end through the smaller hole.
POLY V-BELT REPLACEMENT:This belt can be replaced
after removing the driven disc assembly as described
earlier. Note the arrangement of old belt around pulleys
before cutting and removing it. Slip the replacement belt
over the end of hex shaft pulley and work over idler pulley.
Twist the belt sideways and pull it upward between the dif-
ferential bracket and transmission pulley. Slip belt over
grooves in the hex shaft, clutch idler and transmission
pulleys. Note: When properly installed, the lower span of
the Poly V-Belt will be above the belt guide.
RIGHT REAR \
WHEEL BRACKE'f
IDLER
IDLER
STORAGE PROCEDURE
Prepare your mower for Storage at the end of the mowing
season as follows. (Refer to the engine manual for direc-
tions for preserving engine). With the spark plug wire
disconnected, turn the mower on its side and thorougly
clean underside of deck. Scrape away grass with putty
knife and/or wire brush then wash down with water from a
hose. WARNING: Tape openings closed to prevent spray-
ing water into exhaust or air intake while washing. Clean
external surfaces of mower and allow to dry, then lubricate
all exposed metal with a light coating of oil to prevent cor-
rosion. Make sure grass bag is completely emptied to pre-
vent decay and formation of mold while in storage. The
grass bag may be washed in detergent but allow it to dry
thoroughly. Store mower during off season in a storage sh-
ed or dry area protected from weather. Handles on push
models can be tilted forward for storage by loosening
wingnuts--do not kink cables!
HANDLE HEIGHT ADJUSTMENT
To raise or lower handle, loosen tl_e adjusting Iocknuts on
both sides as shown below, reset handle to desired posi-
tion and retighten the Iocknuts.
LOOSEN
ON LOCKNUTS
PUSH MODELS
ONLY
\\
LEFT ,,,,
SIDE , ,_,....., ,
SHOWN ' / ' "
\ /
\ /
/t
__ X PIVOT
/ POINT
/
CARRIAGE
BOLTS FLAT WASHER
FIG. 13- HANDLE HEIGHT ADJUSTMENT
- 7 - (OVER) ,
 Loading...