Parts Identifications
21
Overview
To reattach the hood, align the marks on the
hood with those on the camcorder, turn it in the
opposite direction from that when you removed it,
then tighten the fixing screw.
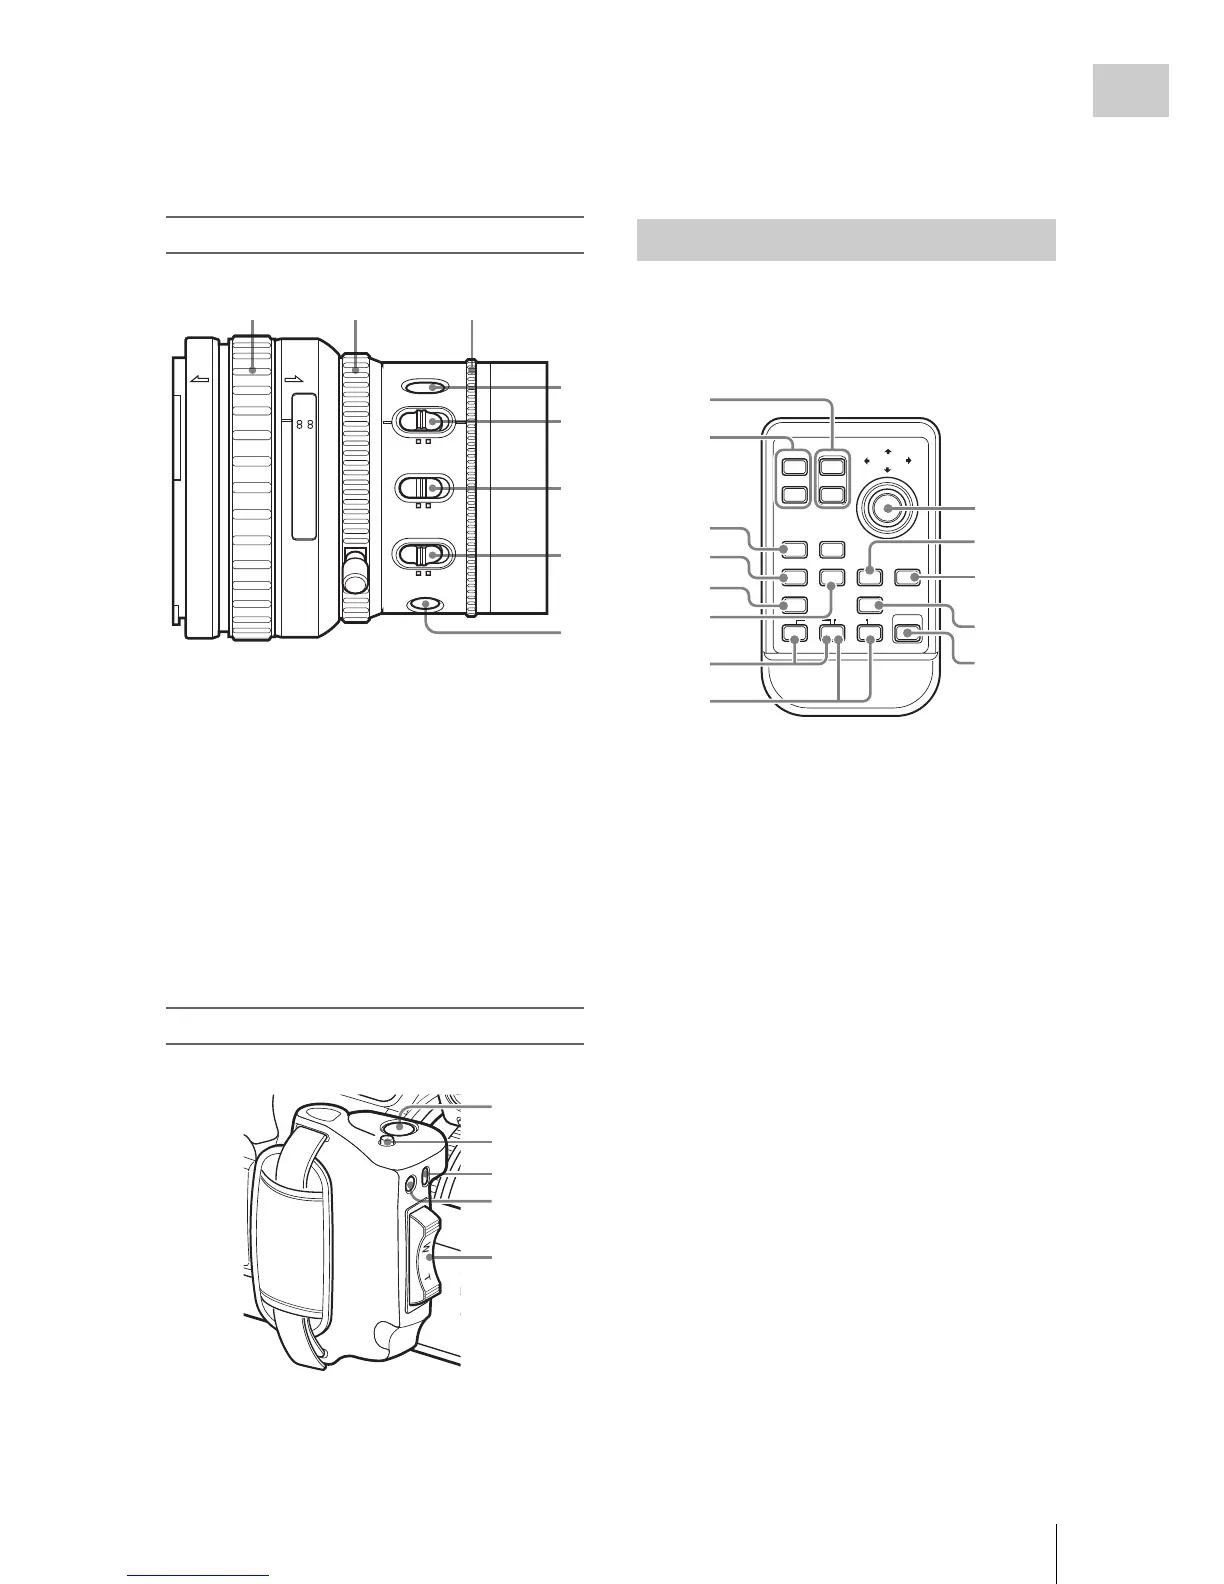
Lens control block
1. Focus ring (page 61)
2. Zoom ring (page 59)
3. Iris ring (page 58)
4. STEADY SHOT button (page 64)
5. IRIS switch (page 58)
6. MACRO switch (page 64)
7. FOCUS switch (page 62)
8. PUSH AF (momentary auto focus) button
(page 63)
Controls on the grip
1.
REC START/STOP button (
page 48)
2. RELEASE (grip release) button (pag
e 36)
3. REC REVIEW button (pa
ge 71)
4. EXPANDED FOCUS button (page 62)
5. Servo zoom lever (page 60)
The buttons without remarks can be used in the
same manner as the corresponding buttons on the
camcorder.
1. ZOOM T/W (telephoto/wide-angle)
button
2. SHOTMARK 1 and 2 buttons (page 70,
page 103)
3. THUMBNAIL button
4. PREV (previous clip jump) button
5. F REV (fast reverse) button
6. PLAY/PAUSE button
7. REC (record) buttons
Press the z button together with the unmarked
button (safety button) to start recording.
8. REC PAUSE buttons
Press the X button together with the unmarked
button (safety button) to pause recording.
9. PUSH SET button (four-way arrow key)
It functions the same as the SEL/SET button
(joystick) on the camcorder.
10. NEXT button
11. STOP button
12. F FWD (fast forward) button
13. PUSH AF button
AF
FULL
MF
15 25 40 81.210
310mm5
10 30 ft15
5.8
C
MANU AUTO
MANU AUTO
MACRO
FOCUS
PUSH AF
IRIS
STEADY
SHOT
OFF ON
8 5.6 4 2.8 1.916
6
7
8
12 3
4
5

 Loading...