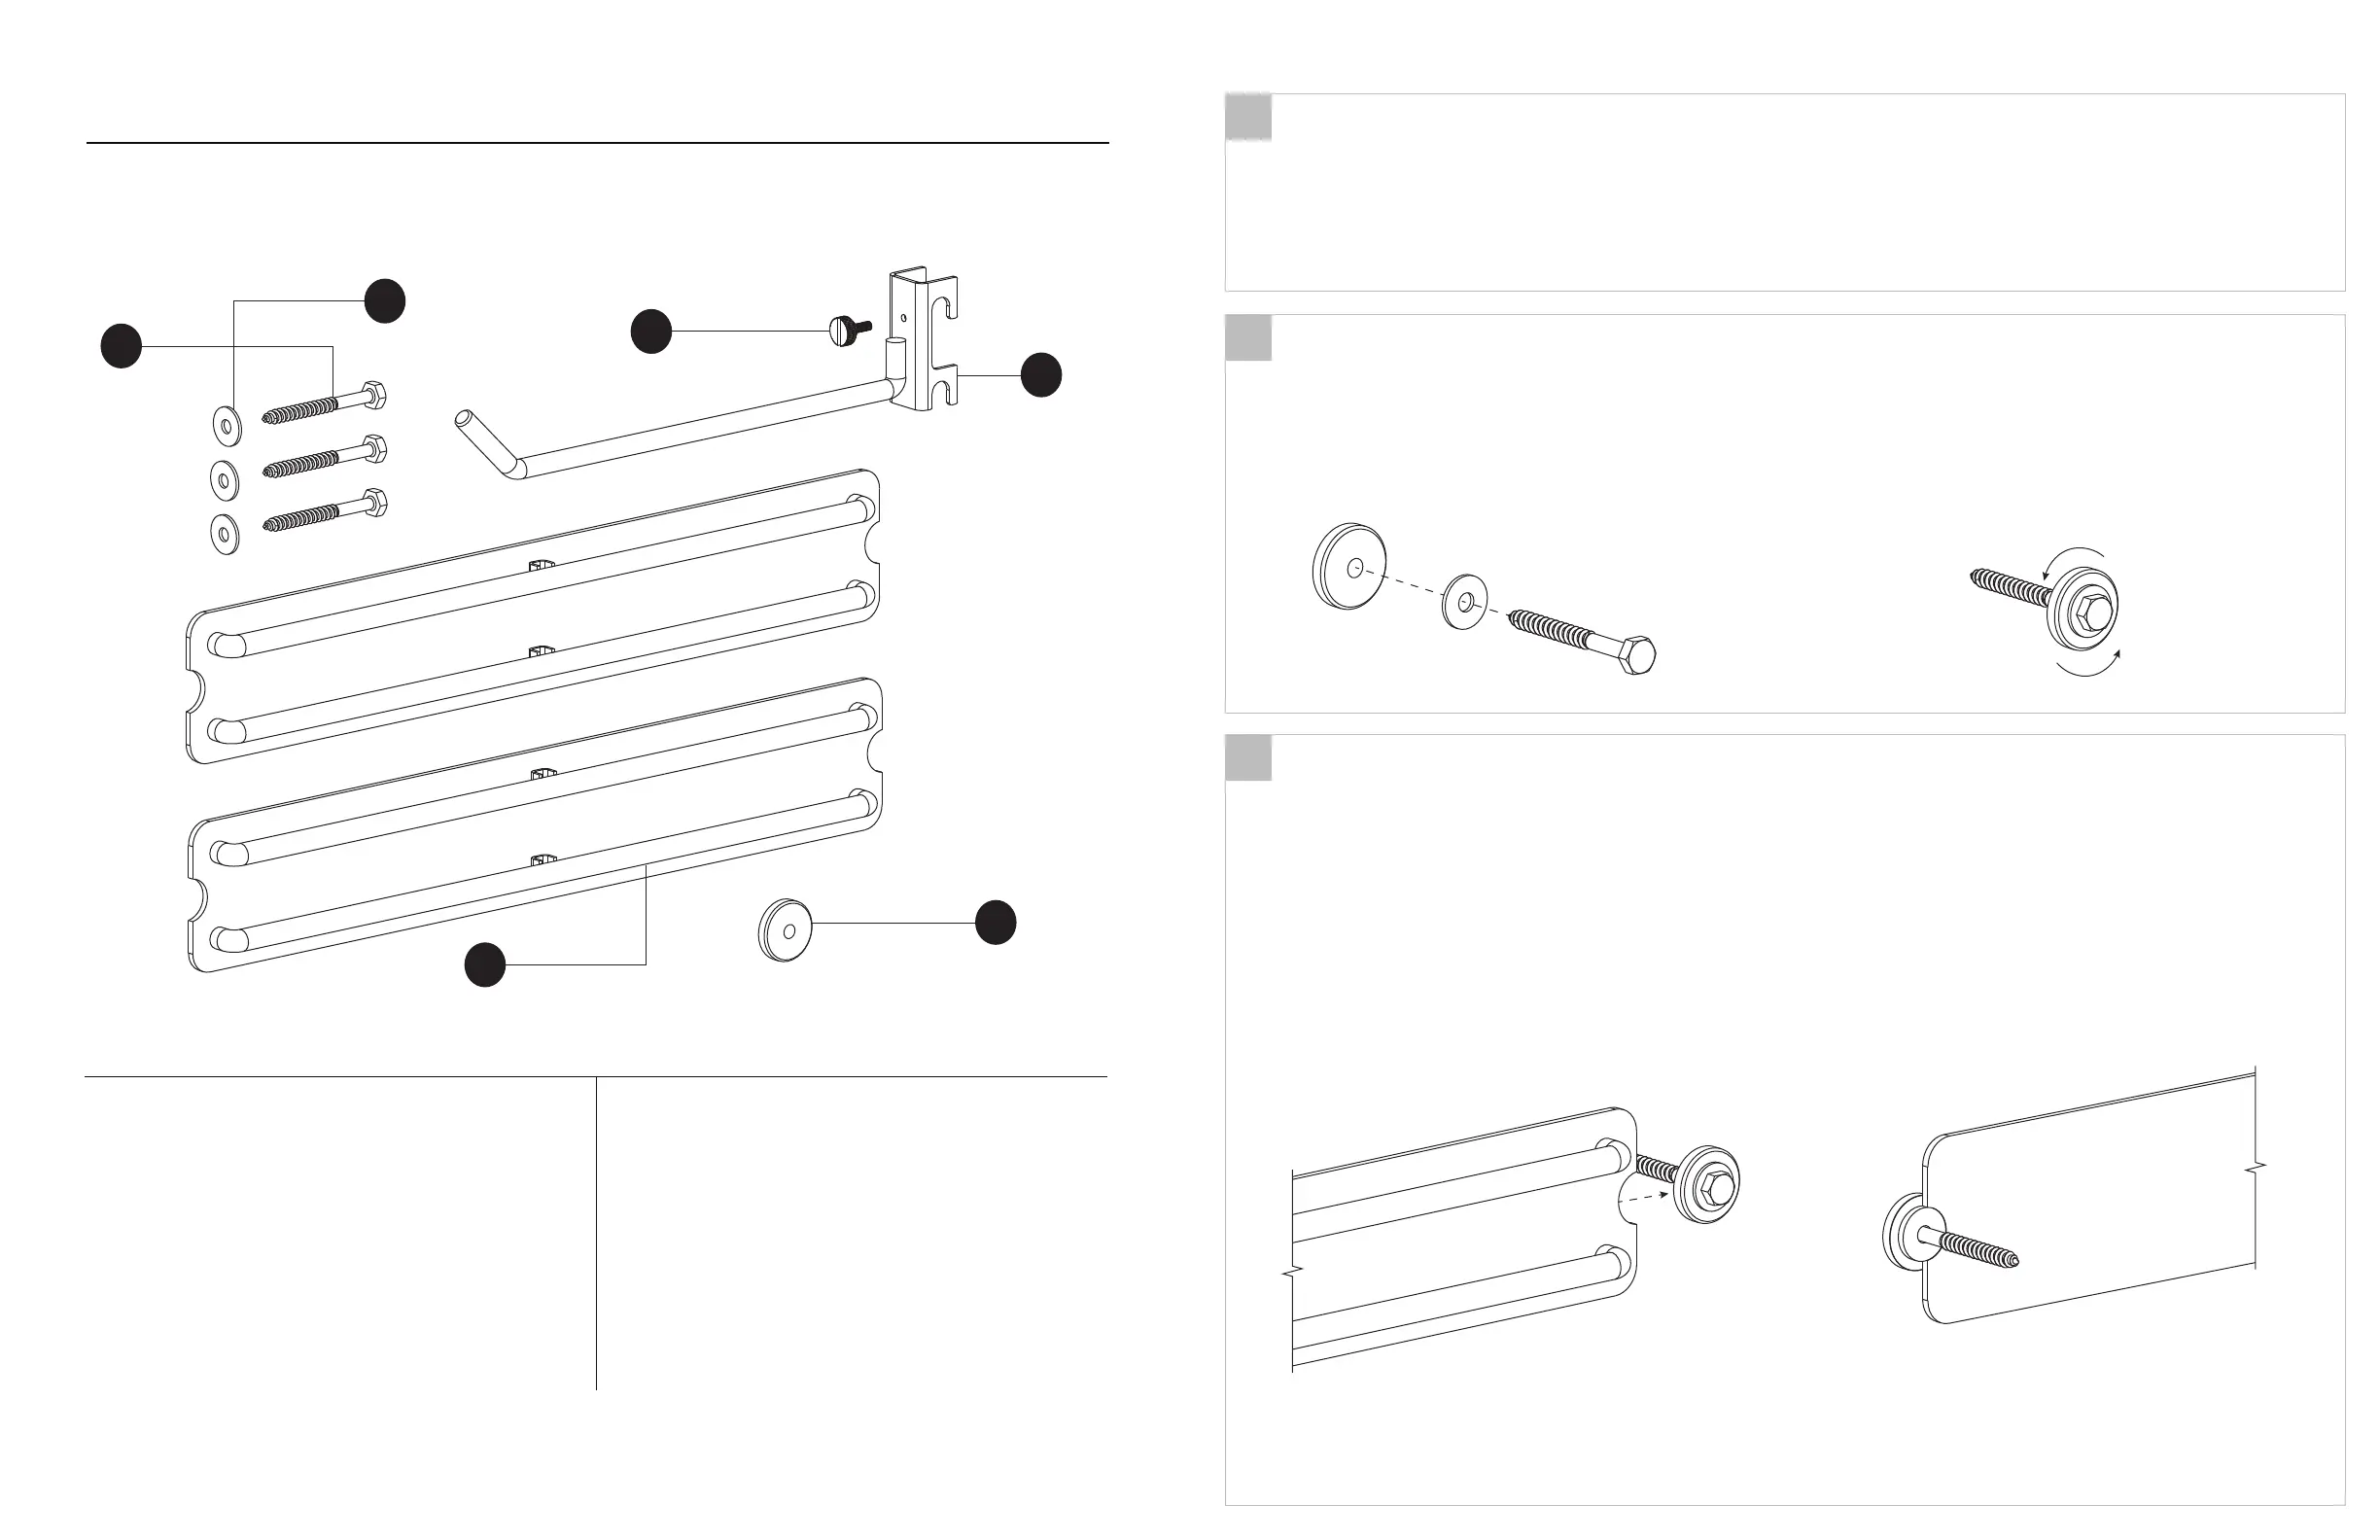
Washer
1/4”
Qty: 3, 4, or 5
Lag Screw
1/4” x 2.5”
Qty: 3, 4, or 5
Drill/Driver
Drill bits
12mm Socket/Driver
Level
Tape measure
Pencil
Stud finder
150 lbs. per backplate (A)
30lbs per attachment (F)
RECOMMENDED TOOLS: WEIGHT LIMITS:
INSTALLATION
NOTE: BLAT Modular must be mounted to a wall stud to achieve the advertised weight limit
Mark Stud Locations
• Use a stud finder to locate a single wall stud where you want to mount the rack. This
stud will be the middle section of the rack so ensure you have adequate spacing on
either side for the remaining Backplates (A).
• Mark the center of the stud with a pencil at the height you want the rack. Ensure that
you are in the middle of the stud for best results.
1
Drill and Install Aluminum Washer
• Line the Aluminum Washer’s (B) center hole with the mark you made in the center of
the stud and make another mark to form an intersection.
• Using a 3/16” drill, drill a hole at the intersection.
• Using a 12mm socket, screw in a Lag Screw (C) and Washer (D) until snug (Figure 2a).
• Back off the screw one to two turns (Figure 2b).
2
Installing Backplate
• Slide one Backplate (A) underneath the Aluminum Washer (B). If it doesn’t fit, you may
need to loosen the Lag Screw some more.
• Ensure that the radius of the Backplate meets with the mating radius on the Aluminum
Washer and tighten the Lag Screw. The Backplate should stay without falling but will still
allow for the leveling adjustments in the next step.
3
D
C
Thumbscrew
Qty: 8, 10, or 12
E
A
Backplate
Qty: 2, 3, or 4
F
Attachment
Qty: 8, 10, or 12
B
Aluminum Washer
Qty: 3, 4, or 5
NOTE: The quantity of the components below will vary based
off the kit that was ordered.
Back View
2b2a
 Loading...