Tools You’ll Need:
• 3/8(10mm)socketornutdriver(anchornuts)•3/32Allenwrench(actionheightadjustmentscrews)
• .050Allenwrench(intonationsetscrews)•1/16Allenwrench(saddlelockingscrews)
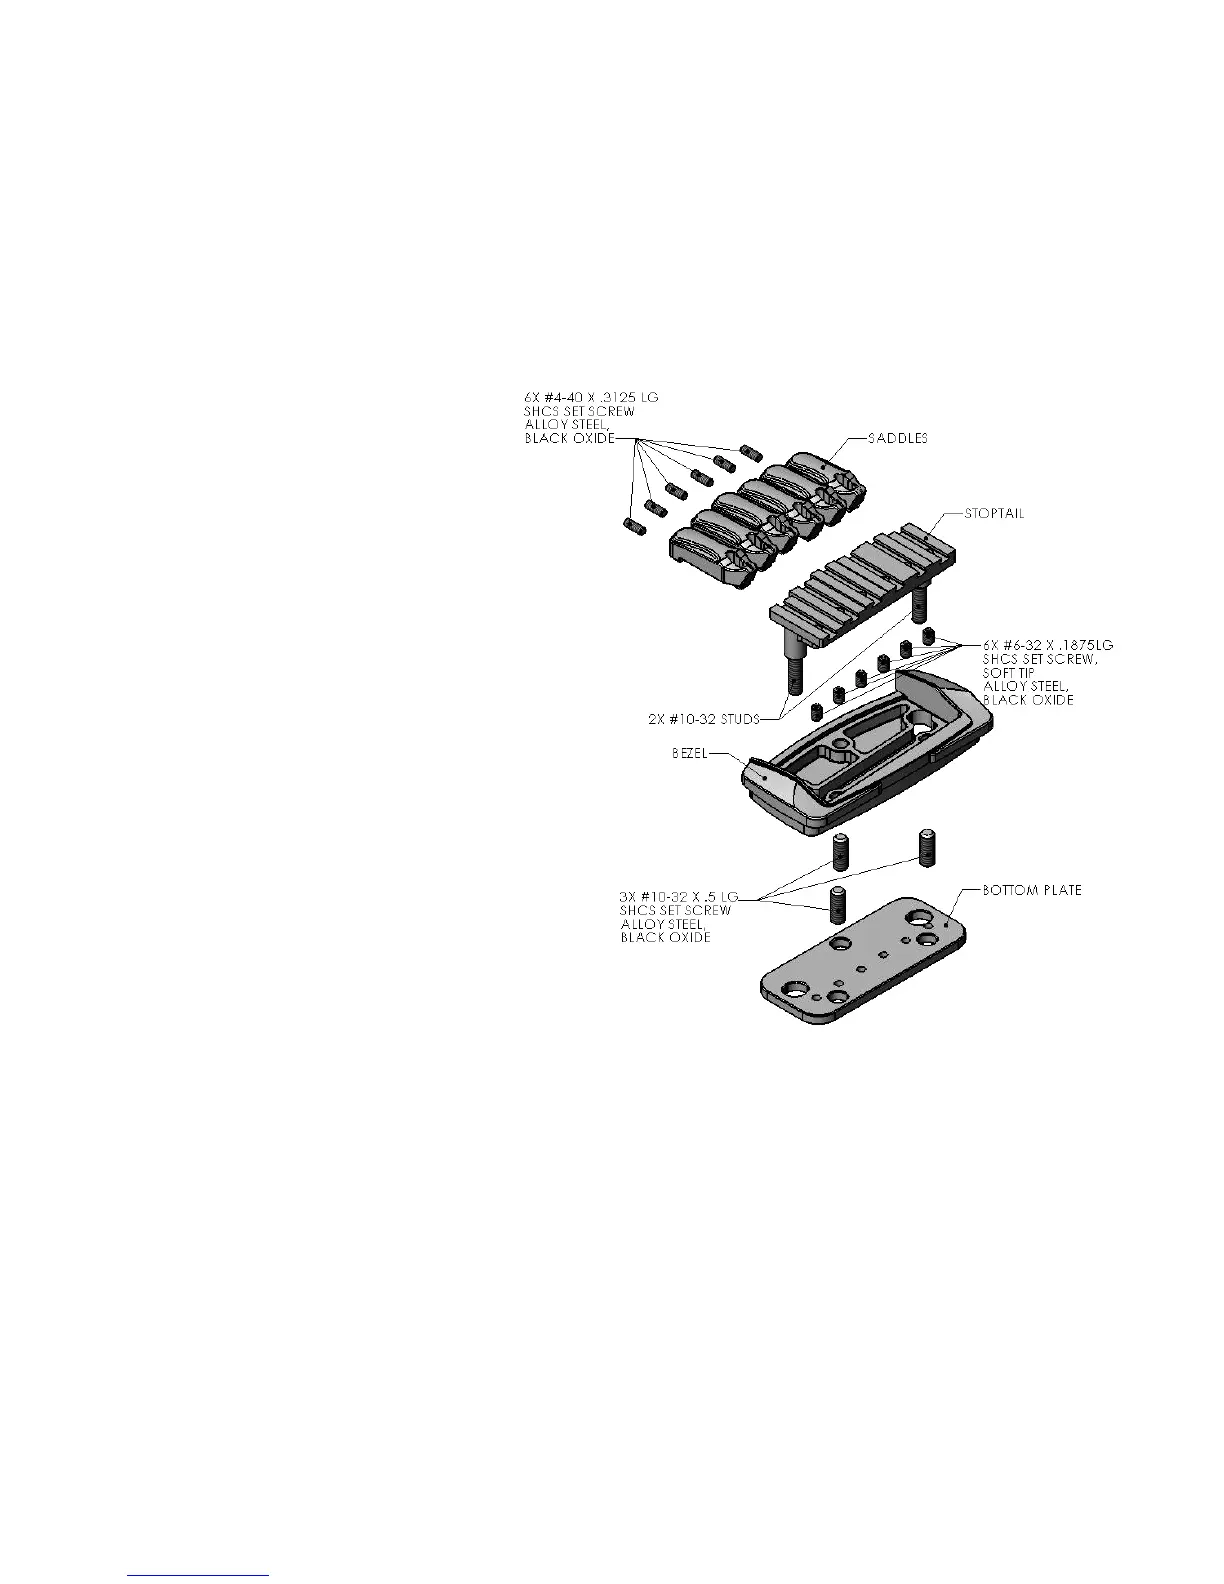
Bridge Components
The bridge consists of three main parts:
1. StoptailAssembly: The stoptail can
be adjusted up or down to change the
bridge height. It holds the individual
saddle pieces, which can be shifted
forward or backward to adjust the
intonation.
2. Bezel: The bezel sits in a shallow pocket
in the top of the guitar and houses the
stoptail assembly.
3. BottomPlate: The bottom plate is
accessible from the back of the guitar and
sandwiches the guitar body between the
plate and the bezel.
Action Adjustment Quick Tips
• Twoanchornuts(Fig 2) hold the bridge
assembly together. Do not remove them
or the bridge will come off.
• Threeactionheightadjustmentscrews
(Fig 3) are used to lower and raise the
action. Two are located on the outside of
the bottom plate (treble and bass) and
one in the center toward the back. The center screw is used to stabilize the bridge, not raise or lower it.
It should be set after the desired bridge height is secured.
• Eachtimeyouraisethebridgeoneitherthetrebleorbassside,youwillneedtoloosentheanchornut(Fig 2)
prior to raising it to relieve clamping tension.
• Eachtimeyoulowerthebridgeoneitherthetrebleorbassside,youwillsimplyneedtore-tightentheanchor
nut after lowering the height to reestablish clamping tension. Do not over-tighten the nut — it only needs to
be snug.
• Aftermakingtrebleandbassheightadjustments,raisethecenteradjustmentscrewuntilitissnugandjust
starts to lift the back of the bridge. Do not over-tighten this or it could break the bridge.
 Loading...