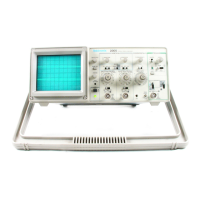
Vertical (both channels)
POSITION Midrange
MODE CH 1
VOLTS/DIV 0.5 V (1 OX PROBE)
VOLTS/DIV Variable CAL detent (fully clockwise)
Input Coupling AC
Horizontal
COARSE POSITION Midrange
MODE X1
SEC/DIV 0.2 ms
SEC/DIV Variable CAL detent (fully clockwise)
Trigger
SLOPE /
LEVEL Midrange
MODE P-PAUTO
HOLDOFF MIN
SOURCE CH 1
COUPLING AC
Connect a probe to the input BNC connector for Channel 1 (labeled CH 1 OR X).
Attach the probe ground lead to the collar of the EXT INPUT connector and apply the
probe tip to the PROBE ADJUST terminal. If necessary, adjust the TRIGGER LEVEL
control to get a stable display.
Change the Channel 1 input coupling switch to GND and use the Channel 1
POSITION control to align the baseline trace to the center horizontal graticule line.
This sets the zero reference for the display.
Switch input coupling back to AC. Notice that the square wave is centered vertically
on the screen. Now switch input coupling to DC and observe what happens to the
waveform. The zero reference is maintained at the center horizontal graticule line.
NOTE: More information about using the controls is contained at the end of this procedure. Refer to it as
often as needed while learning the front-panel controls.
Use the following controls and notice the effect each has on the displayed waveform
as the settings are changed.
Each POSITION control
CH 1 VOLTS/DIV
CH 1 VOLTS/DIV Variable (CAL)
SEC/DIV
SEC/DIV Variable (CAL)
HORIZONTAL MODE
HORIZONTAL MAG
TRACE SEP
TRIGGER SLOPE
At this point, connect the second probe to the CH 2 OR Y input connector. Set the
VERTICAL MODE switch to CH 2 and TRIGGER SOURCE to CH 2, then follow
steps 2 through 5 again, using the channel 2 controls.
 Loading...