5-50
Power Unit
4st 9.9/15/20 2008
40)
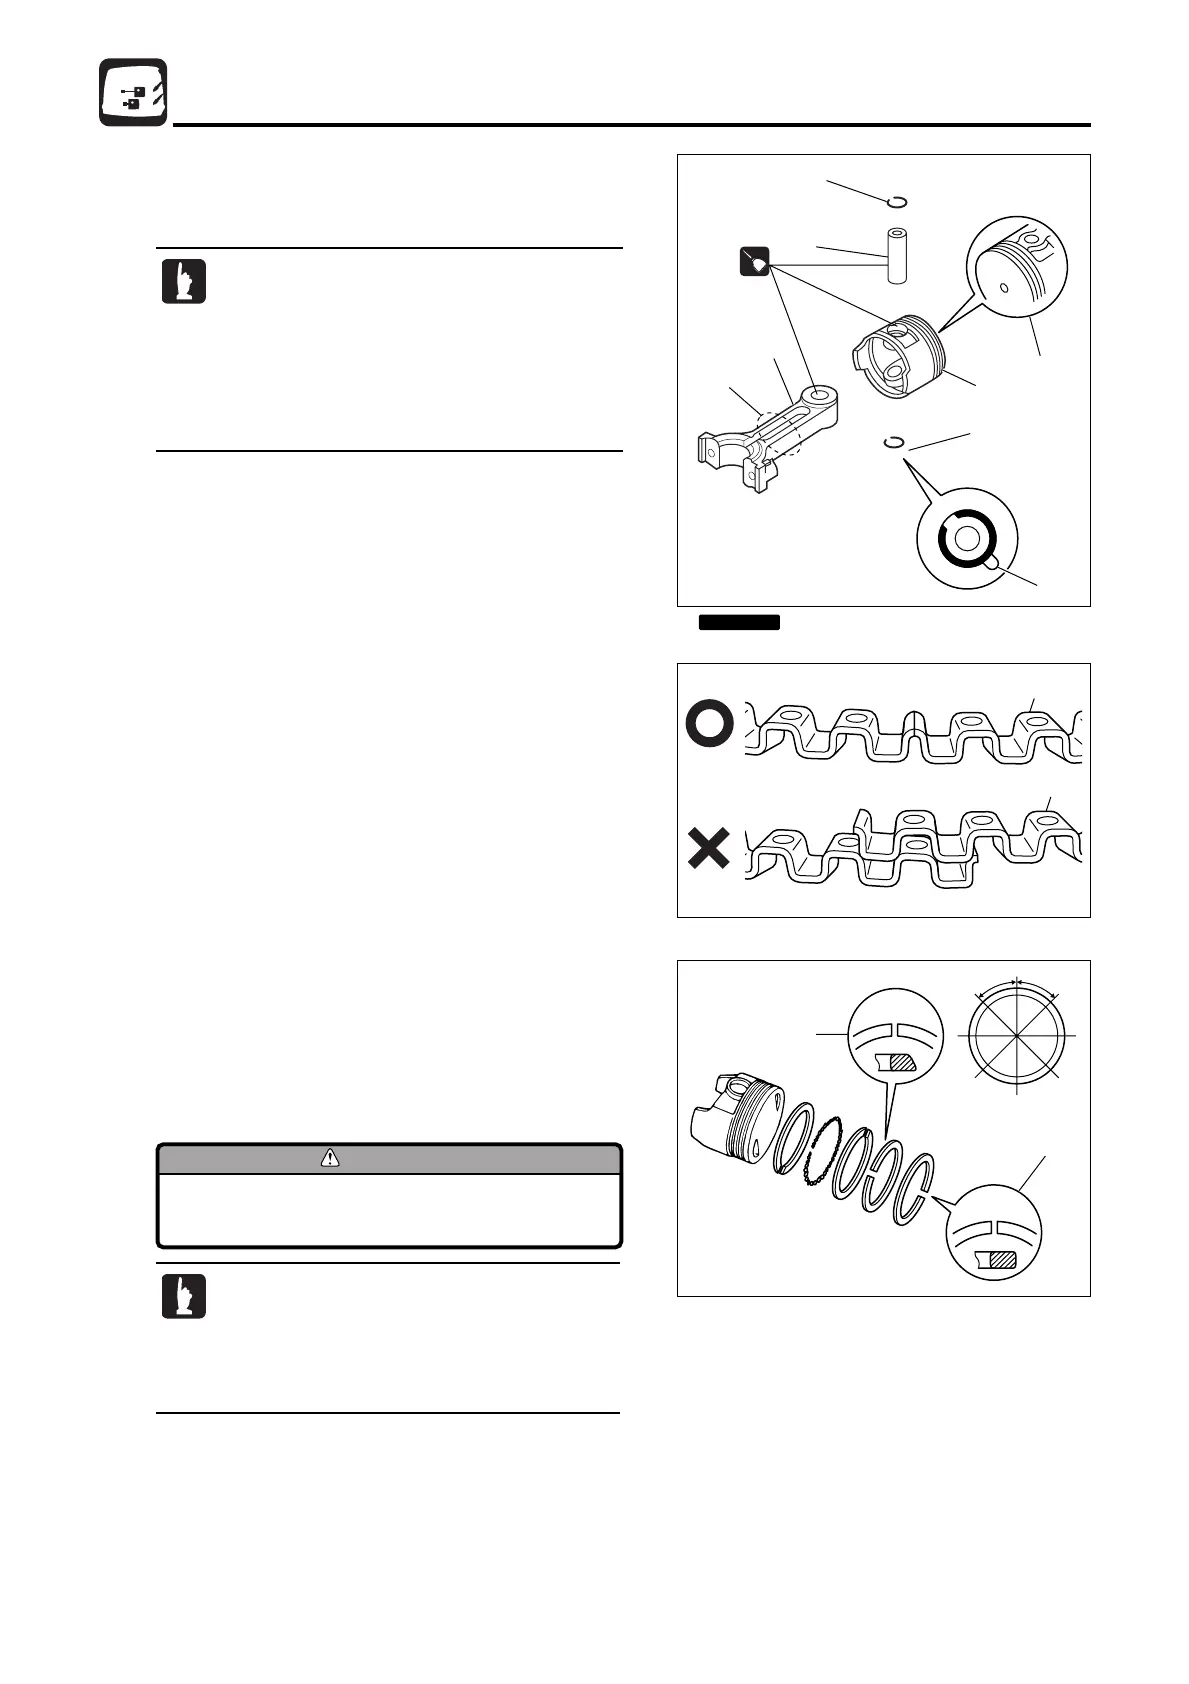
Assembling Piston and Connecting Rod
1. Install connecting rod 2, piston pin 3, and piston pin clip 4
to piston 1.
Be careful not to scratch piston surface
and damage rings.
UP
#1
#2
#4
#5
#3
T
T
UP
#2
#4
#3
#1#5
45°
45°
d
e
2. Put expander 5 (#4) into oil ring groove, and check that
ring ends meet correctly as shown.
3. While holding expander 5 (#4) gap with thumb, put upper
side rail (#3) end into the groove so that the gap is away from
gap of expander 5 (#4) to the left by 90° degrees.
4. In similar way, put lower side rail (#5) into the groove so that
the gap is away from gap of expander 5 (#4) to the right by
90° degrees.
5. Install second ring (#2 taper) and top ring (#1) to piston.
Install the rings so that their side with manufacturer's
identification de (T) faces upward.
6. Bring their gaps are away from each other as shown.
UP
4
4
3
2
1
a
b
c
4st OIL
4st
OIL
·
Point "3RO-UP" mark a of connecting rod and
"UP" mark b of piston at the same direction.
· Be sure to use new piston pin clip, and place
clip gap away from piston pin groove c as
shown.
· Be sure that individual connecting rod cap is
installed to their original connecting rod.
· Install piston rings so that their gaps are away
also from thrust direction of piston and
direction piston pin.
· After installing piston rings, check that they
move smoothly.
4
Do not reuse.
E_MFS20C_ch05_090105.qxd 09.1.20 5:25 PM ページ 50
 Loading...