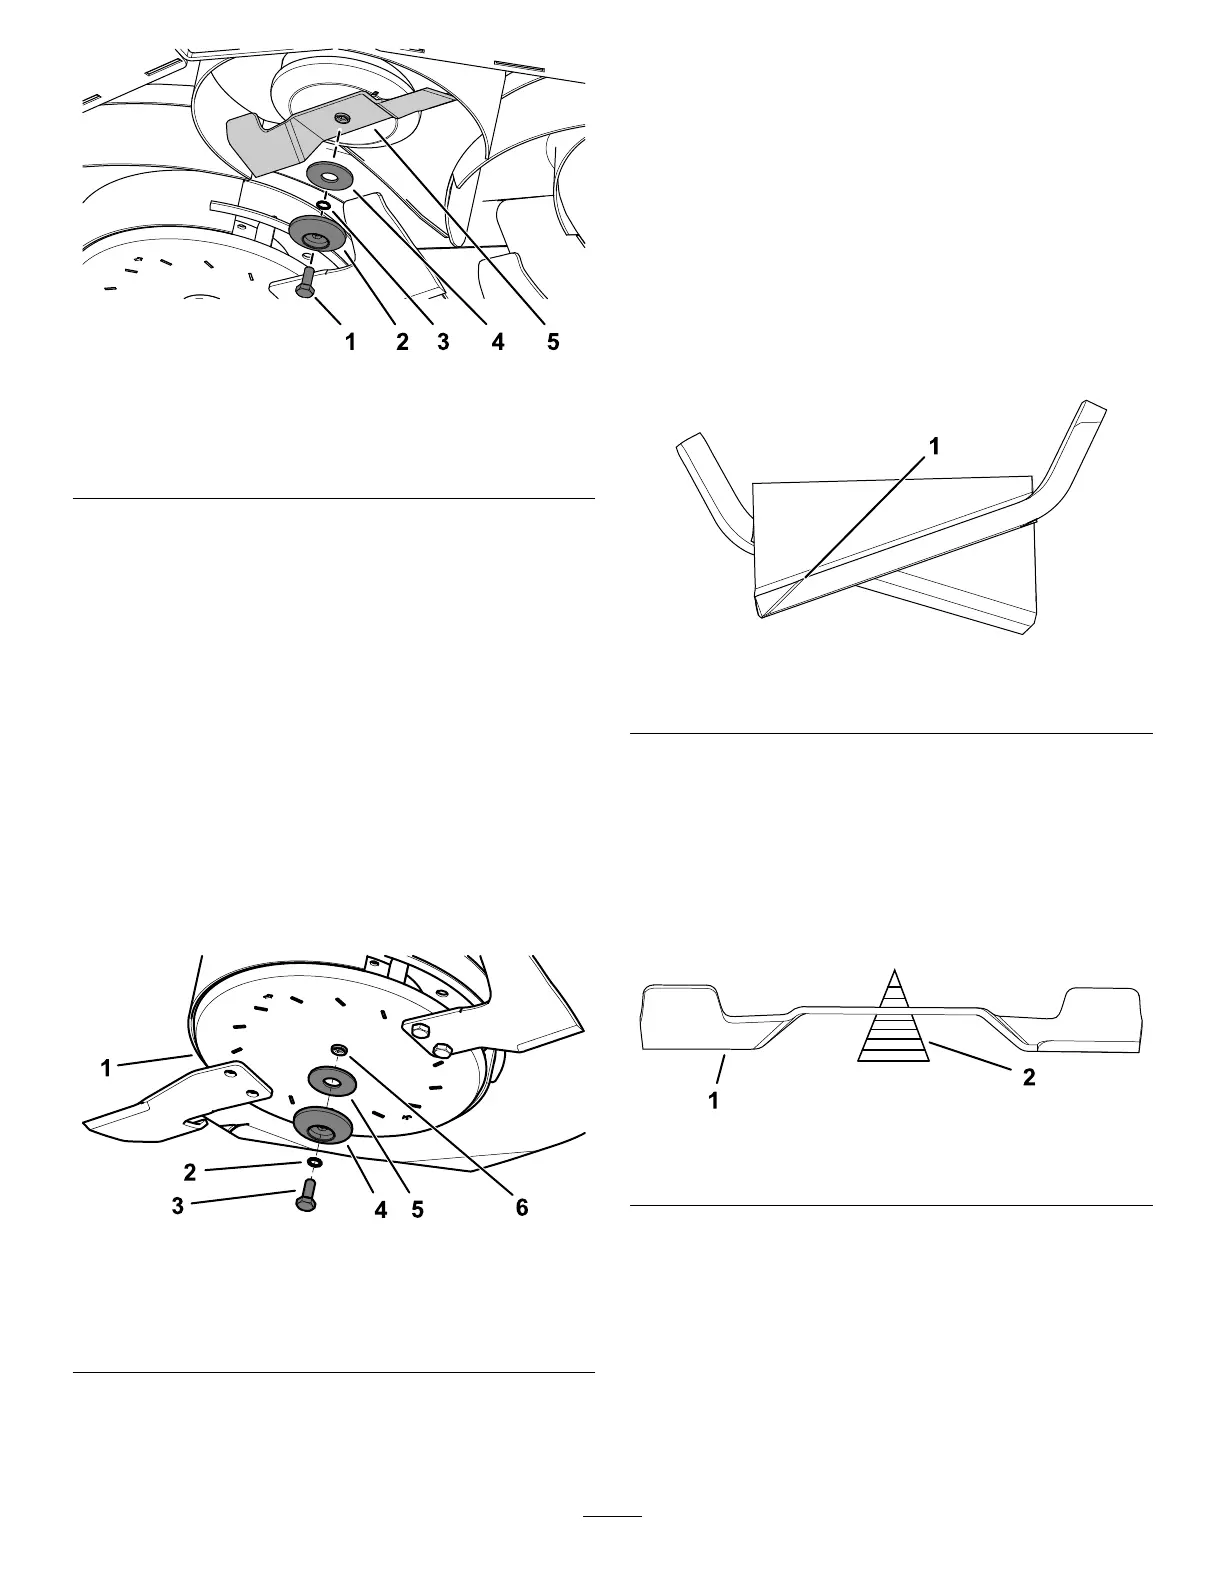
g216037
Figure104
1.Bladebolt
4.Curvedwasher
2.Bladeretainer
5.Centerblade
3.Springlockwasher
RemovingtheWingBladeAssembly
Therightandleftbladeassembliesrotateinopposite
directionsandareuniquetotheirpositions.Ensure
thatyouinstallthefandiscsandbladesinthecorrect
positions.
1.Holdthewingbladeassemblyusingaclothora
thicklypaddedglove.
2.Removethebladebolt,springlockwasher,
bladeretainer,andcurvedwasherfromthe
spindleshaft(Figure105).
3.Removethebladeassembly(Figure105).
Important:Therightbladeassemblyblade
bolthasaleft-handedthread.Turntheblade
boltclockwisetoloosenit.
g216117
Figure105
1.Wingbladeassembly4.Bladeassemblyretainer
2.Springlockwasher5.Curvedwasher
3.Bladebolt
6.Spindleshaft
SharpeningandBalancingthe
Blades
SharpeningandBalancingtheCenterBlade
1.Usealeorsharpeningtooltosharpenthe
cuttingedgeatbothendsoftheblade(Figure
106).
Note:Maintaintheoriginalangle–22°.
Note:Thebladekeepsitsbalanceifyou
removethesameamountofmaterialfromboth
cuttingedges.
g216118
Figure106
1.Sharpenattheoriginalangle–22°.
2.Checkthebalanceofthebladebyputtingiton
abladebalancer(Figure107).
Note:Ifthebladestaysinahorizontalposition,
thebladebalancesanditisreadyforuse.
Note:Ifthebladeisnotbalanced,lesome
metalofftheheavyendofthebladeinthesail
areaonly(Figure106).
g216115
Figure107
1.Blade2.Balancer
3.Repeatthisprocedureuntilthebladebalances.
73

 Loading...