Maintenance
47
m–4278r
1
2
3
5
6
7
4
8
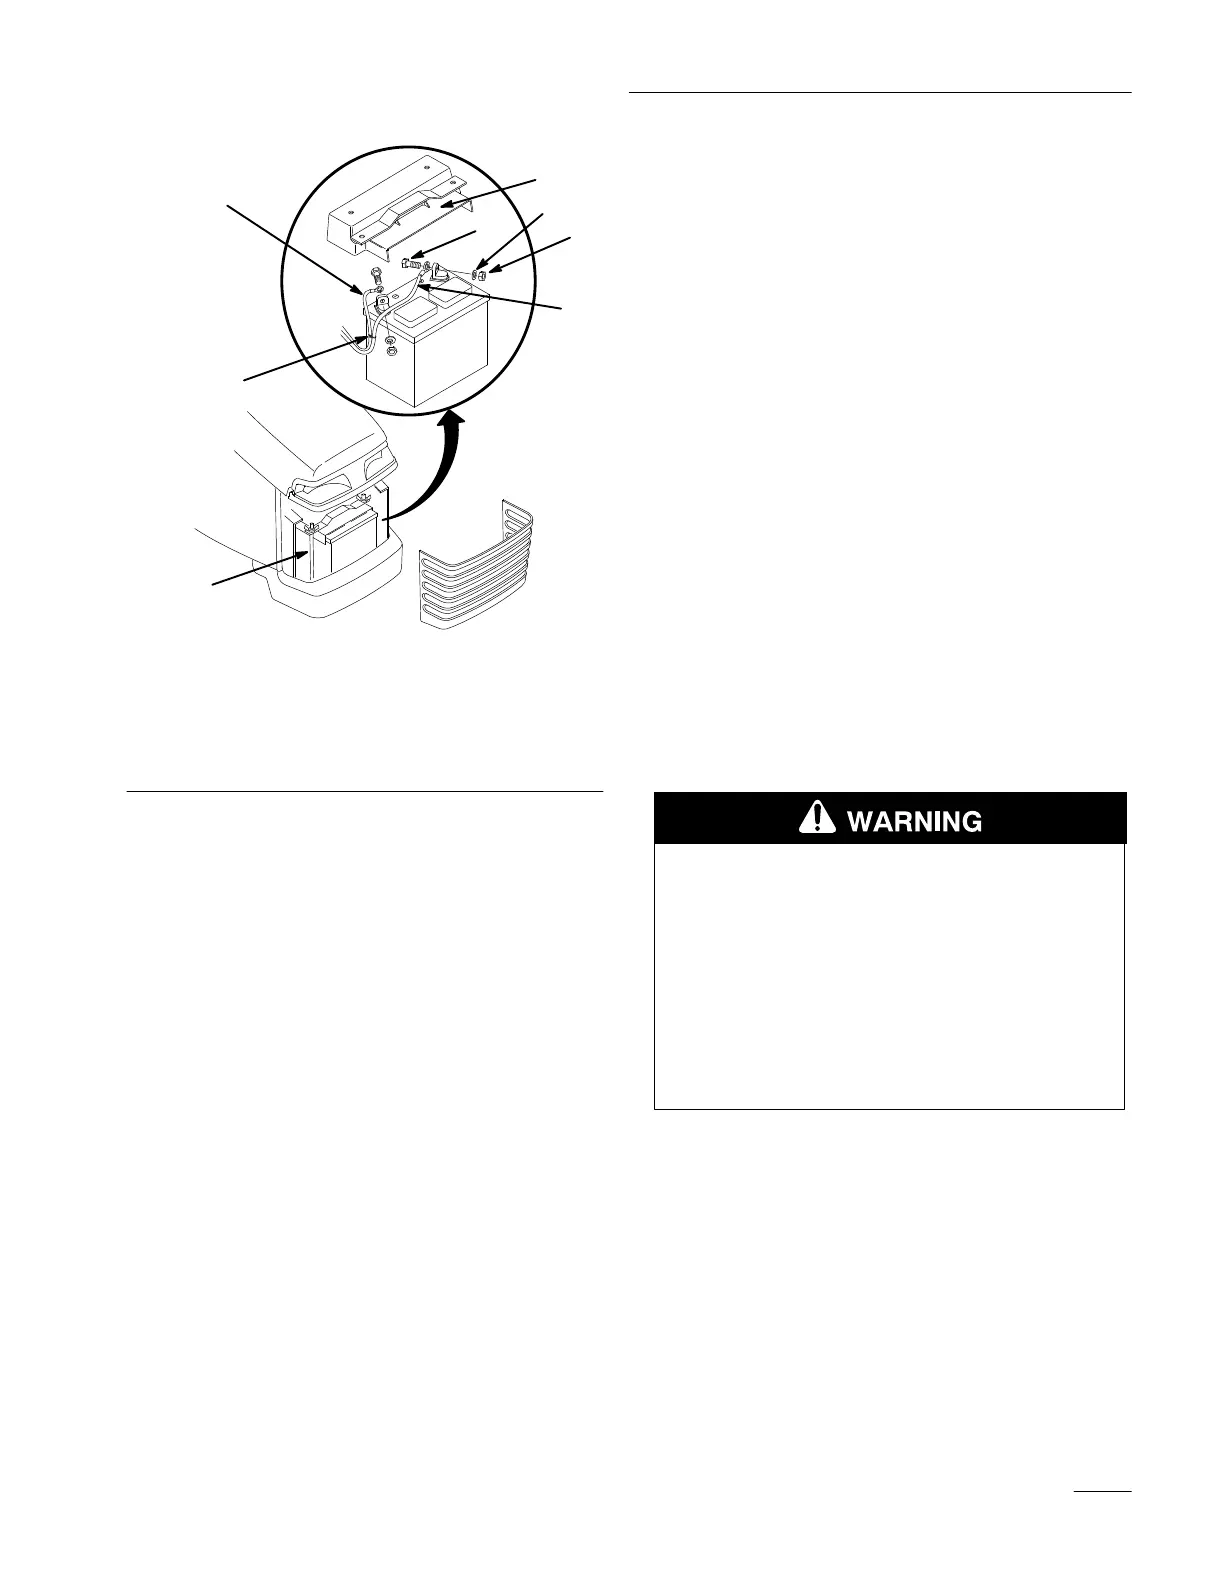
Figure 56
1. Negative
cable (black)
2.
Positive cable (red)
3.
Bolt (2)
4. W
asher (2)
5.
Locknut (2)
6.
Battery shield
7.
Hold–down rod
8.
Wire tie
Installing the Battery
1. Place the battery onto the chassis (Fig. 56).
IMPORTANT: Always connect the positive
(red) cable first.
2. Using the bolt, washer and locknut, connect the
positive (red) cable to the positive (+) battery
post (Fig. 56).
3. Using the bolt, washer and locknut, connect the
negative (black) cable to the negative (–) battery
post (Fig. 56).
4. Replace the battery shield and secure to the
chassis with hold–down rods and wing nuts
(Fig. 56).
IMPORTANT: Keep the battery shield in
place to protect the battery from heat.
5. Replace the front grille of the tractor, securing it
with the two previously removed screws and
washers (Fig. 54).
Charging the Battery
IMPORTANT: Always keep the battery fully
charged (1.260 specific gravity). This is
especially important to prevent battery
damage when the temperature is below 32°F
(0°C).
1. Remove the battery from the chassis; refer to
Removing the Battery, page 46.
2. Check the electrolyte level; refer to Checking the
Electrolyte Level, page 44, steps 2–5.
3. Remove the cell covers from the battery and
connect a 3– to 4–amp battery charger to the
battery posts. Charge the battery at a rate of 4
amperes or less for 4 hours (12 volts). Do not
overcharge the battery. Install the cell covers
after the battery is fully charged.
POTENTIAL HAZARD
• Charging the battery pr
oduces gasses.
WHAT CAN HAPPEN
• Battery gasses can explode.
HOW TO AV
OID THE HAZARD
• Keep cigarettes, sparks and flames away
from battery.
4. Install the battery in the chassis; refer to
Installing the Battery, page 47.

 Loading...