Rev. B
Workman MD Single Cylinder Gasoline EnginePage 4 -- 1 1
Fuel Tank Removal (Fig. 7)
CAUTION
Read safety precautions for handling gasoline
before working on the fuel system (see Safety In-
structions in Chapter 1 -- Safety).
1. Remove seat base from the frame (see Seat Base
Removal in the Service and Repairs section of Chapter
7--Chassis).
2. Use fuel transfer pump to remove gas from fuel tank.
3. Loosen hose clamp and disconnect fuel hose f rom
the fuel tank stand pipe.
4. Release tank web strapping from fuel tank. Do not re-
move strapping from floor plate and frame cross mem-
ber. Lift tank from frame.
NOTE: Workman MD vehicles with serial number
above 310000000 are equipped with a fuel evaporative
control system (EVAP) designed to collect and store
evaporative emissions from t he fuel tank. Fuel tank
components for these vehicles are shown in Fig. 10.
5. If necessary, remove stand pipe, fuel gauge and
bushings from tank.
Fuel Tank Installation (Fig. 7)
1. If removed, install bushings, stand pipe and fuel
gauge to tank.
2. Position fuel tank to frame. Secure tank to frame and
cross member with t ank web strapping.
3. Connect fuel hose to the tank stand pipe and secure
with hose clamp.
4. Install seat base to the frame (see Seat Base Instal-
lation in the Service and Repairs section of Chapter 7 --
Chassis).
5. Fill fuel tank.
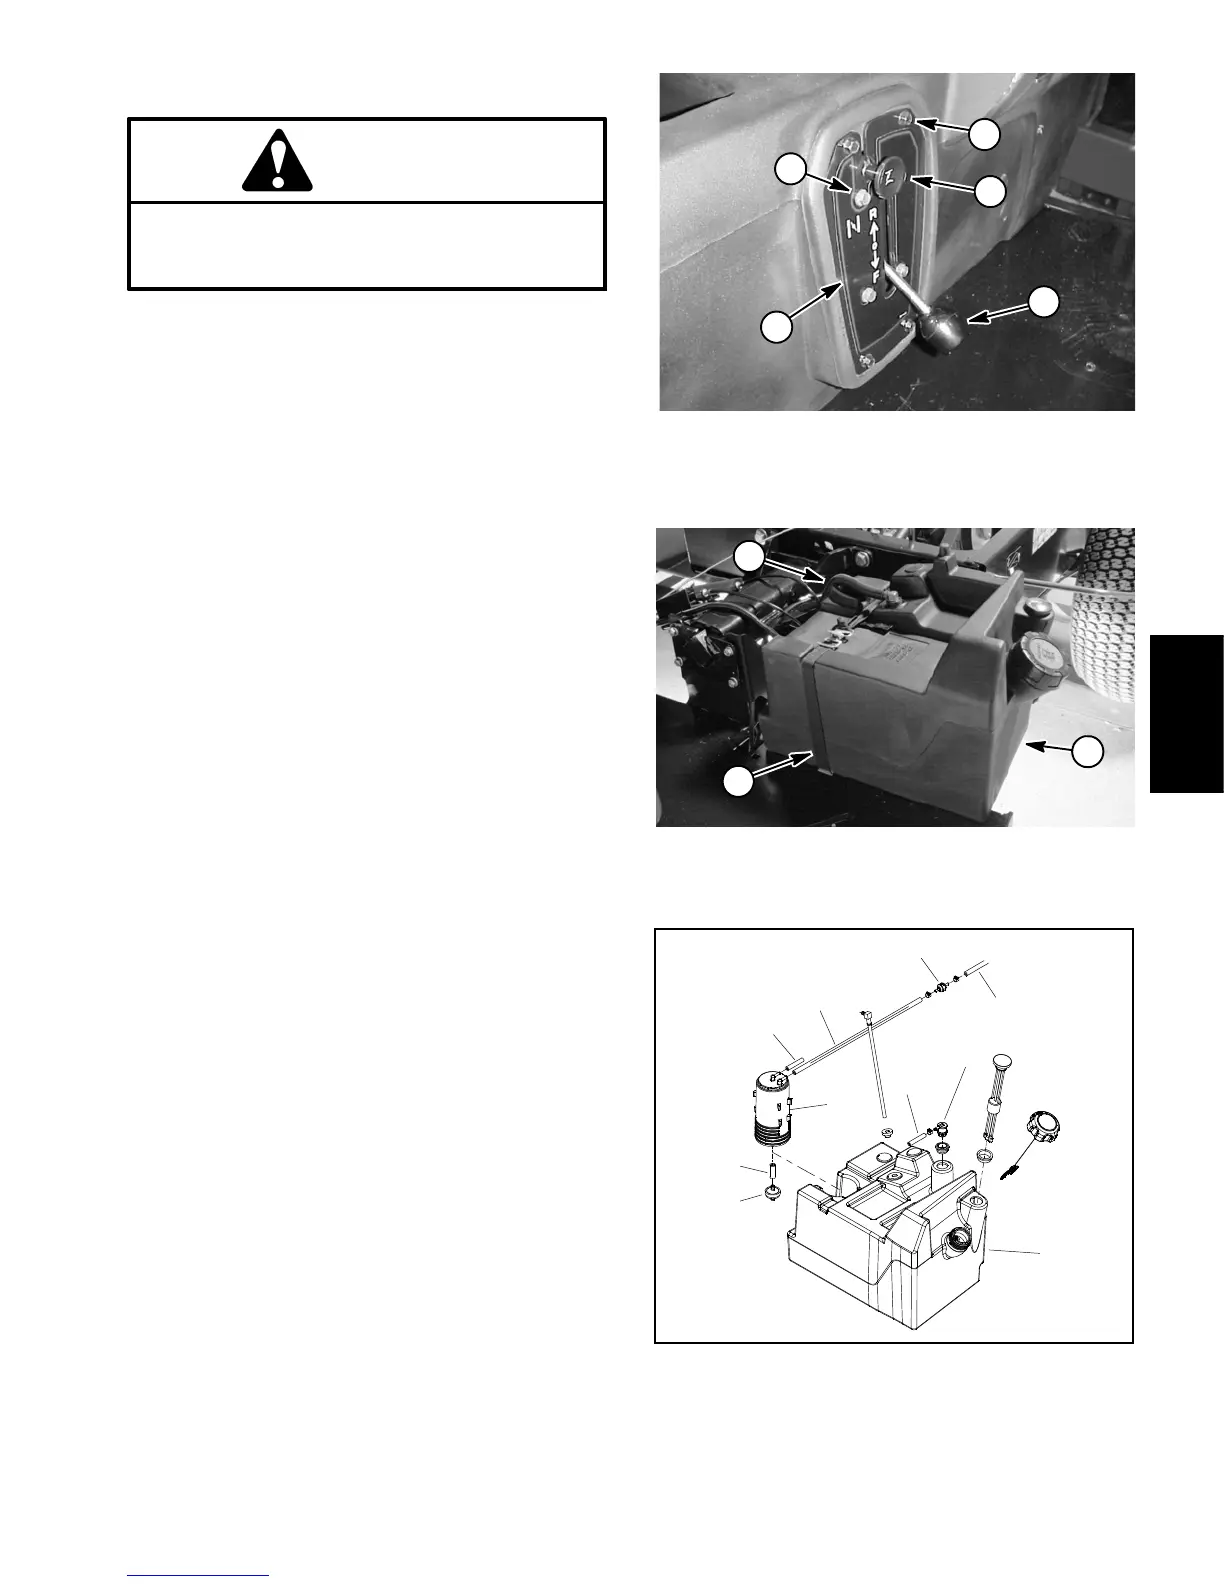
1. Shift lever
2. Cap screw (short)
3. Shift plate
4. Cap screw (long)
5. Choke cable
Figure 8
3
1
2
4
5
Figure 9
1. Fuel hose
2. Fuel tank
3. Tank web strapping
3
1
2
Figure 10
1. Fuel tank
2. Carbon canister
3. Rollover valve
4. Fuel hose (tank vent)
5. Fuel hose
6. Fresh air filter
7. Fuel hose (purge hose)
8. Check valve
9. Fuel hose (to engine)
1
3
2
6
5
9
8
7
4
4
Single Cylinder
Gasoline Engine

 Loading...