e-STUDIO350/352/353/450/452/453 © 2003 - 2008 TOSHIBA TEC CORPORATION All rights reserved
ADJUSTMENT
3 - 92
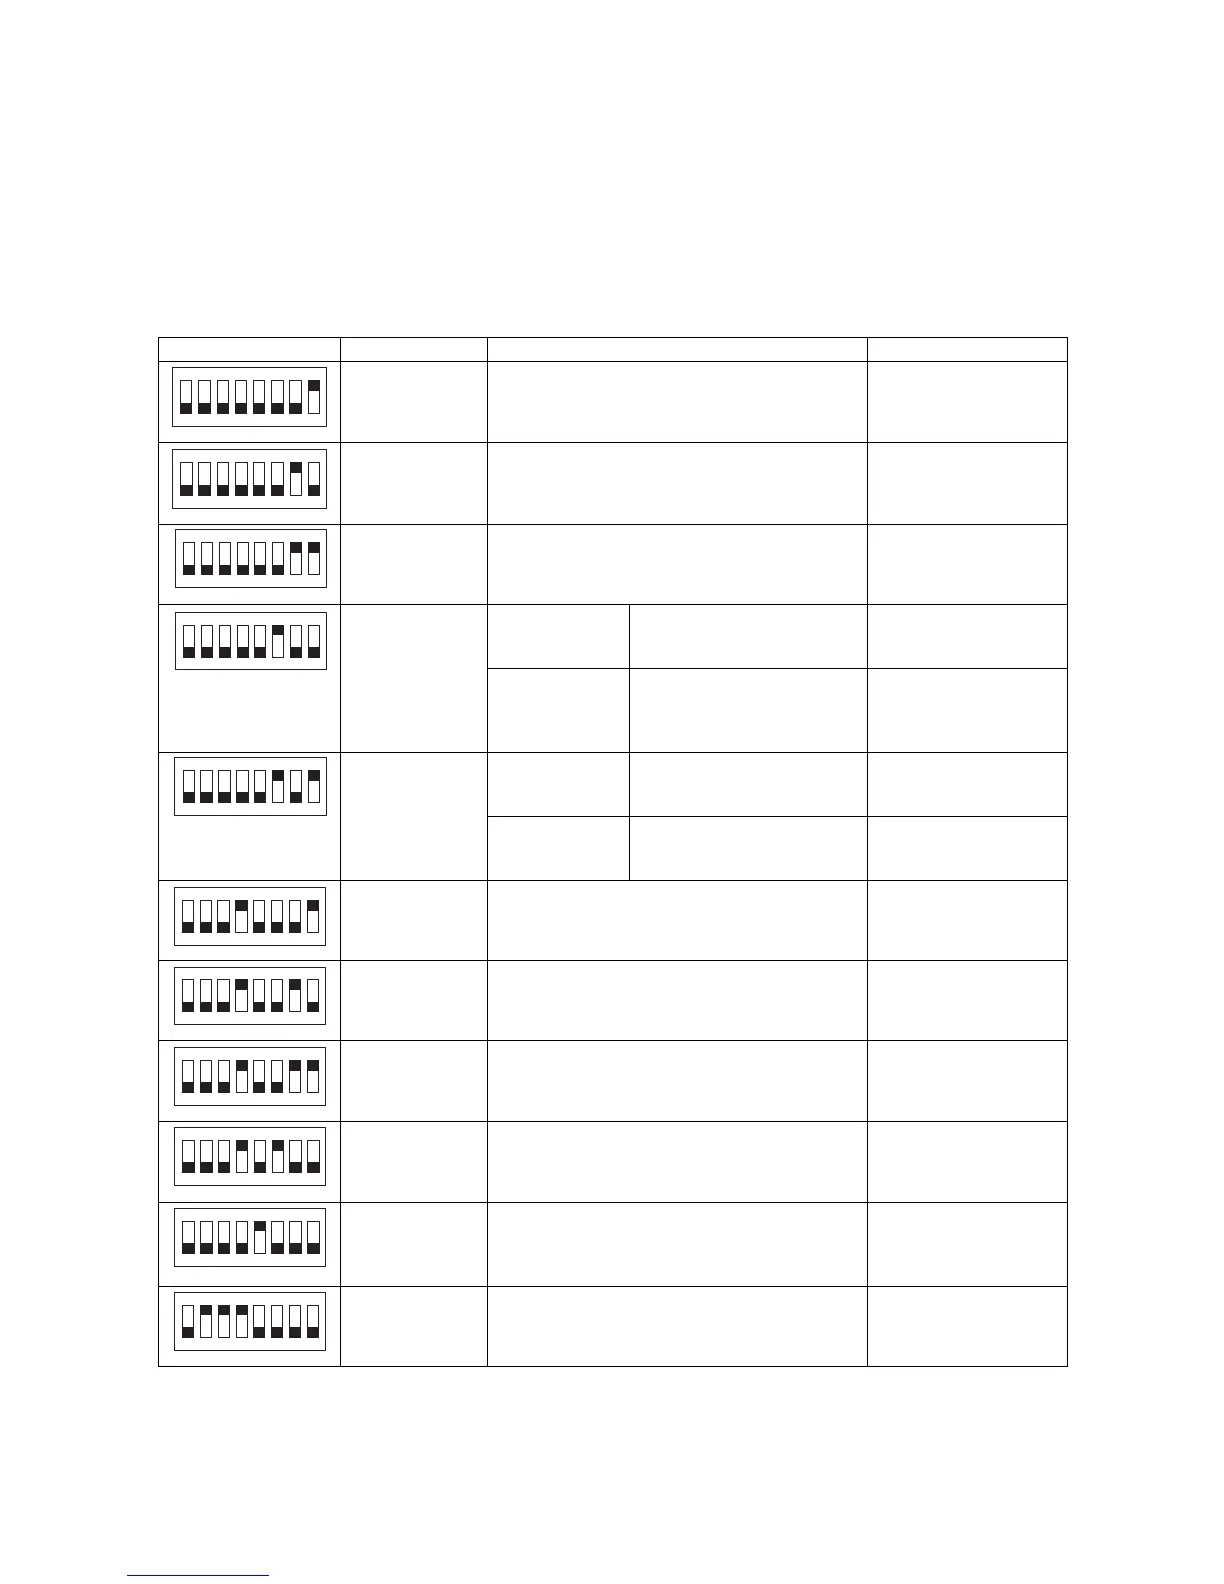
3.12.7 DIP switch functions
You can simulate various functions by setting the DIP switch (SW1) on the finisher controller PC board
appropriately.
Initiating Operations
1) Remove any obstacles from the area of operation.
2) Set the DIP switch (SW1) as shown, and turn ON the power (so that LED1 will start to blink).
3) Press the pushing switch (SW2) twice to initiate the operation in question. (LED2 will remain on dur-
ing operation).
Note: Note:
Perform the shipping position operation when the finisher is packed again.
Setting Item Operation To stop
Delivery motor The delivery roller rotates in a specific speed. • Press SW2 again.
• Turn OFF the joint
sensor (S4).
Stack process-
ing motor (stack
delivery lever)
The stack delivery lever moves to its home
position and stops.
• Turn OFF the joint
sensor (S4).
Stack process-
ing motor
(returning roller)
The returning roller moves to the home posi-
tion and stops.
• Turn OFF the joint
sensor (S4).
Front jogging
plate motor
When not at the
home position
The front jogging plate
moves to its home position
and stops.
• Turn OFF the joint
sensor (S4).
When at the
home position
The front jogging plate
moves over a specific posi-
tion and stops at the home
position.
• Turn OFF the joint
sensor (S4).
Rear jogging
plate motor
When not at the
home position
The rear jogging plate
moves to the home posi-
tion and stops.
• Turn OFF the joint
sensor (S4).
When at the
home position
The rear jogging plate
moves over a specific dis-
tance and stops.
• Turn OFF the joint
sensor (S4).
Upper stack tray
motor (up)
The upper stack tray moves up and stops
when the upper stack tray upper limit sensor
turns ON.
• Press SW2 again.
• Turn OFF the joint
sensor (S4).
Upper stack tray
motor (down)
The upper stack tray moves down and stops
when the lower stack tray lower limit sensor
turns ON.
• Press SW2 again.
• Turn OFF the joint
sensor (S4).
Lower stack tray
motor (up)
The lower stack tray moves up and stops
when the lower stack tray upper limit sensor is
turned ON.
• Press SW2 again.
• Turn OFF the joint
sensor (S4).
Lower stack tray
motor (down)
The lower stack tray moves down and stops
when the lower stack tray lower limit sensor is
turned ON.
• Press SW2 again.
• Turn OFF the joint
sensor (S4).
Stapler motor The stapler motor stops after the stapling
operation.
• Press the stapler
safety switch (S14).
• Turn OFF the joint
sensor (S4).
Shipping posi-
tion operation
The upper and lower stack trays move to the
shipping position and stop.
• Turn OFF the joint
sensor (S4).
ON
12345678
ON
12345678
ON
12345678
ON
12345678
ON
12345678
ON
12345678
ON
12345678
ON
12345678
ON
12345678
ON
12345678
ON
12345678

 Loading...