LC 120 (J12) TOYOTA GENUINE AUDIO
LC 120 (LHD) - 10
07-02
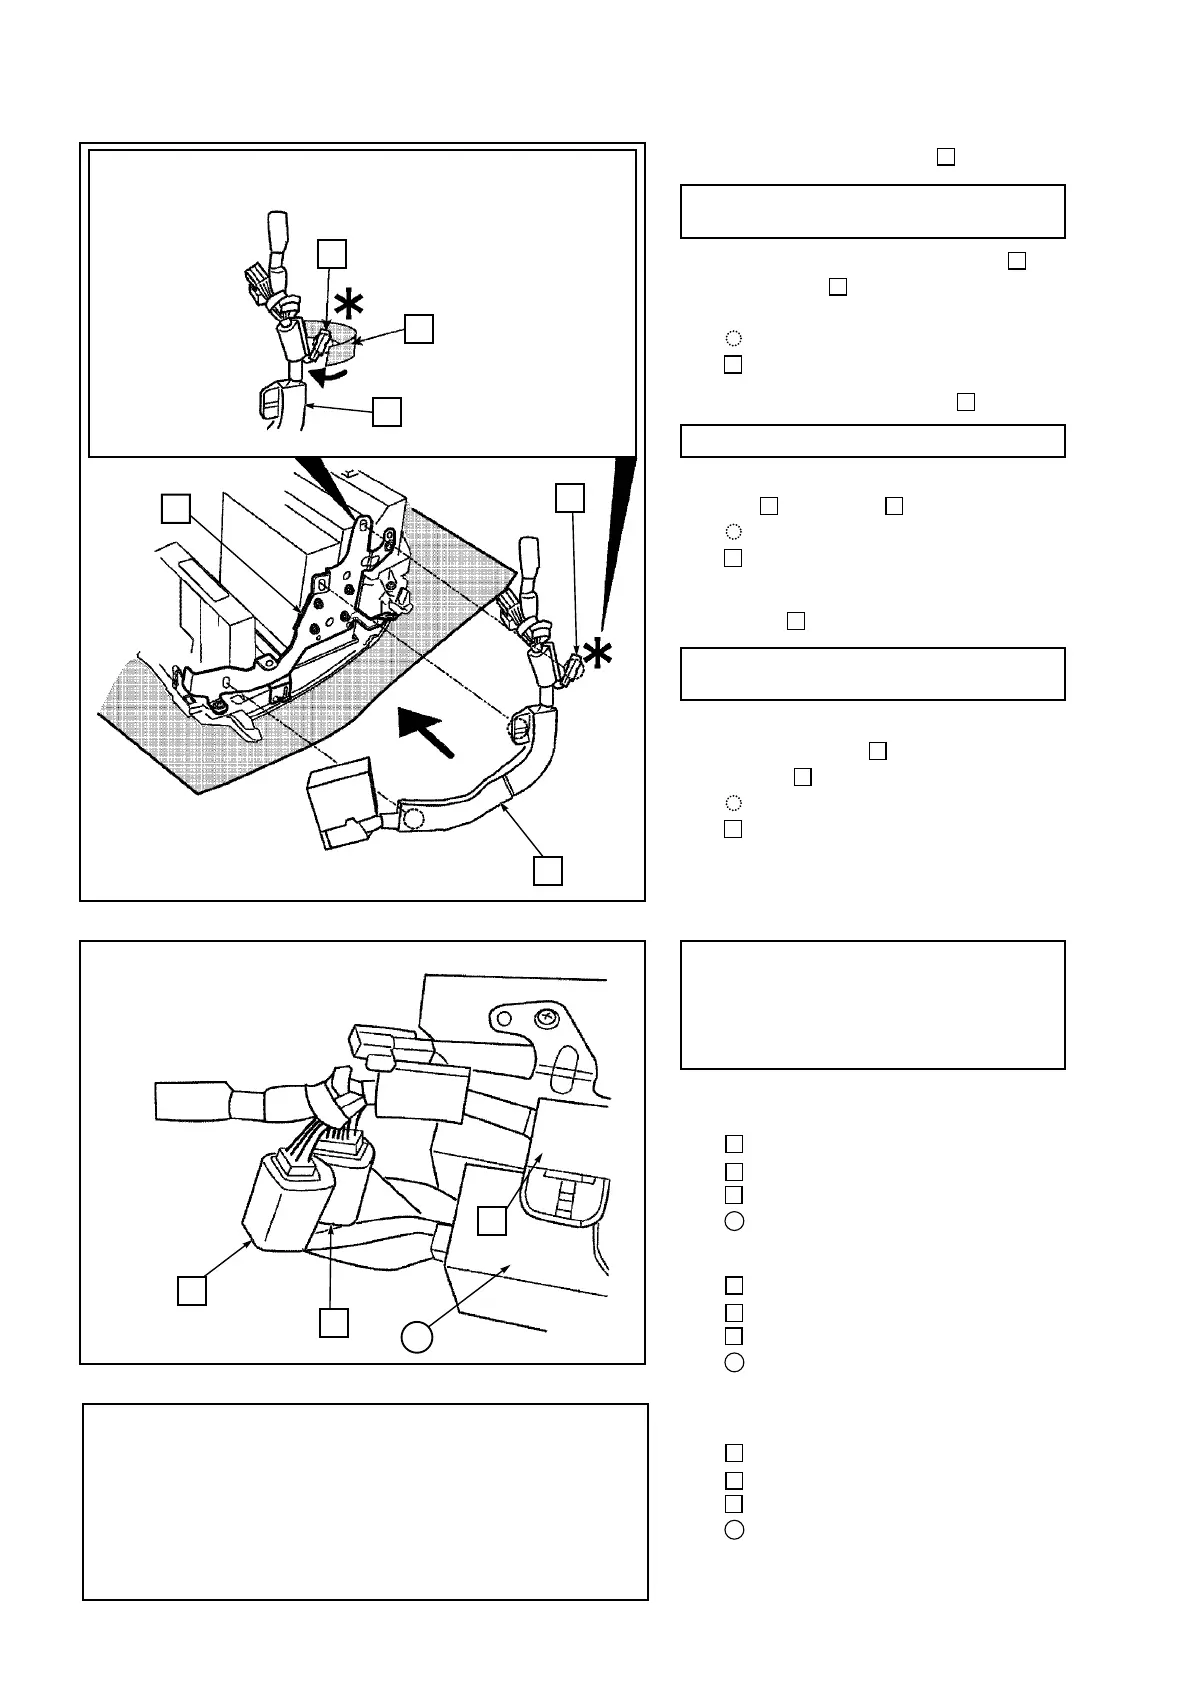
4. Das System anschließen, wie in der
Abbildung gezeigt.
: Stecker
: Stecker
: Kabelstrangschutz
: Kombination
4. Connect the system up as shown.
: Connector
: Connector
: Harness protection
: Combo
4. Raccordez les systèmes de la manière
illustrée.
: Connecteur
: Connecteur
: Protection du faisceau de câbles
: Combinaison
Abb. 11 - Fig. 11
3. Den Kabelstrangschutz anbringen.
Den Antennenverstärkerstecker mit
Klebeband befestigen, wie in der
Abbildung gezeigt.
: Clip (2x)
: Halterung (L)
3. Fit the harness protection .
Attach the antenna amplifier connector
clip using tape as shown.
: Clip (2x)
: Bracket (L)
3. Montez la protection du faisceau de
câbles
.
Attachez le connecteur de l'amplifica-
teur d'antenne à l'aide de ruban
adhésif , comme illustré.
: Clip (2x)
: Support (G)
Abb. 10 - Fig. 10
NUR FÜR IN INSTRUMENTENTAFEL
EINGEBAUTEN WECHSLER
NUR FÜR IN INSTRUMENTENTAFEL
EINGEBAUTEN WECHSLER
ONLY FOR IN-DASH CHANGER
UNIQUEMENT POUR UN CHANGEUR
DE TABLEAU DE BORD
ONLY FOR IN-DASH CHANGER
UNIQUEMENT POUR UN CHANGEUR
DE TABLEAU DE BORD
NUR FÜR IN INSTRUMENTENTAFEL EINGEBAUTEN WECHSLER
ONLY FOR IN-DASH CHANGER
UNIQUEMENT POUR UN CHANGEUR DE TABLEAU DE BORD
VERKLEIDUNG EINPASSEN UND AUSGEBAU-
TE TEILE WIEDER EINBAUEN.
REFIT THE TRIM AND REMOVED PARTS.
REPLACEZ LE GARNISSAGE AINSI QUE LES
PIECES QUI ONT ETE DEMONTEES.

 Loading...