Brakes
Bleeding the Front Brakes,
Renewing Brake Fluid
4.
Place
the
other
end
of
the
tube
in
a suitable
receptacle containing
new
brake fluid.
5.
Turn
the handlebars to bring the fluid reservoir to
a
level
position.
6.
Remove
the
screws from the reservoir
cover.
1
t
Ensure absolute cleanliness when adding brake
fluid
to
the
brake fluid reservoir.
Do
not
allow
moisture or debris
to
enter the cylinder, as this will
adversely affect the fluid properties. Always
use
fluid
from a sealed container
and
do not use fluid from a
container that
has
been
opened
for
any
period
of
time. Always check for fluid leakage around
hydraulic fittings and for damage to hoses. A
dangerous riding condition leading
to
loss
of
motorcycle control and
an
accident could result
if
this warning
is
ignored.
To
prevent paint damage, do
not
spill brake fluid
onto any area
of
the
bodywork. Spilled brake fluid
will damage paintwork.
7.
Carefully
remove
the reservoir cover taking care
not to spill any fluid.
8.
Check the condition of
the
sealing diaphragm for
the
reservoir. Replace if necessary.
1.
Diaphragm
9.
Release the bleed nipple.
o
3
I
Before starting work, ensure the motorcycle
is
stabilised
and
adequately supported. This will help
prevent
it
from falling and causing injury to the
operator or damage to
the
motorcycle.
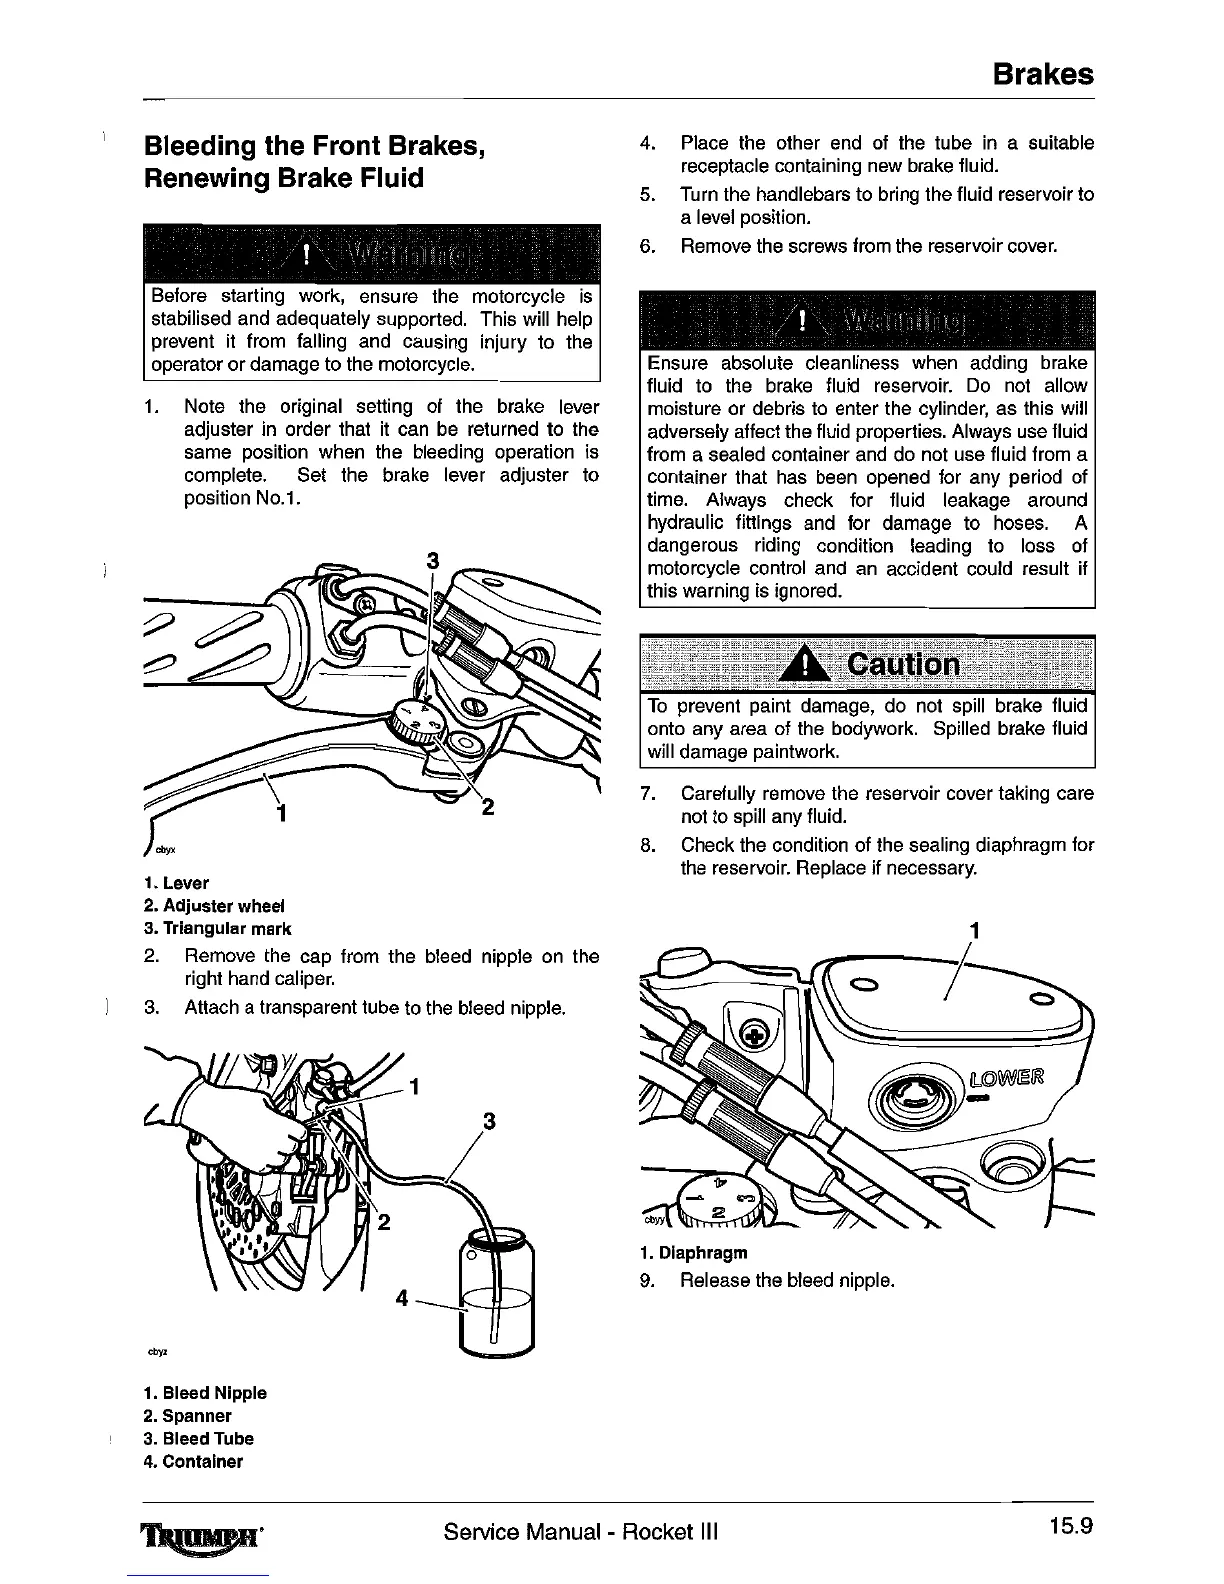
1.
Note the original setting
of
the brake lever
adjuster in order that
it
can
be
returned to the
same position when the bleeding operation is
complete. Set the brake lever adjuster to
position
NO.1.
1.
Lever
2.
Adjuster
wheel
3.
Triangular mark
2.
Remove the cap from the bleed nipple
on
the
right hand caliper.
3.
Attach a transparent tube
to
the
bleed nipple.
1.
Bleed
Nipple
2.
Spanner
3.
Bleed
Tube
4.
Container
~.
Service Manual - Rocket III
15.9
 Loading...