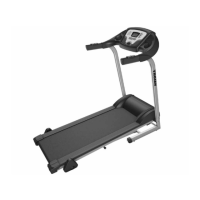
Do you have a question about the Trojan MARATHON 210 and is the answer not in the manual?
| Motor | 2.5 HP |
|---|---|
| Incline | 0 - 12% |
| Running Area | 140 x 50 cm |
| Max User Weight | 120 kg |
| Display | LCD |
| Foldable | Yes |
| Programs | 12 Preset Programs |
| Heart Rate Monitoring | Hand pulse sensors |
Consult physician before exercise; stop if faint, dizzy, or in pain.
Set up on a level surface with ventilation and adequate space for safe operation.
Use as intended, avoid improper exercise, one person at a time.
Supervised area recommended; keep children away from equipment.
Inspect for damage, use only replacement parts, maintain labels, perform maintenance.
Instruct users on proper procedures, keep children away from moving parts, avoid loose clothing.
Maximum user weight is 100 kg.
Ensure adequate space, use supplied parts, check exploded drawing.
Attach handrails to frame base using screws and washers with an Allen wrench.
Connect console cables (upper and lower) to the console support.
Secure console support to handrails with screws; attach handgrip caps.
Connect console cables to the bottom of the console assembly.
Secure console assembly to console support using Phillips head screws.
Overview of initial screen display and function buttons on the console.
Details on SCAN, TIME, and SPEED parameters and their operations.
Explains DISTANCE, CALORIES, STOP display, and heart rate symbol.
Step-by-step guide for starting and operating the treadmill quickly.
Helps blood flow and muscle preparation, reduces risk of injury; includes stretching.
Work to raise heart rate into target zone for improved fitness and muscle strength.
Helps muscles wind down and increases flexibility to prevent post-exercise problems.
Use higher resistance to strain leg muscles for toning; may need to reduce speed.
Effort and duration are key factors for burning calories and achieving weight loss.
Sustained activity improving lung and heart fitness, using large muscles.
Essential for toning, building, and strengthening muscle; consult physician.
Highlights lower body muscle groups developed by treadmill use.
Maintain heart rate between 65-85% of max for effective aerobic exercise and fat burning.
Structure workouts with warm-up, training zone, and cool-down phases.
Plan 3 workouts weekly with rest days; increase to 5 if desired.
Details on performing basic stretches like toe touch, hamstring, calf, quadriceps, and inner thigh.
Clean with soft cloth and mild detergent; wipe perspiration after use.
Store in a clean, dry environment away from children.
Adjust belt tension and centering to prevent shifting and rubbing.
Adjust rear roller clockwise using hex wrench if belt shifts off center.
Pour lubricant under the running deck and walk to distribute evenly.
Lubricate monthly for regular use; before use after 2-month or longer storage.
Warranty excludes damage from disaster, misuse, commercial use, unauthorized modification, or wear and tear.
Claims require proof of purchase or warranty number; contact call centre for assistance.
Warranty repairs are free of charge if compliant with terms; non-covered items require consumer approval for quote.
Repairs for expired warranty items are at consumer's expense, including call-out fees.