SMP series
---UC40+ User Guide
Due to continuou s improvement,
actual product m ay differ from
the manual.
Manual is for refe rence only.
Safety Reminding
1. Pleas e read this manual carefull y before usi ng.
2. Natio nal standard power cable an d power cord w ith ground ing is
sugge sted, so as to e nsure stable po wer supply.
3. No peek ing into the lens while proje ctor is work ing.
4. No clot h, blanket or any other mater ial that cou ld stock ven tilation
holes s hould be placed around the pr ojector wh ile it is work ing.
5.No wa ter-pr oof functi on for this pr ojector, no such apparatus as vase
or cup sh ould be put around the projec tor.
6. Proje ctor shoul d be stocked and us ed at dry and cl ean condit ion.
7. Pleas e turn off the project or and cut off the po wer supply, if it is n ot
used fo r long time.
8. Pleas e use factory original foam a nd other sho ckproof ma terial whi le
trans porting.
9.If fo und projector defected, d o not attemp t to repair it b y yourself .
Pleas e contact with your distrib utor or fact ory direct ly.
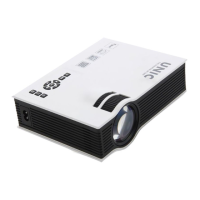
Product Details
1. Esc
2. Play/pause
3. Left
4. Ok
5. Up
6. Right
7. Indicating light
8. Power button
9. Input
10. Menu
11. Down
12. IR receiver
13. Earphone/ 3.5mm Aud io-in
14. AV input
15. HDMI input
16. SD card slot
17. 5V out
18. USB input
19. Focus adjusting handle
20. Keystone correction
21. Height adjustment nut
22. Lens
23. Power input (100-240V)
24. VGA Input
Product Details
1.Input
2.Play/pause
3.Power
4.Next
5.FF
6.OK
7.Right
8.Zoom
9.Volume +
10.Volume-
11. no function
12.Info
13.no function
14.Picture mode
15.Return/esc
16.Down
17.Left
18.Up
19.FR
20.Previous
21.Menu
22.Mute
Do not mix use old and n ew batteries.
If remote is not use d for long time,
batteries shou ld be removed.
Remote should ta rget at the IR rec eiver.
Connecttheproj ector with power cord ( as pic 1 showed), then
plug the power cor d into AC connector. When t he indicator
light (as pic 2 show ed) stops flashi ng,
projector is und er standby statu s.
1.Preparation
Operation Instruction
2.Power on/off
Press the button o n remote or projec tor (as pic 3 showed).
3.Multimedia boot screen
If choose USB and SD i nput, after open s creen, a boot screen (as pi c 4
showed)for mul timedia will be sh owed.
Multimedia boot screen
4.Focus&Keystone correction
Focus
Put the projecto r with lens vertical to
the wall or screen , turn on the projector
and then adjust fo cus adjusting ha ndle
(As showed in 6) unt il the picture is
clear.
Keystone Corre ction
If projector is no t vertically or
horizontally p laced, the image will
present trapez oid twist. Keyst one
correction tec hnology refers t o a kind
normalizing th e twisted image via digital or optical tech nology.
before after
Solut ion
Rotat e the keystone correction n ut as
NO.5 sh owed, unti l image twist be
corre cted. keys tone correcti on angel is
± 15º
before after
Solution
No solution for th is kind of
image twist for th is projector.
Simplified Micro Projector
User Guide Model : UC40+
SMP illustration
SMPisshortfor sim plified micro pr ojector.
It is one kind of proj ector which has si mplified system struc ture
design, but with m ultifunction .(Also means easy handl ing micro
projector.) .
This kind of proje ctors use the simp lified system to reduce c ost
but at the same time s upply end users with a projector with simpl e
setting thus can b e easily used.
Simplified mic ro projector usually uses LCD as the image sy stem
and LED as light sou rce.
Remarks:
User Manual should be read carefully if you are
using the projector. If any difference between
user manual and actual projector. Please subject
to the actual projector.
24