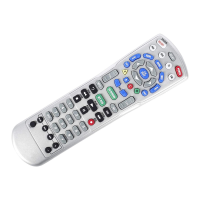
Charter OCAP 4-Device
Remote Control
Universal Electronics, Inc.
www.urcsupport.com
INTRODUCTION
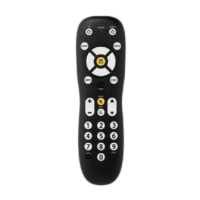
The C4000 Remote Control by Universal Electronics is our latest
generation universal remote control. Their sophisticated technology
allows you to consolidate up to four of your original home
entertainment remote controls into one easy-to-use product. Please
follow the instructions detailed in this manual to set up the unit and
then start enjoying your new remote control and cable service.
INSTALLING BATTERIES
1. Onthebackoftheremotecontrol,pushthetabandliftoffthe
battery cover.
2. Locate the two (2) enclosed AA batteries. Match the + and -
marks with those in the battery case, then insert them.
3. Align the cover’s keys with the case’s holes and press the cover
back into place. The tab should click when the cover is locked.
4. Test theremote control by pressing any mode key (e.g., TV). If the
batteries are inserted correctly, the LED (red light) blinks once.
NOTE: When batteries need replacement, the remote control ceases to
operate.Replacethebatteriesandtheunitwillberestoredtoitsfull
functionality, complete with your favorite settings.
PROGRAMMING DEVICE CONTROL
The C4000 Remote Control is preprogrammed to operate the cable box
(converter) provided by your cable system, an RCA TV, a Toshiba DVD
player, and a Pioneer audio receiver. To control devices other than the
default brands, perform the following steps; otherwise skip this
section.
NOTES: For control of a Combo device (for example, a TV/VCR
combo), skip this section and perform the instructions on “Setting Up
a Combo Unit”. Also refer to “Function Key Chart” on this page to find
out which devices can be programmed onto each device key.
1. Turnonadeviceand,ifapplicable,insertvideomedia,(e.g.,
cassette or disc).
NOTE: Please read steps 2 through 4 completely before proceeding.
Highlight or write down the codes and device you wish to program
before moving on to step 2.
2. On the remote control, press a device key once (i.e., AUX, DVD, TV,
CBL,orSTB); it blinks once. Then press and hold SET UP until the
selected mode key blinks twice.
3. Use the “Setup Codes for Televisions” on page 2) to locate the
type of device and brand name and then enter the first five-digit
code for your device. If performed correctly, the selected mode
key blinks twice.
NOTE: Iftheselectedmodekeyemitsalongblink,theentryisinvalid.
Repeat steps 2 through 3 and try entering the same code again.
4. Aim the remote control at the device and press POWER once.The
device should turn off. If it does not, repeat steps 2 through 3,
trying each code for your brand until you find one that works. If
it still does not respond, try searching for the code (see
“Searching for Your Code”).
NOTE: If the device does not have a POWER key, press the (Play)key.
Repeat steps 1 through4 foreach d evice you want the remote control to
operate. For future reference, write down each working device code in
the boxes below.
AUX Code
Device Type:___________________
DVD Code
Device Type:___________________
CBL Code
Device Type:___________________
TV Code
Device Type:___________________
SETTING UP A COMBO UNIT
IfyouownacombounitsuchasaTV/DVDCombooraTV/VCR
Combo, you need to follow special steps to set it up. Perform the
following instructions to control combo device:
1. For a TV/DVD Combo, turn on your TV/DVD Combo and insert
a DVD. (For a TV/VCR Combo, insert a videocassette).
2. On the remote control, press DVD once; it blinks once. Then press
and hold SET UP until the DVD key blinks twice.
3. Use the “Setup Codes for Televisions” starting on page 2 tolocate
the brand name and enter the first five-digit code for your combo
device (for example, TV/VCR). If you perform this procedure
correctly, the DVD keyblinkstwice.
NOTE: If the DVD keydidnotblinktwiceafterenteringthecode’slast
digit, repeat steps 2 through 3 and try entering the same code again.
If you’ve located a setup code that works for your combo device (for
example, a TV/DVD Combo) and a separate TV code is also listed,
you’llneedtoprogramthiscodeintotheremotecontroltoaccess
volume control (See “Programming Device Control”).
4. Aim the remote control at your combo device (for example, TV/
DVD Combo) and press POWER once.The device should turn off.
If it does not respond, repeat steps 2 through3,tryingeachcode
listed for your brand until you find one that works. If it still does
not respond, try searching for the code (See “Searching for Your
Code”).
5. For future reference, write down each working device code in the
boxes below:
TV/VCR or TV/DVD Code
TV Code (if used)
SEARCHING FOR YOUR CODE
If your home entertainment device does not respond to the C4000
Remote Control after trying all of the codes listed for your brand, or if
yourbrandisnotlistedatall,trysearchingforyourcode.
NOTE: Usethefollowingdevicecodedigitstocontrolaspecificdevice:
0 = Cable (dedicated to cable only)
1 =TV
2 = DVD/VCR
3 = Audio
For example, to search for a code for your TV:
1. Turn on your TV.
2. Ontheremotecontrol,pressTV once;itblinksonce.Thenpress
and hold SET UP until the TV key blinks twice.
3. Enter 9 9 1.TheTV keyblinkstwice.
4. Press 1 (the device code digit for your TV). The TV key blinks
twice. Aim the remote control at the TV and press POWER once.
5. Press and release the CH+ key continuously, then stop when the
TV turns off.
NOTE: Inthesearchmode,theremotecontrolsendsIRcodesfromits
library to the selected device, starting with the most popular code first.
6. Press POWER.TheTVshouldturnon,thenpressSET UP to lock
in the code.
NOTE: If the TV does not turn on during step 6, then slowly press and
release CH- to go back through the codes, then press SET UP when the
TV turns on.
7. To search for the codes of your other devices, repeat steps 1
through 5, but substitute the appropriate key (e.g., AUX, DVD,
CBL,orSTB) for the device you are searching for.
CHECKING THE CODES
If you have set up the C4000 Remote Control by searching for your
device code, you may need to find out which five-digit code is operating
your equipment.
For example, to find out which code is operating your TV:
1. Ontheremotecontrol,pressTV once;itblinksonce.Thenpress
and hold SET UP until the TV key blinks twice.
2. Enter 9 9 0.TheTV keyblinkstwice.
3. To view the code for the first digit, press 1 once. Count the
number of times the TV keyblinks(e.g.,3 blinks= 3)andwrite
down the number in the leftmost TV Code box above.
NOTE: Ifacodedigitis0, the selected mode key does not blink.
4. Repeat step 3 four more times for the remaining digits. Use 2 for
the second digit, 3 for the third digit, 4 for the fourth digit, and 5
for the fifth digit. Finish writing down the code in the TV Code
boxes above.
To check for other device codes, repeat steps 1 through4, but substitute
the appropriate key (e.g., AUX, DVD, CBL,orSTB) for the device you are
checking. Write down the codes in the appropriate boxes above.
PROGRAMMING CHANNEL CONTROL LOCK
By default, the remote control’s channel-control capabilities are locked
to the cable converter. The affected keys are 1 through 0, CH+, CH-,and
LAST. This guarantees that you do not inadvertently change a channel
on your TV or VCR. However, you can de-activate this feature to allow
full access to these keys in the TV and VCR modes.
Unlocking Channel Control
1. Ontheremotecontrol,pressCBL (or STB) once; it blinks once.
Press and hold SET UP until the CBL (or STB) key blinks twice.
2. Enter 9 7 3.TheCBL (or STB) key blinks twice.
3. Press CH- once. The CBL (or STB) key blinks four times.
Now the remote control provides TV and VCR channel-control
capabilities while in the TV or VCR mode.
Locking Channel Control to CBL
1. Ontheremotecontrol,pressCBL (or STB) once; it blinks once.
Press and hold SET UP until the CBL (or STB) key blinks twice.
2. Enter 9 7 3.The CBL (or STB) key blinks twice.
3. Press CH+ once. The CBL keyblinksonce.
4. Press CBL once. The CBL key blinks twice.
Now, regardless of what mode you select, the channel keys only change
channelsonyourcableconverter.
CHANGING VOLUME LOCK
Volume Lock allows you to control the volume through the device
identified as having your primary speaker(s), regardless of which mode
you are using. On the C4000 Remote Control, Global Volume Lock is set
to TV, so you can control TV volume while in the AUX, DVD, TV or CBL
mode. You can perform Individual Volume Unlock on a selected device
to set its volume control for independent operation.
Unlocking Volume Control for a Single Device (Individual Volume
Unlock)
1. AssumingGlobalVolumeLockisactive,selectamodeonthe
remote control that you want to unlock (e.g., CBL) and press it
once. Next, press and hold SET UP until the device key blinks
twice.
2. Enter 9 9 3. The last-selected device key blinks twice.
3. Press VOL- once. The last-selected device key blinks four times.
4. Repeat steps 1 through 3 foreachdeviceyouwantvolumetobe
unlocked.
Now, after you select a device that has volume unlocked (e.g., CBL),
pressing VOL+, VOL-,or MUTE,controlsonlythatdevice’svolume.
Unlocking All Volume Control (Global Volume Unlock)
NOTE: Performing these instructions sets independent volume control
for all programmed devices.
1. On the remote control, press and hold SET UP until the last-
selected device key blinks twice.
2. Enter 9 9 3. The last-selected device key blinks twice.
3. Press VOL+ once. The last-selected device key blinks four times.
Locking Volume Control To One Mode (Global Volume Lock)
1. On the remote control, press and hold SET UP until the last-
selected device key blinks twice.
2. Enter 9 9 3. The last-selected device key blinks twice.
3. Select a mode (e.g., TV or AUX) which you want to use to control
the volume. The selected device key blinks twice.
Now, when you press VOL+, VOL-,or MUTE, the volume of the selected
device (e.g., TV)iscontrolledregardlessofmode.
USING THE SYSTEM ON/OFF KEY
1. Press SYSTEM ON/OFF once. Your devices turn on or off in the
pre-programmed sequence.
NOTE: Only devices you have programmed the remote to control turn
on or off sequentially. For example, if you have programmed control of
your TV, but not your DVD player, SYSTEM ON/OFF does not turn your
DVD player on or off.
USING KEYMOVER
The C4000 Control includes a Keymover feature that allows you to map
(or copy) keys from one mode (i.e., source mode) toanother mode (i.e.,
destination mode).
Programming Keymover
For example, if your DVD player does not have volume control, you can
map those keys (i.e., VOL+, VOL-, and MUTE)fromtheTV mode to DVD
mode as follows:
1. On the remote control, press CBL (or STB) once; it blinks once.
Then press and hold SET UP until the CBL (or STB) key blinks
twice.
2. Enter 9 9 4.TheCBL (or STB) key blinks twice.
3. For the source mode, press a desired device key once (i.e., AUX,
TV, DVD, CBL or STB). For this example, press TV once.
4. For the source key, press a key to be moved once. For this
example press VOL- once.
5. For the destination mode, press a desired device key once (i.e.,
AUX, TV, DVD,orCBL or STB). For this example, press DVD once.
6. For the destination key, press a key to be moved once. For this
example press VOL+ once.
7. Repeat steps 1 to 6 to move additional keys. For this example,
repeat steps 1 to 6 twomore times to map the remaining volume
control keys, substituting VOL- and MUTE as source and
destination keys in steps 4 and 6.
Upon completion of the above procedure, you can now use your C4000
Remote Controls to control the TV’s volume and mute in the DVD mode,
as well as in the TV mode.
Restoring All Keymover Keys in a Single Mode
1. On the remote control, press CBL or STB once; it blinks once.
Then press and hold SET UP until the CBL key blinks twice.
2. Enter 9 9 4. The CBL (or STB) key blinks twice.
3. Press and release the mode key you want to clear twice. For
example, to clear all Keymover keys for the TV mode, press and
release TV twice.
Restoring a Single Keymover Key
1. On the remote control, press the MODE key once.
2. Press and hold SET UP until the last-selected mode key blinks
twice (for example, TV).
3. Enter 9 9 4. The mode key blinks twice.
Press and release the device key twice. For example, to clear the CH+
key in TV mode, press and release CH+ twice.
CLEARING CUSTOM PROGRAMMING
The C4000 Remote Control contains a Custom Programming Reset
program. You can use it to remove all custom programming.
IMPORTANT: Executing this programming sequence will erase all
custom programmed settings such as Volume Lock, Channel Control
Lock and Keymover. However, your device programming remains the
same.
1. On the remote control, press and hold SET UP until the last-
selected device key blinks twice.
2. Enter 9 8 0. The last-selected device key blinks twice, pauses,
and blinks twice again to confirm that all custom programming
is cleared.
TROUBLESHOOTING
PROBLEM: Devicekeydoesnotblinkwhenyoupressakey.
SOLUTION: Replace the batteries with two (2) new AA batteries (See
“Installing Batteries”).
PROBLEM: Devicekeyblinkswhenyoupressakey,buthome
entertainment device does not respond.
SOLUTION: Make sure you are aiming the remote control at your home
entertainment device and that you are within 15 feet of the device you
aretryingtocontrol.
PROBLEM: The remote control does not control home entertainment
devicesorcommandsarenotperformingproperly.
SOLUTION: Try all listed codes for the device brand being set up. Make
sure all devices can be operated with an infrared remote control.
PROBLEM: TV/VCR Combo does not respond properly.
SOLUTION: Use the VCR codes for your brand. Some combo units may
requirebothaTVcodeandaVCRcodeforfulloperation.
PROBLEM: NovolumeonasecondTV.
SOLUTION: Follow instructions under “Changing Volume Lock”.
PROBLEM: Remote control does not turn on Sony or Sharp TV/VCR
Combo.
SOLUTION: For power on, these products require programming TV
codes on the remote control. For Sony, use TV code 10000 and VCR
code 20032. For Sharp, use TV code 10093 and VCR code 20048.
FCC NOTICE
This equipment has been tested and found to comply with the limits for
a class B digital device, pursuant to part 15 of the FCC Rules. These
limits are designed to provide reasonable protection against harmful
interference in a residential installation. This equipment generates,
uses and can radiate radio frequency energy and if not installed and
used in accordance with the instructions, may cause harmful
interference to radio communications.
However, there is no guarantee that interference will not occur in a
particular installation. If this equipment does cause harmful
interference to radio or television reception, which can be determined
by turning the equipment off and on, the user is encouraged to try to
correcttheinterferencebyoneormoreofthefollowingmeasures:
• Reorient or relocate the receiving antenna.
• Increasetheseparationbetweentheequipmentandreceiver.
• Connect the equipment into an outlet on a circuit different from that
to which the receiver is connected.
• Consult the dealer or an experienced radio/TV technician for help.
This equipment has been verified to comply w ith the limits for a class B
computing device, pursuant to FCC Rules. In order to maintain
compliance with FCC regulations, shielded cables must be used with
this equipment. Operation with non-approved equipment or
unshielded cables is likely to result in interference to radio and TV
reception. The user is cautioned that changes and modifications made
to the equipment without the approval of manufacturer could void the
user’s authority to operate this equipment.
ADDITIONAL INFORMATION
This product does not have any user-serviceable parts. Opening the
case, except forthe battery cover, may cause permanent damageto your
C4000 Remote Control.
ForhelpviatheInternet,visitusat:
www.urcsupport.com
©Copyright 2010 by Universal Electronics Inc. No part of this
publication may be reproduced, transmitted, transcribed, stored in any
retrievalsystem,ortranslatedtoanylanguage,inanyformorbyany
means, electronic, mechanical, magnetic, optical, manual, or
otherwise, without prior written permission of Universal Electronics
Inc.
US Patents
6,014,092 5,515,052
M1060 Rev C
MANUFACTURER’S CODES
Setup Codes for Cable Converters
Setup Codes for Televisions
Setup Codes for Televisions (LCD)
1
2
3
Charter 01376, 01877
Cisco 01877, 01982
Diego 01187
Motorola 01376, 01982
Pace 01376, 01877, 01982
Scientific Atlanta 01877
Admiral 10093, 10463
Advent 10761, 10783, 10815, 10817, 10842,
11933
Akai 10812, 11675, 10702, 10672, 11207,
11903, 11935, 12232
Albatron 10700, 10843
America Action 10180
Anam 10180
AOC 11365, 11589, 11590, 12014, 12087,
12402
Aomni 11623
Apex Digital 10156, 10748, 10879, 10765, 10767,
10890, 11217, 11991, 12397
Astar 11531, 11738
Audiovox 10451, 10180, 10623, 10802, 10846,
10875, 11284, 11937, 11951, 11952
Aventura 10171
Axion 11937
BenQ 11032, 11315
Bradford 10180
Broksonic 10236, 10463, 11935
Carver 10054
Celebrity 10000
Celera 10765
Changhong 10765
Citizen 10060, 11671, 11672, 11935
Clarion 10180
Coby 11538, 11634, 12306, 12314, 12315,
12338, 12340, 12343, 12344, 12345,
12347, 12348, 12350, 12351
Commercial S olutions 11447, 10047
Contec 10180
Craig 10180
Crosley 10000, 10054
Crown 10180
Curtis 12352, 12466
Curtis Mathes 10047, 10054, 10451, 10093, 10060,
10702, 10145, 10166, 11661, 11147,
11347
CXC 10180
Daewoo 10451, 11661, 10623, 10661, 10672
Dell 11264, 11080, 11178, 11403, 11863
Denon 10145
Digital Lifestyles 11765
DirecTV 11501
Dish Network 11948
Disney 12152
Dumont 10017
Durabrand 10463, 10180, 10178, 10171, 11034
Dynex 11463, 11780, 11785, 11810, 12049,
12184
Electroband 10000
Electrograph 11755, 11623
Electrohome 10463, 11670, 11672
Element 11687, 12183
Emerson 11864, 10017, 10451, 10236, 10463,
10180, 10178, 10171, 11661, 10623,
11394, 11944, 11963
Emprex 11422, 11546, 11765
Envision 10813, 11365, 11589, 12014, 12087
Epson 10833
ESA 10812, 10171, 11944, 11963
Fujitsu 10809, 10683, 10853
Funai 10000, 10180, 10171, 11271, 11963
Futuretech 10180
Gateway 11755,11756
GE 11447, 10047, 10051, 10451, 10178,
11347, 12359
GFM 10171, 11963, 12167
Gibralter 10017
Go Video 10886
GoldStar 10178
Grundig 10683
Grunpy 10180
Haier 11034, 11748, 11749, 11753, 12309
Hallmark 10178
Hanns.G 11783
Hannspree 11348, 11351, 11745, 11783
Harman/Kardon 10054
Harsper 11206
Harvard 10180
Havermy 10093
Helios 10865
Hello Kitty 10451
Hewlett Packard 11494, 11502
Hisense 10748, 11314, 11660, 12098, 12355,
12419
Hitachi 11643, 11145, 10145, 10797, 11960
HP 11494, 11502
Humax 11501
Hyundai 10849
iLo 11286, 11603, 11684, 11990
Infinity 10054
InFocus 12199
Initial 11603, 11990
Insignia 11423, 11564, 10171, 11204, 11517,
11641, 11660, 11710, 11780, 11892,
11963, 12002, 12049, 12088, 12417
Inteq 10017
IX 10877
JBL 10054
JCB 10000
Jensen 10761, 10815, 10817, 11933
JVC 10463, 10053, 10650, 10731, 11253,
11601, 11774, 12271
KDS 11498, 11687
KEC 10180
KLH 10765, 10767
KTV 10180
LG 11423, 10017, 11265, 10178, 10700,
10856, 11178, 11768, 11993, 12358,
12424
LXI 10047, 10054, 10156, 10178
MAG 11498, 11687
Magnavox 11454, 11866, 10054, 10051, 10706,
10802, 11198, 11254, 11365, 11856,
11944, 11963, 11990, 12372
Marantz 11454, 10054, 10704, 10855, 11154,
12447
Matsushita 10250, 10650
Maxent 11755, 11714
Megapower 10700
Megatron 10178, 10145
Memorex 10463, 10150, 10178, 10877, 11670,
11892, 11903
MGA 10150, 10178
Midland 10047,10017, 10051
Mintek 11603, 11990
Mitsubishi 11250,10093, 10150, 10178, 10836,
10868, 12010
Monivision 10700, 10843
Motorola 10093, 10835
Moxell 10835
MTC 10060
Multitech 10180
NAD 10156, 10178, 10866, 11156
NEC 10704, 10882, 11704, 11797
NetTV 11755
Nexus Electronics 12183
Nikko 10178
Norcent 10748, 10824, 11365, 11589, 11590,
12110
Norwood Micro 11286
NuVision 11657, 12158
Olevia 11610, 11144, 11240, 11331
Onwa 10180
Optimus 10250, 10166, 10650
Optoma 11348, 12161
Optonica 10093
Orion 10236, 10463, 11463
Panasonic 10250, 11480, 11457, 10051, 10650,
11271, 11291, 11410, 11941, 11946
PARK 12104
Penney 10047, 10156, 10051, 10060, 10178,
11347
Petters 11523
Philco 10054, 10171, 11271, 11394, 11963
Philips 11454, 11866, 10054, 10690, 11154,
11744, 11806, 11856, 11867, 12372,
12374
Pioneer 11457, 10166, 10679, 10866, 11260
Planar 11496
Polaroid 11523,10765, 12425, 12121, 12120,
12119, 12063, 12002, 11991, 11766,
11687, 11538, 11498, 11341, 11314,
11286, 11276, 10865
Portland 10451, 11661
Prima 10761, 10783, 10815, 10817, 11785,
11933
Princeton 10700
Prism 10051
Proscan 11447, 10047, 11347, 12147, 12256
Proton 10178
Protron 11320
Proview 10835, 11401, 11498, 11687
Pulsar 10017
Puneet 11546
Quasar 10250, 10051, 10650
RadioShack 10047, 10180, 10178
RCA 11547, 11447, 10047, 10051, 10093,
10679, 11047, 11147, 11247, 11347,
11781, 11948, 11953, 11958, 12002,
12187, 12247, 12434
Realistic 10180,10178
RevolutionHD 11623
Runco 10017, 11629
Sampo 11755
Samsung 10812, 10060, 10702, 10178, 10650,
10766, 10814, 11060, 11903, 12051
Sansui 10463, 10171, 11409, 11670, 11892,
11935
Sanyo 10054, 11142, 12448
Sceptre 10878, 11217, 11360, 11599
Scotch 10178
Scott 10236, 10180, 10178, 11711
Sears 10047, 10054, 10156, 10178, 10171
Seleco 11351
Sharp 10818, 10093, 10688, 10851, 11602,
12360
Sheng Chia 10093
Sherwood 11399
Sole 11623
Sony 10000, 10810, 10834, 11317, 11685
Soundesign 10180, 10178
Sova 11320, 11952
Soyo 11520, 11546, 11826, 11828
Spectroniq 11498, 11687
Squareview 10171
SSS 10180
Starlite 10180
Studio Experience 10843
SunBrite 11420, 12337
Superscan 10093, 10864, 11944
Supreme 10000
SVA 10748, 10865, 10870, 11963
Sylvania 11864, 10054, 10171, 11271, 11314,
11394, 11886, 11944, 11963
Symphonic 10180, 10171, 11944
Syntax 11610, 11144, 11240, 11331
Tandy 10093
Tatung 11286, 11756
Technics 10250, 10051
Techview 10847
Techwood 10051
Teknika 10054, 10180, 10150, 10060
Telefunken 10702
TMK 10178
TNCi 10017
Toshiba 11524, 10156, 11256, 11265, 10060,
10650, 10822, 10832, 10845, 11156,
11356, 11656, 11704, 11935, 11945,
12006
TruTech 11723, 12066
TVS 10463
US Logic 11286
Venturer 11865
Victor 10053
Vidikron 10054, 11629
Vidtech 10178
Viewsonic 11755, 10797, 10857, 10864, 10885,
11330, 11578, 11627, 11640, 11742,
12014, 12087
Viore 11207, 11684, 11811, 12104, 12352
Vizio 11758, 10864, 10885, 11756
Wards 10054, 10178, 10866, 11156
Waycon 10156
Westinghouse 11712, 10451, 10885, 10889, 10890,
11282, 11300, 11577, 12293
White Westinghouse 10463, 11661, 10623
Wyse 11365
Yamaha 10769, 10797, 10833
Zenith 10000, 11423, 10047, 10017, 10463,
11265, 10178, 11145, 10145, 11661
Akai 11675, 11935, 12232
AOC 11365, 11589, 12014, 12087, 12402
Aomni 11623
Apex Digital 10890, 11217, 12397
Astar 11531, 11738
Audiovox 10180, 10802, 10846, 10875, 11284, 11937,
11951, 11952
BenQ 11315
Akai 11675, 11935, 12232
Citizen 11671, 11672, 11935
FUNCTION KEY CHART
SET UP
Use for all programming sequences.
POWER
Press POWER once to turn on or off a home entertainment device.
AUX, DVD, TV, CBL
Selects the device you wish to operate and signals remote control activity.
INFO
Use INFO to display the current channel and program information.
CURSOR KEYS
Use the Cursor keys to move the cursor in the program guide and menu screens
and to navigate within the interactive service.
LAST
Press LAST once to recall the last channel.
OK/SELECT
Use OK/SELECT to choose options, PPV events, and to tune to programs from the
program guide.
A, B, C, D
Use A, B, C, or D to access additional cable features (see your cable converter’s
manual).
CH UP/DOWN
Use CH+ (or CH-) to select the next higher (or lower) channel.
ON DEMAND
Press ON DEMAND to access Video on Demand services. This is also a
programmable macro key.
FAV
Displays favorite channels.
LIVE
Press LIVE tocommand your PVR/DVR cable box to return to watching live TV.
PLAYBACK KEYS
PerformstandardVCRandDVDfunctionswheninVCR and DVD mode, and
Video-On-Demand functions when in CABLE mode.
NUMERIC KEYS
Use the keypad numbers (1-9,and0) to directly tune channels (e.g., 09).
ASPECT
Alters the aspect ratio (4:3 or 16:9) configuration of set top box.
System ON/OFF
UseSYSTEM ON/OFF to control the MasterPower macro.
MENU
Displays the Applications menu.
GUIDE
Displays the on-screen program guide.
PAGE UP/DOWN
Use PAGE+ (or PAGE-) to page up (or page down)
through menu screens andthe program guide.
EXIT
Used to exit menus, guides, and on-screen applications.
DAY+/-
Skipforwardorbackwardonedayintheprogram
guide.
VOL+/-
Raises and lowers audio levels.
MUTE
Press MUTE once to turn the sound off or on.
Replaytheprevious15secondsofaprogram
MY DVR
Displays a list of programs you have recorded.
INPUT
Press SHIFT to access additional cable features.
In TV, DVD, AUX use
INPUT tocycle through the available
inputs on the selected device
PIP-ON/OFF
Use PIP ON-OFF to switch the Picture-In-Picture feature
on or off.
PIP SWAP
Use PIP SWAP to switch images and sound between
the main and window pictures
VIDEO SOURCE
Use to select the video source options on
your cable converter
PIP MOVE, PIP +/-
Use PIP MOVE tomove the window picture
to different positions in the main picture.
Use PIP CH+ (or CH-) to select the next higher (or
lower) PIP channel.