Viale Vicenza 14
36063 Marostica VI - Italy
www.vimar.com
30804-20594 EN 02 2303
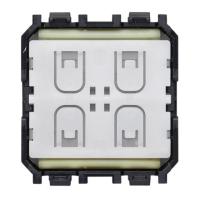
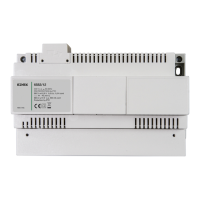
Connected roller shutter control device
EIKON
20594.0
ARKE'
19594.0-19594
IDEA
16494
PLANA
14594.0-14594
LINEA
30804
30804-20594.0-19594.0-14594.0: to be completed with two interchangeable half-button
caps: 1 module.
19594-16494-14594: complete with buttons.
The device is equipped with an output with 2 one-position stable relays with interlocked opera-
tion, in other words with mutually exclusive activation of the relays with a minimum interlocking
time. In the event of a mains power supply failure, the relays both remain open.
The front buttons of the device only control the on-board roller shutter actuator:
- Short press: if the roller shutter is not moving, the slat rotates; if the roller shutter is moving,
it stops.
- Long press: the upper button raises the roller shutter while the lower button lowers it.
- Double pressing of either of the two buttons: recalling of favourite position (this is saved via the
VIEW Wireless App).
TWO OPERATING MODES (ALTERNATIVE)
or
Download the View Wireless App from the stores onto the tablet/smartphone you
will be using for configuration.
When the device is powered for the rst conguration, we recommend you search for any
new rmware and perform the update.
Depending on the mode you select, you will need:
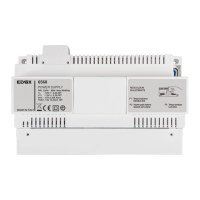
Gateway
art. 30807.x-20597-19597-14597
Smart Home Hub
View App
for management via smartphone/tablet
Samsung SmartThings Hub
Amazon Echo Plus, Eco Show or Echo
Studio
Amazon Alexa, Google Assistant, Siri
(Homekit) voice assistants for possible
voice operation
CONFIGURATION IN
1. Create your Installer account on MyVimar (on-line).
2. Wire all the devices in the system (2-way switches, actuators, thermostats, gateway, etc.).
3. Start the View Wireless App and log in with the credentials you just created.
4. Create the system and the environments.
5. Associate all the devices with the environments, except for the gateway (which should be
associated last).
To associate the roller shutter control device:
• Select “Add” (
), choose the environment to place it and give it a name
• Select ; activate the Bluetooth connection on your tablet/smartphone and approach
the device
• Simultaneously press buttons and and set the desired function
6.
For every device, set the function, the parameters and any accessory devices (wired or radio
control and related function).
7. Transfer the configuration of the devices to the gateway and connect it to the Wi-Fi network.
8. Transfer the system to the Administrator user (who must have created his/her profile on
MyVimar).
For details please refer to the View Wireless App manual you can download from www.
vimar.com DOWNLOAD View Wireless MOBILE App
CONFIGURATION IN
Follow the procedure above from points 1 to 3.
Associate the device directly to a ZigBee Hub (e.g. Amazon Echo Plus, SmartThings Hub).
1) Download the Zigbee software using the View Wireless App (see the View Wireless App
manual). Simultaneously press the buttons on the device until the LED flashes. To update the
software on the device, the procedure is the same.
2) After conversion to Zigbee technology (or the software update), the device automatically goes
into pairing mode for 5 minutes. If the device is not in pairing mode, cut off the power supply
and restore it after a few seconds.
3) Associate the device according to the procedure envisaged by the ZigBee Hub.
Set the parameters of the roller shutter control device.
1) Within the first 5 minutes after the device has been powered (already associated with a ZigBee
Hub), simultaneously press the buttons for 15 s so you can set the activation time (the LED
flashes green during the roller shutter closing, which will take 3 minutes, or until button
is
pressed). The LED is permanently lit green and within a timeout of 2 minutes, press button
for a prolonged time to raise the roller shutter. During the raising process the LED flashes
green; briefly press button
to stop it. The time that passes between the long press and the
short press of button
is the raising/lowering operating time that will be saved by the device
(the LED lights up amber).
2) Where present now set the total slat rotation time (however the slat management is usually
not supported by zigbee hubs, it is recommended not to set this parameter). Press button
, the roller shutter begins to close and the LED flashes amber; when the roller shutter is
closed, the LED remains lit in amber permanently. Briefly press button
to increase by he
slat rotation time by 200 ms each time, while briefly pressing push button
will decrease
it by 200 ms. Each press of the buttons will turn the amber LED off and back on again and
will move the slats.
3) Simultaneously press buttons
and
to save the rotation time set; the LED flashes amber
quickly three times to confirm the setting.
N.B. If at the beginning of the slat handling time configuration the button is not pressed shortly
and the confirmation is given immediately by pressing both buttons at the same time, the slats
will be excluded from operation. So in practice, when the roller shutter is in motion, pressing a
button briefly will stop it whereas if the roller shutter is not in motion pressing the button briefly
will not give rise to any movement.
N.B. When the voltage returns after a power outage, the roller shutter remains at a standstill.
Summary of Zigbee technology mode signalling.
• During normal operation:
LED Meaning
On
(white for Linea, amber for Eikon, blue for Arké, green
for Idea and Plana)
Roller shutter in motion
Off Roller shutter at a standstill
• In the configuration phase:
LED Meaning
Flashing white
(for max 5 min.)
Zigbee mode active hub gateway association
Flashing blue
(for max 2 min.)
Pending receipt of a fw update
Blue permanently lit
Device associated with the smartphone via
Bluetooth
Flashing green during the time configuration Roller shutter opening
Green permanently lit during configuration
Pending pressure on the button after
complete closure
Amber permanently lit Start slat rotation time configuration
Amber on while the button is pressed Increase or decrease slat rotation time
Flashing amber during the time configu-
ration
Roller shutter closing
Flashing green 3 times
Confirm up and down time configuration
mode
Flashing amber 3 times Confirm slat rotation time configuration
Flashing green quickly 3 times
Device correctly associated with the voice
assistant
On
(white for Linea, amber for Eikon, blue for
Arké, green for Idea and Plana)
Roller shutter in motion during normal
operation
CONTROLLABLE LOADS.
Maximum loads Roller shutter motor
100 V~ 2 A cos ø 0.6
240 V~ 2 A cos ø 0.6
RESETTING THE RELAY MODULE.
The reset restores the factory settings. Within the first 5 minutes from powering, simultaneously
press
the and
buttons for 30 s until the white LED flashes.
INSTALLATION RULES.
• Installation must be carried out by qualified persons in compliance with the current regula-
tions regarding the installation of electrical equipment in the country where the products are
installed.
• The device must be completed with interchangeable buttons and installed in flush mounting
boxes or surface mounting boxes with Linea, Eikon, Arkè and Plana mounting frames and
cover plates.
• The relay output power circuit must be protected against overloads by installing a device, fuse
or automatic 1-way switch, with a rated current not exceeding 10 A.
• Installation must be carried out with the system switched off. Install the buttons onto the roller
shutter control device before powering up the system.