CAUTION: To reduce the risk of fire or injury to
persons or damage to the telephone, read and follow
these instructions carefully:
Use only three AA alkaline batteries (not included).
Dispose of these batteries in a safe manner. Do not
burn or puncture. Like other batteries of this type,
if burned or punctured, they could release caustic
material which could cause injury.
Do not open or mutilate the battery. Released
electrolyte is corrosive and may cause damage to the
eyes or skin. It may be toxic if swallowed.
Exercise care in handling batteries in order not
to create a short circuit. Do not allow conductive
materials such as rings, bracelets or keys to touch
the battery. The battery or conductor may overheat
and cause harm.
Use the battery identified for use with this product
only in accordance with the instructions and
limitations specified in this manual.
Observe proper polarity orientation between the
battery and metallic contacts.
Do not disassemble your telephone. There are no
user-serviceable parts inside. Refer to qualified
service personnel for servicing.
•
•
•
•
•
•
•
Congratulations
on purchasing your new VTech product. Before using this
telephone, please read Important safety instructions of
this manual.
This manual has all the feature operations and
troubleshooting necessary to install and operate your
new VTech telephone. Please review this manual
thoroughly to ensure proper installation and operation
of this innovative and feature rich VTech product. For
support, shopping, and everything new at VTech, visit our
website at www.vtechcanada.com.
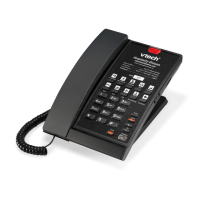
Handset layout
OPTION
When the telephone is
idle, press repeatedly
to scroll through the
feature menus.
While in the menu,
press to save
your selection and
advance to the next
feature setup.
DELETE
While reviewing the
call log, press to delete
the displayed entry,
or press and hold to
remove all entries.
/CALL LIST/
When the telephone is
idle, press to browse
through call log entries.
Press to scroll up or
to scroll down while
in a feature menu.
DISPLAY DIAL
Press to dial the call
log entry currently
displayed.
CANCEL
While in the menu,
press to return to idle
mode.
FLASH
During a call,
press to answer an
incoming call when
you receive a call
waiting alert.
Telephone base layout
Speed dial keys
(M1/M2/M3)
Press to dial the
telephone number
stored in the
corresponding speed
dial key.
Switch hook
When held down, the
telephone is in idle
mode.
When released, the
telephone is ready to
make a call.
Press to temporarily
switch to tone dialing
mode.
MUTE
Press and hold to
mute the microphone.
Release to return
to the two-way
conversation.
VOLUME (LO, MED
or HI)
Slide to adjust the
listening volume to LO,
MED or HI.
PROG
Press to store a
number in a speed
dial location.
REDIAL/PAUSE
Press to redial the
last number dialed.
When storing a
number in the
memory, press
to add a dialing
pause in the dialing
sequence.
RINGER ON/OFF
Slide to turn the ringer on
or off.
Battery installation
Before using the telephone, install three AA alkaline
batteries (not included) to provide memory backup and
enable the use of caller ID feature. If batteries are not
installed, the display only works when you lift the handset.
If you unplug the telephone from the wall jack, or
you lose telephone service for over few minutes, and
batteries are not installed, the following information
will be lost: call list, numbers stored in the speed dial
memory, last number redial and all settings in the
feature menu. It is recommended that you initially install
new batteries and change the batteries soon after the
low battery icon
appears.
Press the tab and lift upwards to open the battery
compartment cover.
1.
Install three AA alkaline batteries (not included) in
the battery compartment matching the labels + and
- engraved in the battery compartment.
2.
Close the battery compartment cover. Make sure it
clicks into place.
3.
Do not mix old and new batteries. Do not mix
alkaline and standard (carbon-zinc) batteries.
After you replace the batteries, the clock needs to
be reset.
If there are no batteries installed and the telephone
is plugged into a telephone wall jack, the screen
display operates using power from the telephone
line when you lift the handset. When operating in this
mode, the screen display may be dimmer than usual.
•
•
•
Wall installation
Your telephone base is ready for wall installation. To
mount your telephone on a wall, you need a standard
dual-stud telephone wall mounting plate. If you do not
have this mounting plate, you can purchase one from
many hardware or consumer electronic retailers. You
may need a professional to install the mounting plate.
If you subscribe to high-speed Internet service digital
subscriber line (DSL) through your telephone line, you
must install a DSL filter between the telephone line cord
and the telephone wall jack. The filter prevents noise
and caller ID problems caused by DSL interference.
Please contact your DSL service provider for more
information about DSL filters.
To mount the telephone on a wall:
Route the telephone line cord through the channel as
shown below. Then plug the telephone line cord into
a telephone wall jack.
1.
Mount the telephone base on the mounting plate.
Make sure the mounting holes in the telephone aligns
with the mounting studs on the mounting plate. Then
push the telephone down until it clicks firmly into place.
2.
Wall installation to desktop installation
Push the telephone up to remove it from the wall plate,
then unplug the telephone line cord from the wall jack.
Remove the telephone line cord from the channel.
1.
Handset tab
Lift the handset and place it aside. On the telephone
base, slide the handset tab upwards until it is out of
the slot. Rotate the tab 180°, and then insert it back
into the slot until it clicks into place.
2.
Telephone settings
The telephone screen will display prompts to help you set
up the telephone when you first install it. Press OPTION
to enter, save and browse through the feature menus.
Press OPTION repeatedly to browse through the feature
menus.
Press or to scroll through setting options.
Press OPTION to save your selection and
automatically advance to the next feature setup.
-OR-
Press CANCEL to exit without saving the selection
and return to idle mode.
Feature summary
Default settings are indicated by *.
Features Functions Options
SET LANGUAGE Choose a desired
language for the
screen display.
ENGLISH*
FRANCAIS
ESPANOL
SET CONTRAST Adjust the screen
brightness to a
comfortable level.
1, 2, 3*, 4, 5
HOME AREA CODE? You must enter a
number to make
calls from the call
log. If you dial
seven digits for
local calls, enter
your area code. If
you dial ten digits
for local calls, enter
three zeros (000)
for HAC, and then
enter your area
code as a local
area code (LAC).
HAC-_ _ _*
LOCAL AREA CODE? Program up to four
local area codes
which may not
require dialing 1
before them.
LAC1-_ _ _*
LAC2-_ _ _*
LAC3-_ _ _*
LAC4-_ _ _*
SET TIME/DATE Set the time and
date.
12:00
AM
1/01*
SET TONE/PULSE Choose tone or
pulse dialing mode.
TONE*
PULSE
1.
2.
3.
Telephone operation
Make and answer calls
To make a call:
Lift the handset and wait for a dial tone.
Use the dailing keys to enter the number you want
to dial.
Place the handset on the telephone base to hang up.
To answer a call:
Lift the handset while the phone is ringing.
Place the handset on the telephone base to hang up.
Last number redial
The last number dialed is stored in the redial memory
(up to 32 digits).
To redial the last number dialed:
Lift the handset and wait for a dial tone.
Press REDIAL/PAUSE on the handset.
Place the handset on the telephone base to hang up.
Flash
If you subscribe to call waiting service from
your telephone service provider, you hear
an alert tone and the screen displays the
caller ID information of the new incoming
call while you are already on a call. Press
FLASH on the handset to put your current
call on hold and answer the new call. You
can press FLASH any time to switch back
and forth between calls.
Mute
You can press and hold MUTE to mute the
microphone. The other party cannot hear
you, but you can still hear the other party.
Release the button to resume the
two-way conversation.
Temporary tone dialing
If you have pulse dial (rotary) service, you can switch
to touch-tone dialing during a call. After you hang up or
press FLASH, the telephone automatically returns to
pulse dialing mode.
During a call, press .
Use the dialing keys to enter the number. The
telephone sends touch-tone signals.
The telephone automatically returns to pulse dialing
mode a few seconds after you hang up.
Speed dial overview
This telephone can store up to 13 telephone numbers in
the speed dial locations (MEMORY 0 - MEMORY 9, M1,
M2 and M3) for fast dialing. Each location can store a
number that is up to 32 digits.
Store a speed dial entry
Lift the handset and press PROG.
Use the dialing keys to enter the number you want to
store. Press REDIAL/
PAUSE
once to store a
3-second pause in the dialing sequence, twice for a
6-second pause and so on.
-OR-
Press REDIAL
/PAUSE
to store the last number dialed.
Press MEMORY, then press a dialing key (0-9) to
save the entry.
-OR-
Press M1, M2 or M3 to save the entry.
You cannot delete a speed dial entry. To replace the
entry in the speed dial location, you need to store a
new speed dial entry.
Review a speed dial entry
Lift the handset and hold down the switch hook on
the handset.
Press MEMORY, then press the corresponding
speed dial location (0-9) to display the desired entry.
-OR-
Press M1, M2 or M3 to display the desired entry.
Dial a speed dial entry
Lift the handset and wait for a dial tone.
Press MEMORY, then press a dialing key (0-9) to dial
the desired entry.
-OR-
Press M1, M2 or M3 to dial the desired entry.
1.
2.
3.
1.
2.
1.
2.
3.
1.
2.
3.
1.
2.
3.
1.
2.
1.
2.
Dialing keys
Press to enter
numbers or characters.
Plug the telephone line cord in the telephone wall jack.
Bundle it neatly with a twist tie if necessary.
3.
Parts checklist
Your telephone package contains the following items.
Save your sales receipt and original packaging in case it
is necessary to ship your telephone for warranty service.
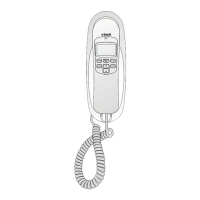
Telephone base and
handset with telephone
line cord installed
User’s manual
MEMORY
Press to enter the
memory locations 0-9.
User’s manual (Canada version)
CD1113
Use r’s ma nual
CD1113
If you have DSL
high speed
Internet service,
a DSL lter (not
included) is
required.
Desktop installation to wall installation
Lift the handset and place it aside. On the telephone
base, slide the handset tab upwards until it is out of
the slot. Rotate the tab 180°, and then insert it back
into the slot until it clicks into place.
1.
Handset tab
Follow the steps in the Wall installation section to
install the telephone on a wall.
2.
Set time and date
If you subscribe to caller ID service, the day, month and
time are set automatically with each incoming call. You
can also set the time and date manually.
Press OPTION repeatedly until the screen displays
SET TIME/DATE.
Press or to select the appropriate number (1-12)
for the hour. Press DISPLAY DIAL to move on to set
the minute.
Press or to select the appropriate number
(00-59) for the minute. Press DISPLAY DIAL to
move on to set the month.
Press or to select the appropriate number (1-12)
for the month. Press DISPLAY DIAL to move on to
set the date.
Press or to select the appropriate number (1-31)
for the date. If you need to make any corrections,
press DISPLAY DIAL to start from Step 2 again.
Press OPTION to save and advance to the next
feature setup.
Ringer on/off
Slide the RINGER switch on the side of the
telephone base to turn the ringer on or off. If
you turn the ringer off, the telephone will not
ring when there is an incoming call. You can
still see the caller ID information of the
incoming call if you subscribe to caller
ID service provided by your telephone
service provider.
Handset volume
Slide the VOLUME switch on the handset
to adjust the listening volume. You can set
the volume to low (LO), middle (MED) or
high (HI).
1.
2.
3.
4.
5.
6.