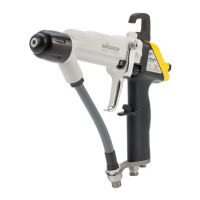
Locking and Unlocking the Spray Gun
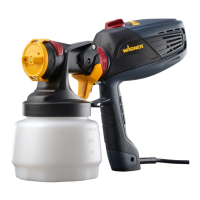
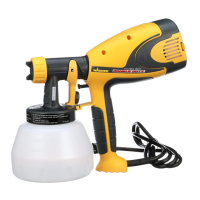
Attaching the Tip Assembly
1. Thread the spray guard assembly onto the gun. Tighten by hand.
Unclogging the Spray Tip
Do not attempt to unclog or clean the tip with your finger. Do not use a
needle or other sharp pointed instrument to clean the tip. The hard
tungsten carbide is brittle and can be chipped.
The spray gun is equipped with a reversible tip which allows you to blow
out any particles of old paint or other contaminants that may obstruct
the paint flow through the tip. If the spray pattern becomes distorted or
stops completely while the gun is triggered, follow these steps:
1. Follow Pressure Relief Procedure (see sprayer instruction manual)
2. Rotate the reversible tip cylinder arrow 180°
so that the point of the arrow is toward the
rear of the gun.
3. Unlock the gun and squeeze the trigger,
pointing the gun at a scrap piece of wood or
cardboard. This allows pressure in the spray
hose to blow out the obstruction. When the
nozzle is clear, paint will come out in a straight, high pressure stream.
4. Release the trigger and lock the gun off.
5. Reverse the tip so the arrow points forward again.
6. Unlock the gun and resume spraying.
Cleaning the Gun
NOTE - If spraying with latex paint, use warm soapy water for cleaning.
If using oil or alkyd-based paints, use mineral spirits or paint thinner.
Refer to the paint manufacturer’s instructions for specific
recomendations.
Do not use mineral spirits or paint thinner on latex paint, or the mixture
will turn into a jellylike substance which is difficult to remove.
1. Check that the spray tip assembly has been removed from the gun.
2. Run the appropriate solvent through the pump.
3. Hold the metal part of the gun against a metal
container to ground the gun.
4. Trigger the gun into the container until it is flushed
clean. Use the lowest possible pressure.
Begin
tightening
the tip at
this angle
to achieve
the desired
spray angle
when tight.
Unlocking the gun
To unlock the gun, turn the
trigger lock to be in line with the
trigger.
Locking the gun
The gun is secured when the
trigger lock is at a 90° angle
(perpendicular) to the trigger in
either direction.
Cleaning the Filter
1. Unclip the trigger guard from the filter housing by pulling outward from
the filter housing. Unscrew the housing.
2. Remove the filter from the spray gun housing and clean with the
appropriate cleaning solution (warm, soapy water for latex paints,
mineral spirits for oil-based materials).
3. Inspect the filter for holes (see Hole picture, above). Replace if holes
are found.
NOTE - NEVER POKE THE FILTER WITH A SHARP INSTRUMENT!
4. Replace the cleaned filter, tapered end first, into the gun housing.
5. Replace the housing and spring and snap the trigger guard back into the
housing.
Parts List
Item Part # Description Quantity
1 0501011 Guard Assembly....................................................1
2 0501415 Tip, 415..................................................................1
3 0515229 Complete gun assembly........................................1
4
0154675
Filter
, yellow*
5
0515332
Seal
.......................................................................
1
6
0515329
Filter housing
.........................................................
1
*2-pack replacement kit
Hole
Filter top
(tapered
end)
Housing
Filter
Trigger
guard
Part No. Tip Size Filter
Type
Mesh
Number
Color of
Filter
Body
0154675 413 - 415 Fine
100 mesh
0.140 mm
yellow
This filter must be cleaned every time you use your sprayer.
When using thicker paints, the filter might need to be cleaned
more often.
© 2006 Wagner Spray Tech, 1770 Fernbrook Lane, Plymouth, MN 55447 - All Rights Reserved.
 Loading...