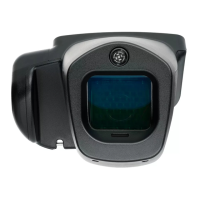
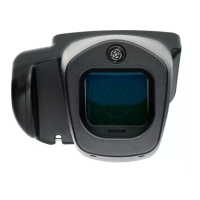
Spot
TM
Vision Screener–Quick Reference
2
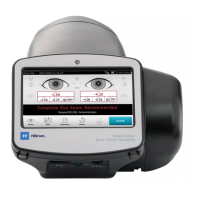
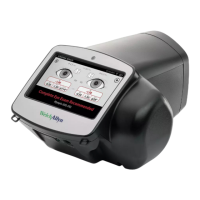
The Subject Results screen appears at the end of the screening
process.
Note: Do not allow the device storage to become 100% full. For
best results, when the device has accumulated 300 records,
delete all records from the vision screener. Verify you have
successfully exported the records to a USB flash drive before you
select Clear All.
Understanding the results
All results viewing options are in the Tools menu under Results.
The device displays a message indicating whether the results
are in or out of range. The message is intended to prompt the
caregiver to assess whether the subject should be referred to an
eye care specialist for further evaluation or simply be monitored
at future screenings.
Results that are out-of-range are indicated in red.
1
2
3
4
5
67
8
9
7. Pupillary distance
8. Pupil size indicator
9. Right eye (OD), Left eye (OS)
10. Complete refraction
SE – Spherical equivalent
DS – Sphere
DC – Cylinder
Axis – Axis
5. Screening result
6. Home
7. Cylinder convention
8. Alignment indicator
9. Degree, horizontal, vertical
How to screen a subject
Before screening
1. Dim the lights, if possible.
2. Close blinds or curtains, if possible.
3. The subject’s back should be positioned to the interfering
light source.
4. Avoid direct light into the subject’s eyes from:
• Ambient light sources
• Exterior light
• Incandescent and halogen lights
Note: Florescent light is the best testing environment,
if options are limited.
Screening a subject
If the vision screener has a location specified, the name of the
location is displayed on the top left of the screen in parentheses.
If there is no location specified, and you want a location included
in the screening information, on the Home screen touch Tools,
and then touch Location to specify the screening location.
Completed exams are saved automatically.
1. Turn on the vision screener. The Home screen appears.
2. Have the subject close his or her eyes for 10 to 15 seconds to
encourage dilation.
3. Stand approximately 3 feet (1 meter) from the subject with one
foot ahead of the other for stability.
4. Hold the vision screener on an even plane with the subject’s
eyes.
5. Touch the age range on the Home screen that matches the age
of the subject.
The screening begins immediately. The vision screener emits
the sound of chirping birds. This sound is intended to focus the
subject’s attention on the device. Touch the Loudspeaker icon
to mute the device.
6. Keep the vision screener steady until the screening wheel
appears, indicating the capture process is underway.
 Loading...