IP Protocol Setup
Auto IP (DHCP) - No Action required
Follow this procedure if you want to make any changes to the Protocol Settings. If no
changes are require, continue on Step 4.
Static IP Configuration
1. Press “Access” button on the User Interface Control Panel.
2. Enter “System Administrator” Password. (Default – 11111)
3. Press “Confirm”
4. Press “System Settings”
5. Press “System Settings”
6. Press “Network Settings”
7. Press “Protocol Settings”
8. Select setting to be changed.
9. Select “Change Settings”
10. Make desired changes
11. Press “Save”
12. Repeat steps 8-11 to make any other changes.
13. Select “Close” to exit.
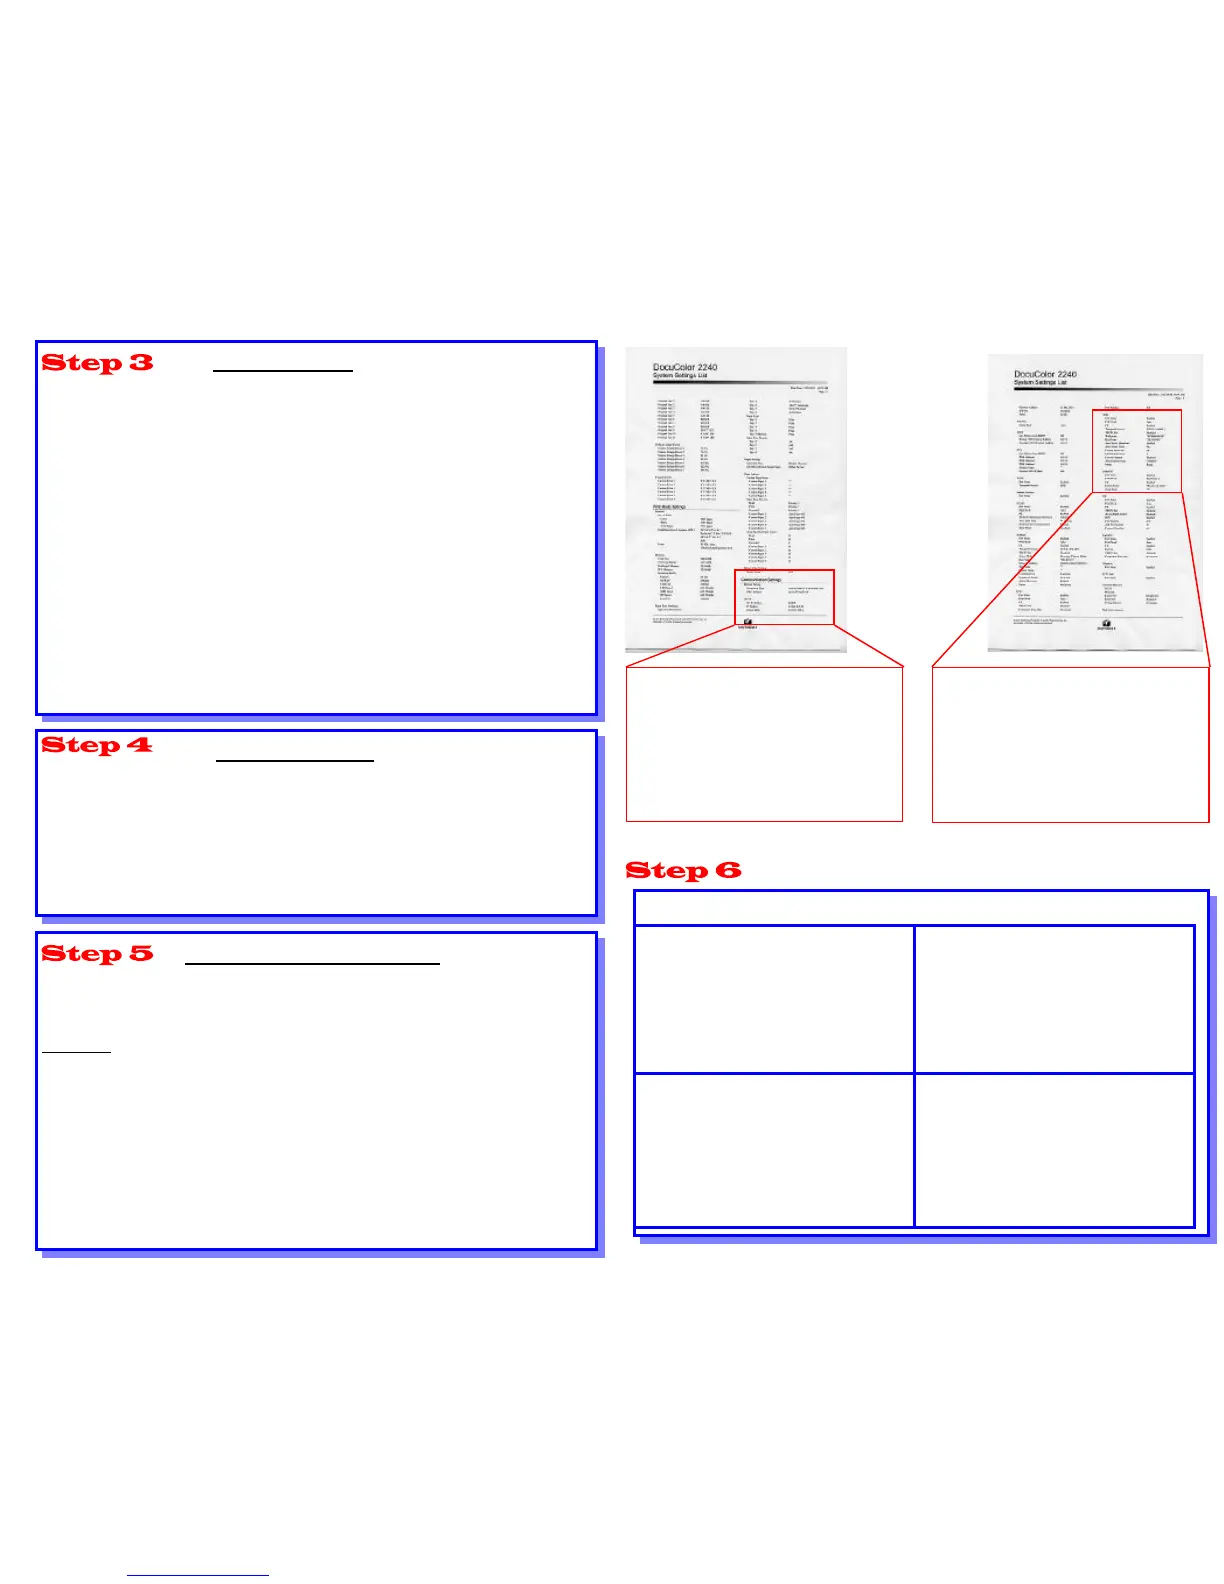
Print a Settings List
1. Press “Machine Status” button on the User Interface Control Panel.
2. Select Billing Meter / Print Report
3. Select “Print Report / List”
4. Select “Print Mode Settings”
5. Select “Settings List (Common Items)”
6. Press “Start” Button to print a Settings List.
7. Refer to Sample Settings List on opposite page.
Web User Interface Instructions
A PC client connected to the network is required to complete the printer network set-up.
Follow this procedure if you want to make any other changes to the printer configura-
tion.
Procedure
1. Open a web browser (Internet Explorer)
2. Verify that Proxy Servers are being bypassed for local web addresses.
3. Type the TCP/IP address assigned to the printer in the URL window. (Refer to the
Settings List for the TCP/IP Address)
4. Select “Properties” Tab.
5. Make desired changes.
Note: Default User Name: admin / Default Password: admin
6. Reboot print server.
7. Print a new Settings List.
Port Status Enabled
Print Mode Auto
PJL Enabled
Transport Protocol TCP/IP, NetBEUI
TBCP Filter Disabled
Workgroup WORKGROUP (Default)
Host Name FX-0D3595 (Default)
Auto Driver Download Enabled
Auto Master Mode On
Encript Password On
Sample
Settings List
Pages
Page 2
Page 3
Print Driver Installation information for printing using LPR
Load Print Drivers
Win 95 / 98 / Me
Requires third party Print Utility (Spooler)
software to enable the creation of an LPR
Port.
Windows NT
Add Printer wizard
Add LPR Port
Server Name or Address – Refer to IP
Address on the Settings List.
Name of Printer or Print Queue—”raw”
Windows 2000
Add Printer wizard
Local Printer
Create new port—LPR Port
Server Name or Address – Refer to IP
Address on the Settings List.
Name of Printer or Print Queue—”raw”
Windows XP
Add Printer wizard
Local Printer
Create new port—LPR Port
Server Name or Address – Refer to IP
Address on the Settings List.
Name of Printer or Print Queue—”raw”
 Loading...


