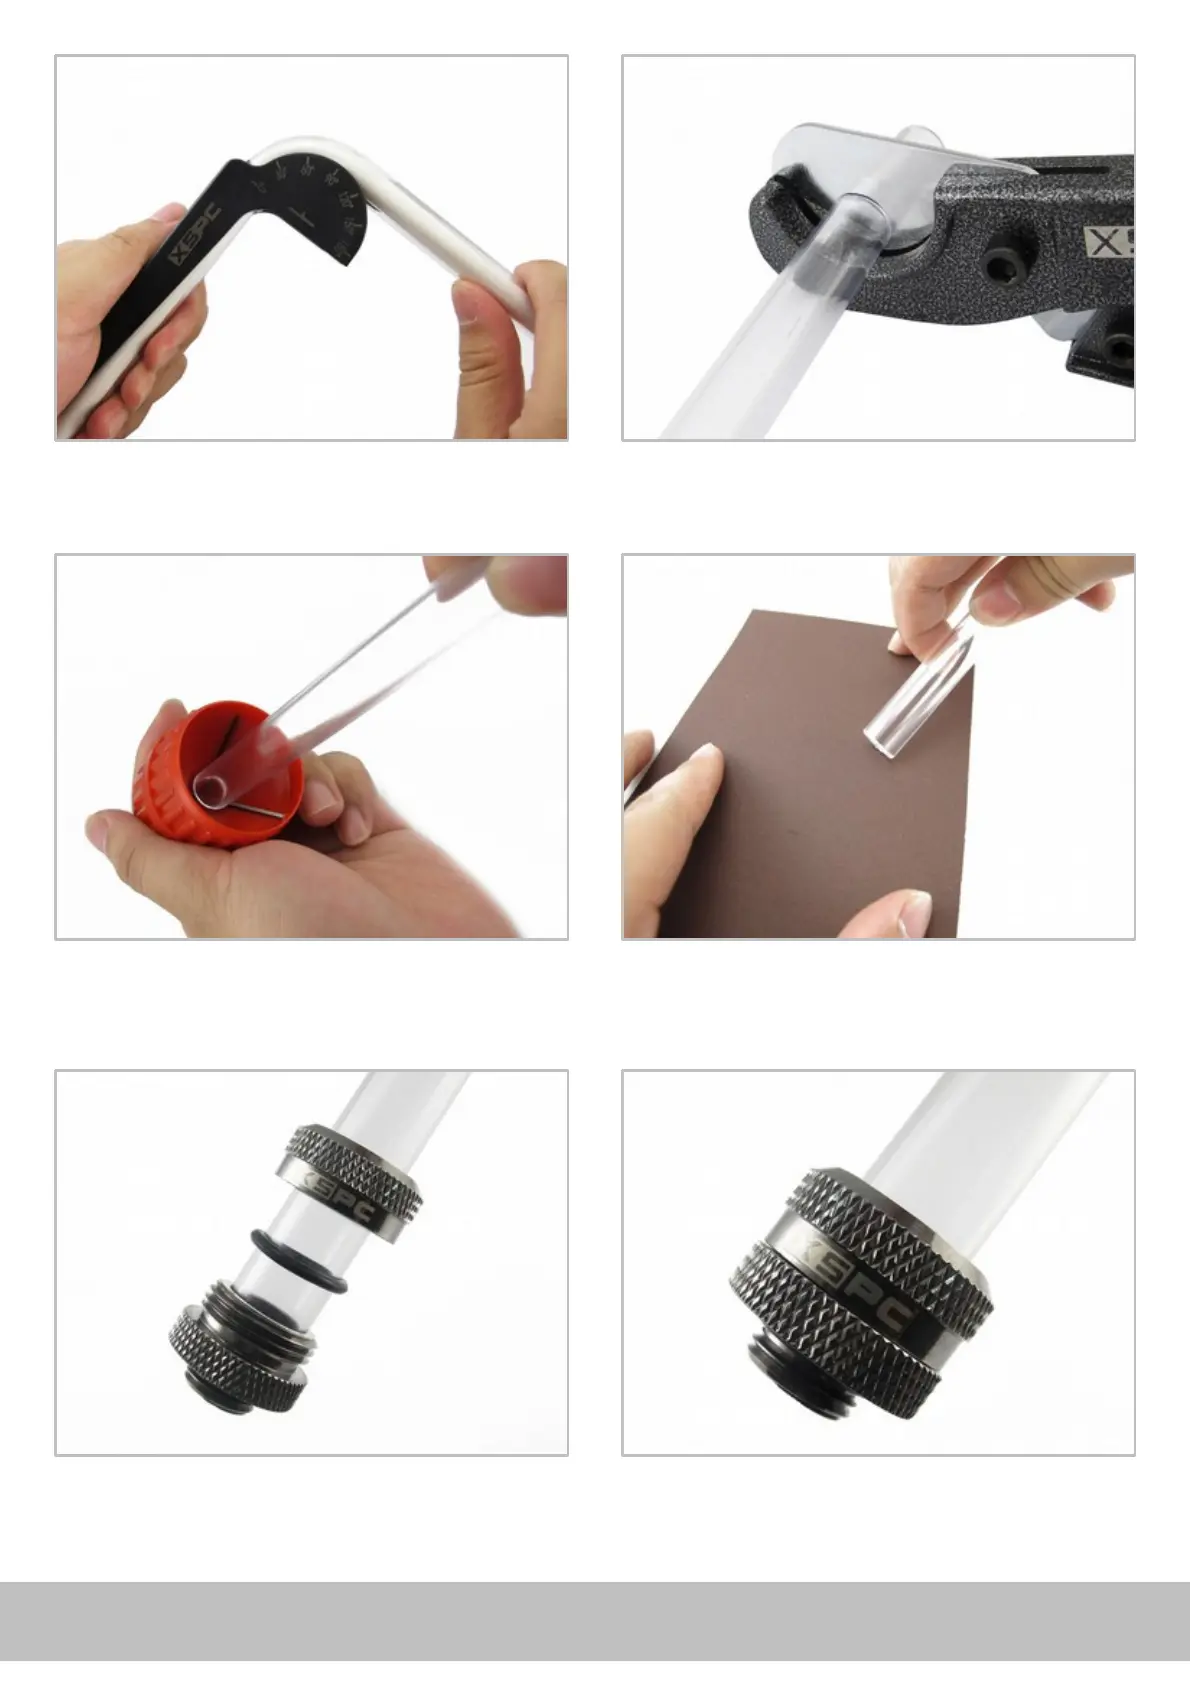
7. Use the chamfer tool to add an edge to each end of
the cut tube. You must only rotate anti-clockwise. If
you turn clockwise the blades will dig into the tube and
give a poor finish.
8. Use the sand paper to clean the chamfered edges
of the tube. Do not sand the sides of the tube as this
may stop the tube sealing in the fitting.
5. Bend the tube over the head of the tool until you get
the desired angle. Hold it steady and allow the tube to
cool before removing it from the tool.
6. Remove the bending rubber and trim the edges of
the PETG tubing to the correct length for your build. To
remove the bending rubber, just twist and pull.
www.xs-pc.com/support
9. Place the compression fittings nut and o-ring over
the PETG tube and push the chamfered end of the
tube into the fitting. You will need to use some force to
get the tubing past the two internal o-rings.
10. Screw the nut down until the fitting is completely
closed and sealed.

 Loading...