MOX6/MOX8 Owner’s Manual
Quick Guide
46
13 Record Phrases to the other Tracks of Section A
as desired using the same operation.
Record a bass line to Track 2, then record guitar backing to
Track 3 by repeating steps 4 – 13 above.
14 Press [STORE] [F1] SEQ [ENTER] to store the
recorded Phrases as a Pattern.
This operation will store all the Song/Patterns.
Now that you’ve recorded Section A, go on to the following
instructions and create Section B by using the Pattern Copy
Job with the already recorded User Phrases.
Creating another Pattern (Section
B) by using already recorded data
Here, you’ll learn how to create a Section B by using recorded
data copied from Section A. For example, the drum part and
bass part will be copied from Section A, and the guitar part
will be created via the same note data as that of the bass part.
First, copy all the recorded data from the Section A to Section
B by using the Pattern Copy Job.
1 Press [PATTERN] [JOB] to enter the Pattern Job.
2 Press the [F6] PATTERN button, select “01: Copy
Pattern” then press the [ENTER] button.
The Copy Pattern Job display appears.
3 Select the Pattern number and Section to be
copied.
For the copy source, select the Pattern number and Section
which you have already recorded in the previous section.
For the copy destination, select the same Pattern number
and “Section B.”
4 Press the [ENTER] button to execute the Pattern
Copy Job.
All the data of Section A will be copied to Section B.
5 Press the [EXIT] button a few times to return to
Pattern Play.
6 Press the [PATTERN SECTION] button so that its
lamp lights then press the Number [2] button.
Section B is now selected. Press the [F] (Play) button to
hear Section B and confirm that the Section B data has been
copied from Section A.
In this section, you’ll replace the note data of the guitar part
with that of the bass part, so that the bass and guitar play the
same phrase in unison.
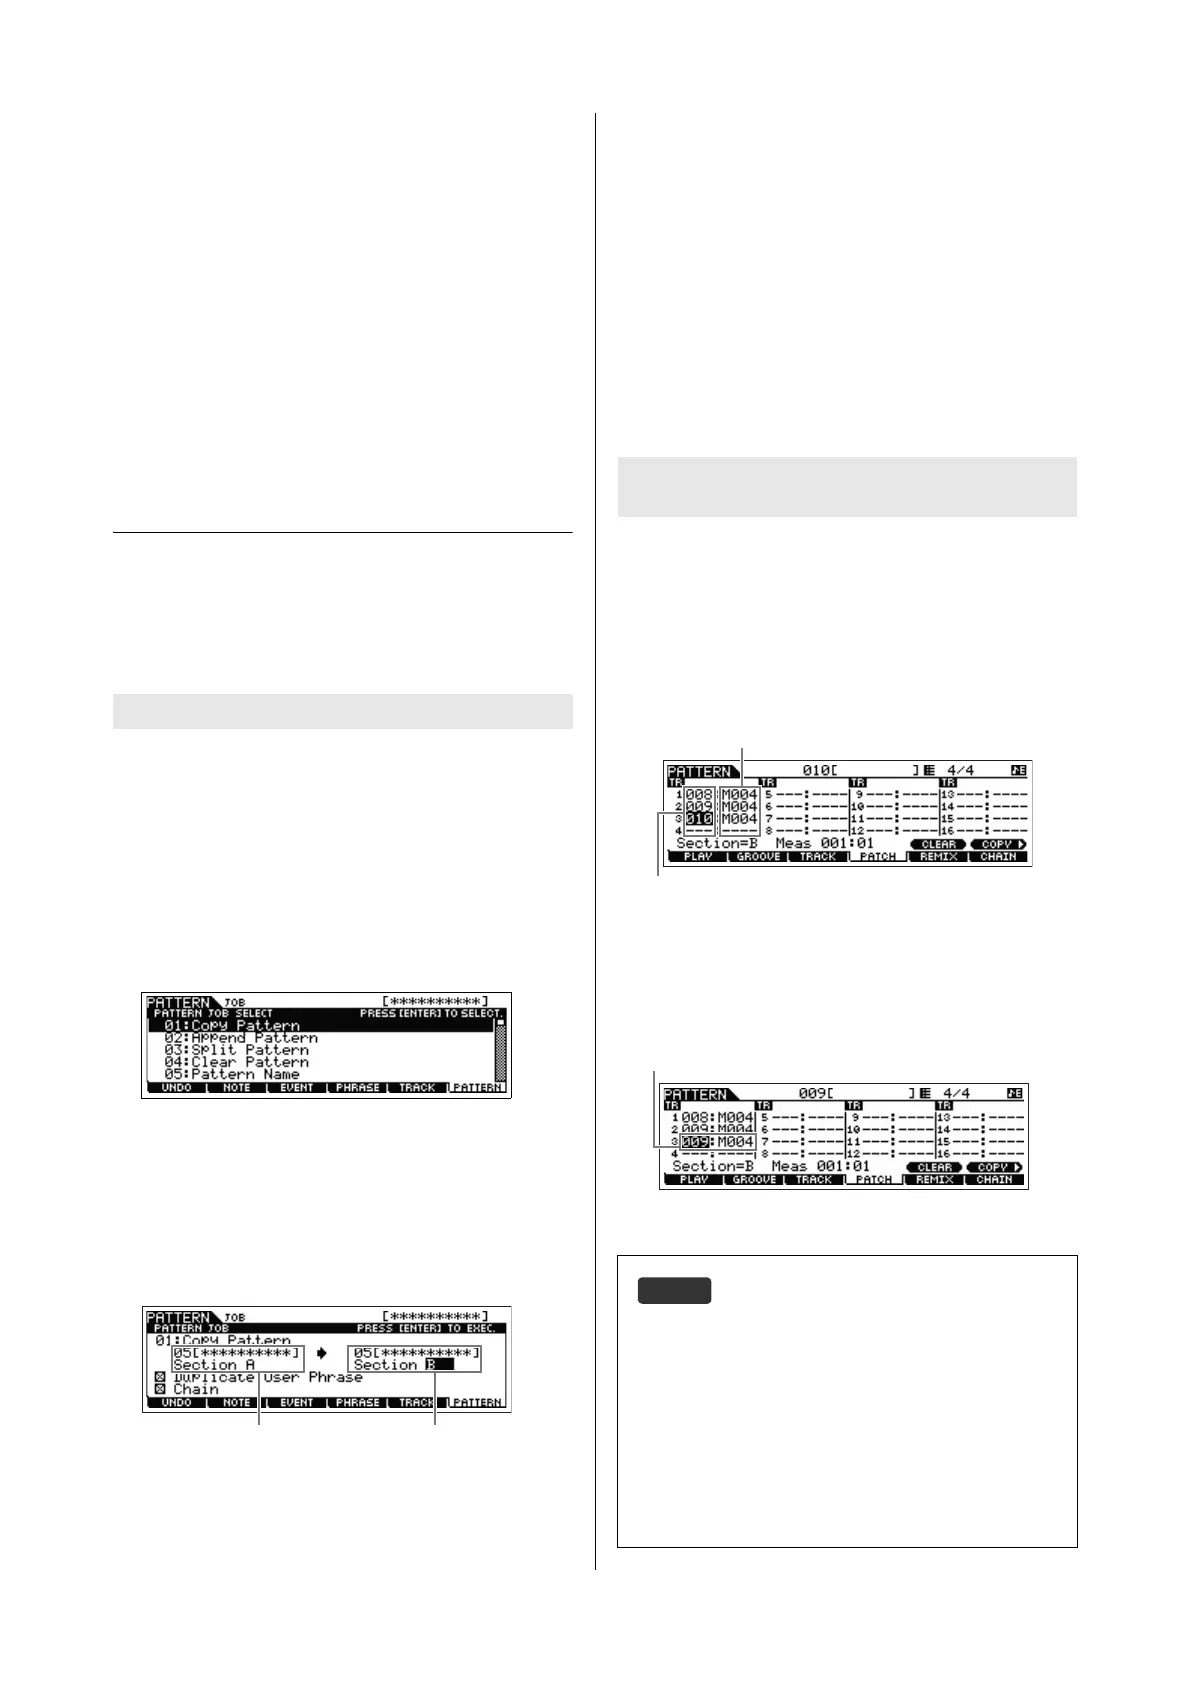
7 Press the [F4] PATCH button to call up the PATCH
display.
8 To Track 3 (guitar part), assign the same Phrase as
that of Track 2 (bass part).
This operation will have the guitar (Track 3) and bass (Track
2) play the same Phrase in unison.
Copying the Pattern data
Assign the already recorded data
(User Phrase)
Pattern Patch display
On the Pattern Patch display, only the User Phrase contained
in the current Pattern can be assigned to any Track. If you wish
to use Phrases belonging to other Patterns, follow the
instructions below:
1 Press the [SF6] COPY button.
2 Select the desired Phrase as the copy source.
3 Select the User Phrase number and Track number as the
copy destination.
4 Press the [ENTER] button to execute the Copy operation.
The amount of measures
Phrase number
Assign the same Phrase as that of Track 2.
 Loading...