PaloSanto Solutions
Yealink SIP-T26P Server Setup Guide
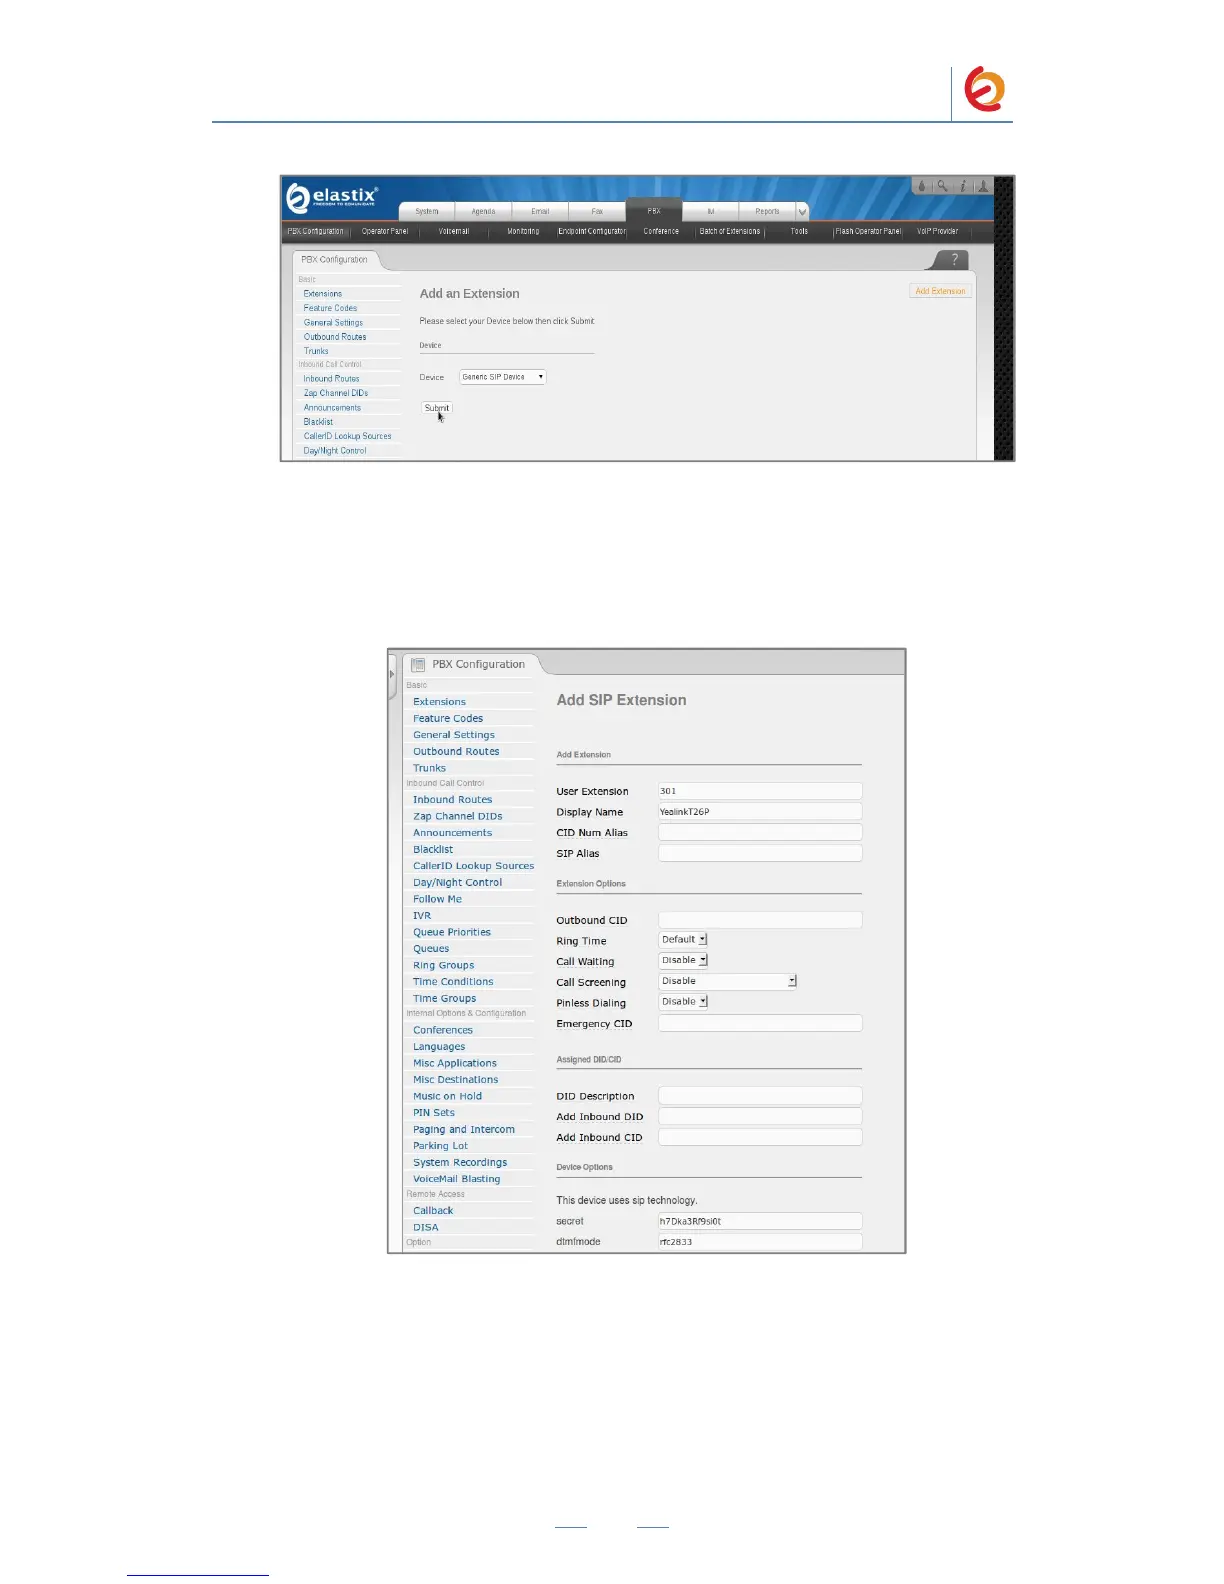
Figure 4-3. Add an Extension
6. On the Add SIP Extension page (Figure 4-4), fill in the following information:
• User Extension (301 in this example)
• Display Name (‘YealinkT26P’ in this example)
• secret (‘h7Dka3Rf9si0t’ in this example)
Figure 4-4. Add SIP Extension
7. Click on the ‘Submit’ button at the end of the page. The extension will be created and
you will see the page on Figure 4-5 displaying the “Apply Configuration Changes Here”
pink ribbon on top of the screen.
8. Click in the “Apply Configuration Changes Here” link
PaloSanto Solutions
Yealink SIP-T26P Server Setup Guide
Figure 4-3. Add an Extension
6. On the Add SIP Extension page (Figure 4-4), fill in the following information:
• User Extension (301 in this example)
• Display Name (‘YealinkT26P’ in this example)
• secret (‘h7Dka3Rf9si0t’ in this example)
Figure 4-4. Add SIP Extension
7. Click on the ‘Submit’ button at the end of the page. The extension will be created and
you will see the page on Figure 4-5 displaying the “Apply Configuration Changes Here”
pink ribbon on top of the screen.
8. Click in the “Apply Configuration Changes Here” link
 Loading...