Manually Connecting the IP phone to an Available Wiereless Network
To manually connect the IP phone to an available wireless network (take the SIP-T48G
IP phone for example):
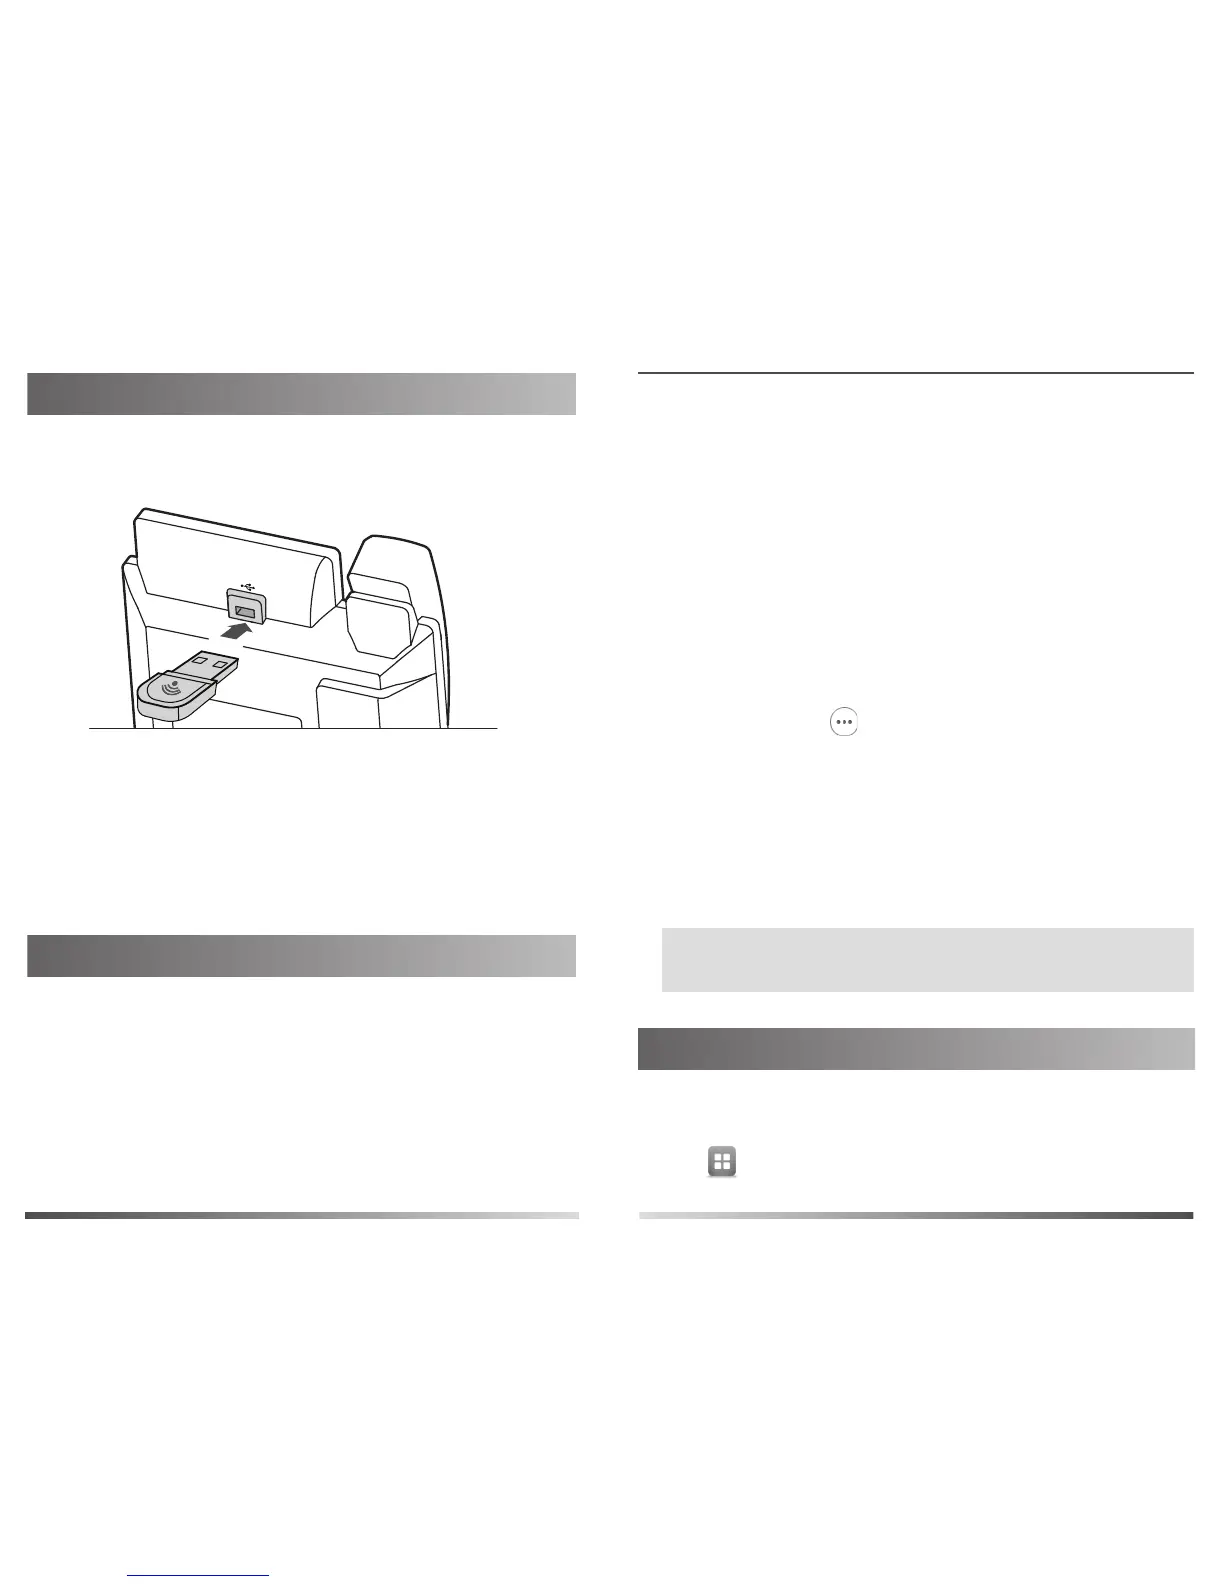
Assembling the Wi-Fi USB Dongle
Assembling the Wi-Fi USB Dongle, as shown below:
To assemble the Wi-Fi USB Dongle:
1. Insert the Wi-Fi USB Dongle into the USB port on the back
of the phone.
Before setting up wireless, it is important to note that the IP
phone must be connected to its power adapter and NO
Ethernet cable (either wired Ethernet or Ethernet over Power)
should be connected.
WiFi USB Dongle WF40 User Guide
www.yealink.com
6. Tap OK.
2. Tap OK.
Disabling Wi-Fi Feature on the IP Phone
To disable Wi-Fi feature, do one of the following (take the SIP-T48G IP phone for
example):
- Tap ->Basic->Wi-Fi.
Mark the Off radio box in the Wi-Fi field.
1. Insert the Wi-Fi USB Dongle WF40 into the USB port on the
back of the phone when the phone is in the idle state.
The touch screen prompts: Wi-Fi adapter connected. Scan for available
Wi-Fi neworks?
The IP phone will toggle the Wi-Fi to on and search for
available wireless networks in your area.
3. (Optional.) To re-search the available network, tap the Scan
soft key.
4. Tap the desired wireless network (SSID) to connect to it.
You can also tap at the end of the desired SSID, and
then tap Connect.
Once the connection has completed successfully, the prompt
Connected appears at the end of the desired SSID.
5. If the network is secure, enter its password in the Wi-Fi
Password field.
Note: Contact your network administrator for the Wi-Fi
password.
 Loading...